
Plants need enough water to survive. But what if you forgot to water the plants? This multi-part ESP8266 tutorial aims to provide a simple soil moisture sensor that reminds you, via WiFi, that your flora needs a shower.
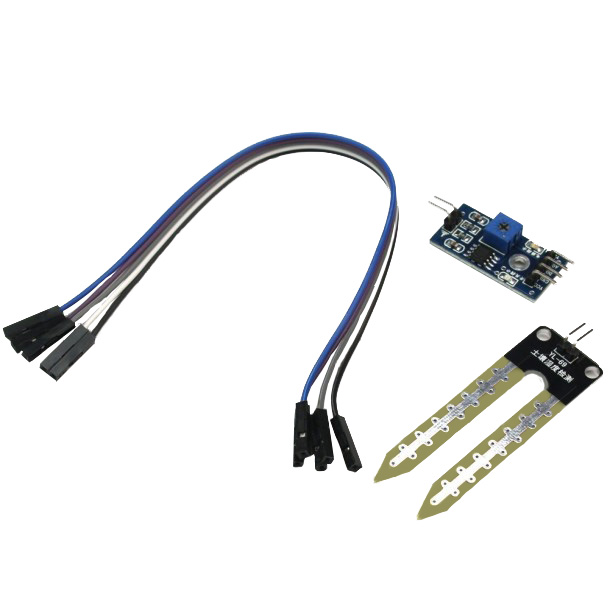
Soil Moisture Sensor
The soil moisture sensor for this project is an inexpensive sensor that reads the resistance of the soil.

Soil moisture is inversely proportional to its resistance, i.e., the higher the water content in the soil, the lower its resistance. The sensor is designed as an electrode whose resistance varies with both the moisture and how deep it is plunged into the soil.
The type of soil and temperature are other factors that determine soil moisture. Thus, reading soil moisture through this sensor might not be enough for more complex applications or scientific researches. However, for our intended purpose -- which is to simply notify the user if the plant needs watering -- this sensor fits the bill.
The sensor comes with a LM393 module that helps give out a digital or an analog signal. If the soil moisture reaches a value (adjustable through the potentiometer on the module), the digital pin (D0) goes high and the D0-LED on the module turns on. On the other hand, the analog pin (A0) gives a voltage proportional to the soil moisture. The higher the soil moisture, the lower this voltage goes.
Sending Sensor Values through WiFi
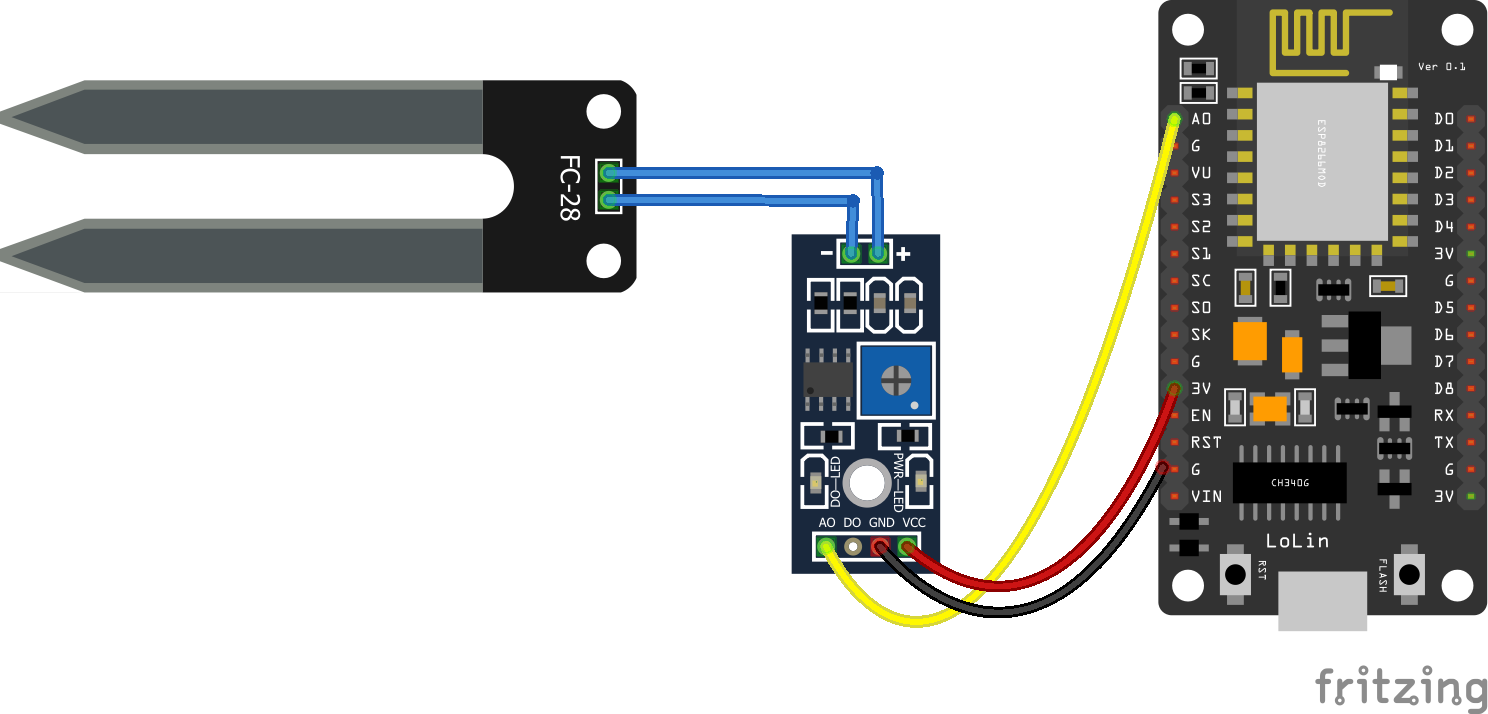
For a user to be able to read the soil moisture through WiFi, a microcontroller with wireless network capabilities is required. For this project, I will be using the ESP8266 microcontroller, particularly the NodeMCU V2.0 board.
The soil moisture sensor connects to the NodeMCU like this:
Next, load the sketch below to the NodeMCU. Modify lines 6 and 7 according to your WiFi SSID and password. Make sure your NodeMCU can be programmed with the Arduino IDE.
#include <ESP8266WiFi.h>
#include <WiFiClient.h>
#include <ESP8266WebServer.h>

// Replace with your network credentials
const char* ssid = "<Your WiFI SSID>";
const char* password = "<Your WiFI Password>";

ESP8266WebServer server(80);   //instantiate server at port 80 (http port)

String page = "";
double data;
void setup(void){

  pinMode(A0, INPUT);

  delay(1000);
  Serial.begin(115200);
  WiFi.begin(ssid, password); //begin WiFi connection
  Serial.println("");

  // Wait for connection
  while (WiFi.status() != WL_CONNECTED) {
    delay(500);
    Serial.print(".");
  }
  Serial.println("");
  Serial.print("Connected to ");
  Serial.println(ssid);
  Serial.print("IP address: ");
  Serial.println(WiFi.localIP());
  server.on("/", [](){
    page = "<h1>Soil Moisture Sensor with ESP8266</h1><h3>Value:</h3> <h4>"+String(data)+"</h4>";
    server.send(200, "text/html", page);
  });

  server.begin();
  Serial.println("Web server started!");
}

void loop(void){
  data = analogRead(A0);
  delay(1000);
  server.handleClient();
}
Upload the sketch and if successful, open serial monitor (make sure baud rate is set to 115200!). The serial monitor displays the IP address of the NodeMCU.
Using your preferred browser, visit that IP address. The soil moisture value is now on the web page!
The disadvantage of the given sketch is that you need to refresh the page to get updates. You can check out my AJAX tutorial for dynamically changing sensor values on a web page. Also, what does those numbers mean? We'll make our project better in the next part of this tutorial!

