
If somehow a 16x2 LCD or a Nokia 3310/5110 LCD is too large for your project, then there's a 0.96" display you can add to your arsenal. This display is OLED (organic LED) instead of LCD - which means the backlight is unnecessary. In this tutorial, we will look at how to use the 0.96" tiny OLED display with Arduino.
Introduction
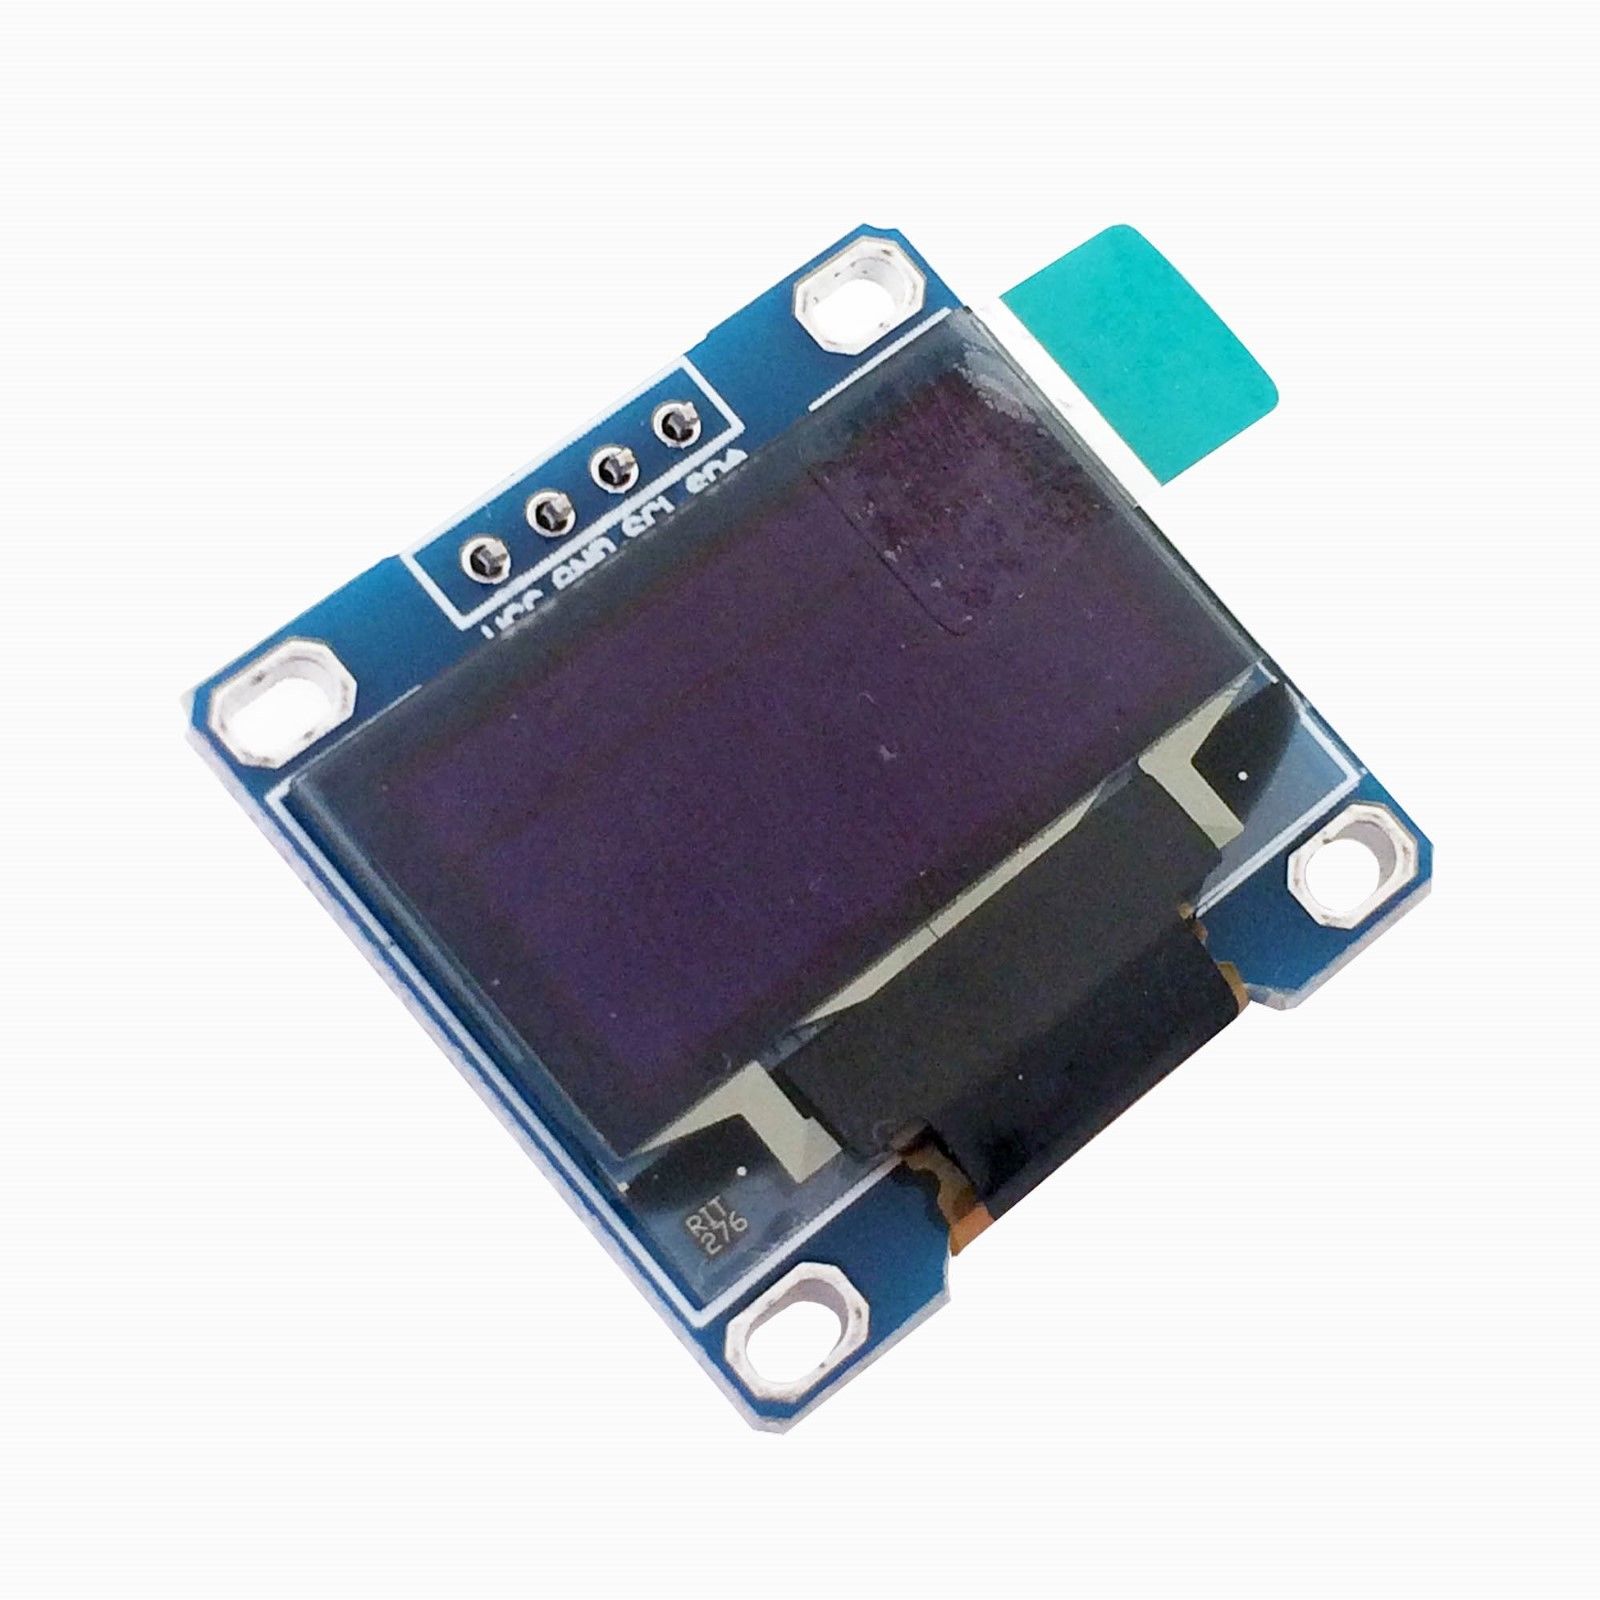
The 0.96" OLED runs on an SSD1306 controller with a resolution of 128 x 64 or 128 x 32 pixels. Moreover, it can use both SPI and I2C buses. My device only has four pins on it:
It is actually monochrome (single color) only. Some models like mine have a yellow filter on top, hence the color you see in the picture above. If you want to display colors, go for the SSD1331-based tiny OLED display.
Here's the rest of the specifications for the 0.96" OLED display:
- Viewing angle: 160 degree
- Ultra-low power consumption: full screen lit only 0.08 W
- Voltage: DC 3.3v or 5v
- Working temperature: -30℃ 70 ℃
- I2c address: 0x3c
- Pins definition:
- gnd -> ground
- vcc -> 2.2v-5.5v
- scl -> clk(high level 2.2v-5.5v)
- sda -> mosi (high level 2.2v-5.5v)
SSD1306 Arduino Library
Adafruit provides a library to be used with SSD1306-based OLED displays. This works with the Adafruit GFX library so you need to have that also. The library provides an example (go to File -> Examples -> Adafruit SSD1306 -> ssd1306_128x64_i2c) that shows all the capabilities of the library.
Note that you have to edit the SSD1306.h file (located at Documents -> Arduino -> Libraries -> Adafruit SSD1305) to match which OLED model you have. Go to lines 72 to 74 and find this section:
    -----------------------------------------------------------------------*/
//   #define SSD1306_128_64
   #define SSD1306_128_32
//   #define SSD1306_96_16
/*=========================================================================*/
If your display is the 128 x 164 version, comment out the 2nd line and uncomment to first line:
    -----------------------------------------------------------------------*/
   #define SSD1306_128_64
//   #define SSD1306_128_32
//   #define SSD1306_96_16
/*=========================================================================*/
Simple Example
Here's a simple example that displays text:
#include <SPI.h>
#include <Wire.h>
#include <Adafruit_GFX.h>
#include <Adafruit_SSD1306.h>

#define OLED_RESET 4
Adafruit_SSD1306 display(OLED_RESET);

#if (SSD1306_LCDHEIGHT != 64)
#error("Height incorrect, please fix Adafruit_SSD1306.h!");
#endif

void setup()   {
  display.begin(SSD1306_SWITCHCAPVCC, 0x3C);  // initialize with the I2C addr 0x3C (for the 128x64)
  display.display();
  delay(2000);
  display.clearDisplay();
  display.setTextSize(1);
  display.setTextColor(WHITE);
  display.setCursor(0,0);
  display.println("Hello, world!");
  display.display();
  delay(2000);
}
You might have noticed the Adafruit logo popping out every boot. This is because whoever created the library cleverly embedded the logo on the buffer array. This array loads every time you call display.display() for the first time. To remove the logo, open the Adafruit_SSD1306.cpp file and change each byte in the buffer array to 0x00.
Here's a modified Adafruit_SSD1306.cpp file with the logo removed: http://textuploader.com/dlkzp

