
Last time, I featured the 0.96” OLED display and how to use with an Arduino microcontroller. If that screen was too small, you can try upgrading to a slightly larger 1.3” display. This tutorial aims to guide you on how to use the 1.3” OLED with popular microcontroller boards such as Arduino and ESP8266.
The 1.3” I2C OLED
OLED’s hold an advantage over LCDs and TFTs because they don’t need backlight and consumes very little power.
There are two kinds of 1.3” OLED that you’ll find: SPI and I2C. The SPI OLED has 7 pins while the I2C OLED has only four pins. This tutorial will primarily feature the I2C OLED because some users have trouble using it with non-Arduino boards.
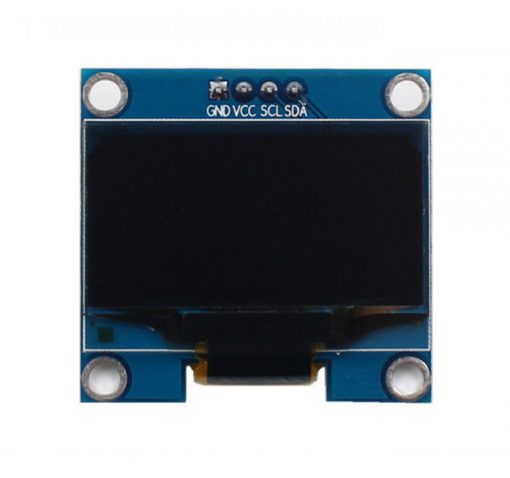
This is the front of the I2C OLED:
The 1.3” OLED display uses either 3.3V or 5V. Here are the rest of its specifications:
- Diagonal Screen Size:1.3"
- Number of Pixels:128 x 64
- Color Depth:Monochrome (Write)
- Dimension:35.4 x33.5x 4.3 mm
- Power: 0.06W Max
- Viewing Angle: >160 Degree
- Duty:1/32
- Brightness ( cd/m2):150 (Typ) @ 5V
- Interface: I2C
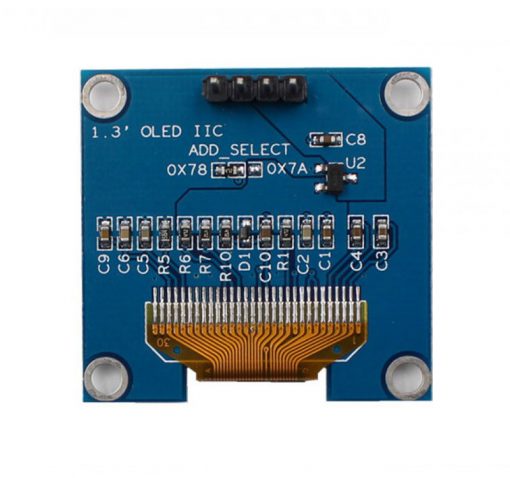
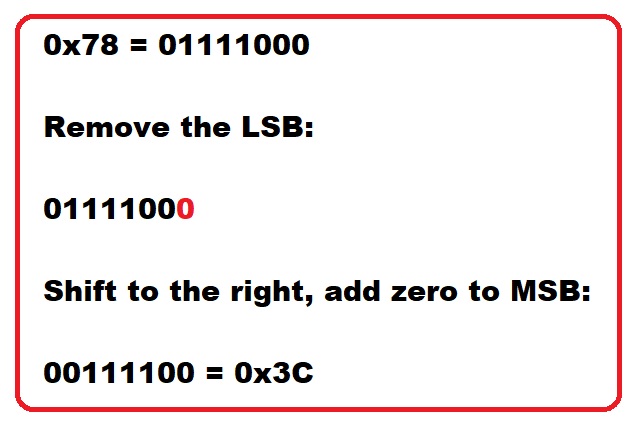
The back of the display shows an address select option and by default is at 0x78. Recall that I2C devices have their own addresses. However, note that 0x78 here is an 8-bit address. We normally use the 7-bit address when writing programs. Thus, we use 0x3C instead.
The display uses a SH1106 controller, which is different from the SSD1306 controller on the 0.96” OLED. Actually, the only difference between the two controllers is the amount of RAM: the SH1106 controller has 132x64 pixel of RAM while the SSD1306 has 128x64 pixel.
If not for that difference in RAM, you could use the Adafruit SSD1306 library to use the 1.3” OLED.
Using the 1.3” OLED with Arduino
There are plenty of options when using this OLED screen with an Arduino board. First, you can use this modified Adafruit SSD1306 library with Adafruit GFX library and take advantage of the arsenal of graphics options similar to what I did with the 0.96” OLED.
Here’s a video showing the OLED screen with an Arduino UNO:
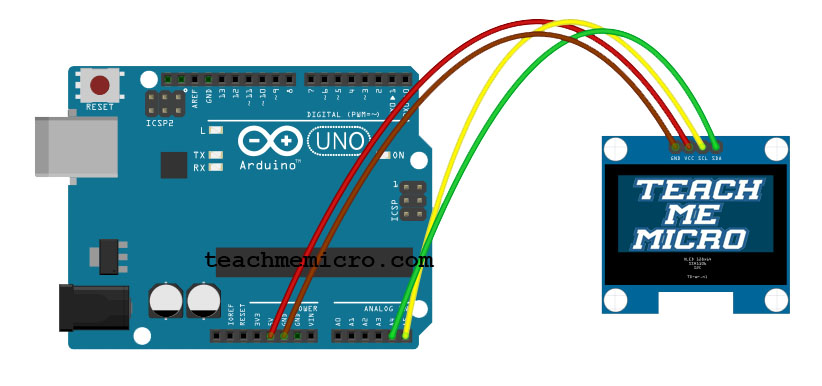
The sketch for the video above is the sh1106_128x64_i2c sketch included in the modified library I mentioned. The OLED display directly connects to the Arduino UNO using I2C. Here’s the wiring diagram:
Another option is to use the u8glib library, a versatile library that covers almost all monochrome LCDs and OLEDs.
The library provides plenty of examples. You can start with the HelloWorld example. Just remember that to use this sketch with the 1.3” OLED and the Arduino UNO, uncomment one of these lines:
//U8GLIB_SH1106_128X64 u8g(U8G_I2C_OPT_NONE); // I2C / TWI
//U8GLIB_SH1106_128X64 u8g(U8G_I2C_OPT_DEV_0|U8G_I2C_OPT_FAST); // Dev 0, Fast I2C / TWI
//U8GLIB_SH1106_128X64 u8g(U8G_I2C_OPT_NO_ACK);    // Display which does not send AC
The only problem with this library is the lack of graphics option unlike that of Adafruit’s. However, its strength is its versatility when it comes to using other LCDs and OLEDs.
Using the 1.3” OLED with ESP8266 Boards
Unfortunately, none of the libraries presented thus far will work with ESP8266 boards such as NodeMCU and WeMos D1. With due diligence, I found out that squix78’s OLED library will work with the 1.3” I2C OLED with a few changes.
Install the library from the link I just presented and then open any one of the included examples. Next, locate the line with it says
#include<SSD1306Wire.h>And replace it with this:
#include<SH1106.h>Also, locate this line:
SSD1306Wire display(0x3C,D3,D5)And change it to this:
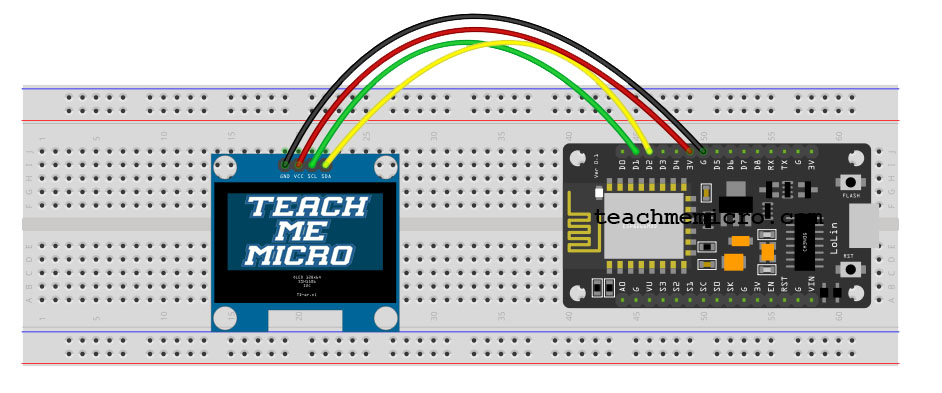
SH1106 display(0x3C,D1,D2)Note for the last changes, we define the SDA and SCL pins as D1 and D2 on the NodeMCU. You can follow this wiring diagram:

Here’s the video showing the results of the SSD1306UiDemo sketch:
Since the WeMos D1 and NodeMCU are essentially the same, expect the same results when the former board is used.
I hope you find this article useful. If you encounter some problems, kindly drop a comment below!

