
A sensor is a device that transforms physical quantities like temperature, humidity, pressure, etc., to an electrical signal. Moreover, this signal is often fed to a microcontroller like the Arduino for further processing, displaying or recording. This data from the sensor are often analog in nature, i.e., they vary over time and not simple on-off (digital). The Arduino sensor system uses an analog to digital converter circuit to process sensor signals.
Analog to Digital Conversion Basics
Sampling
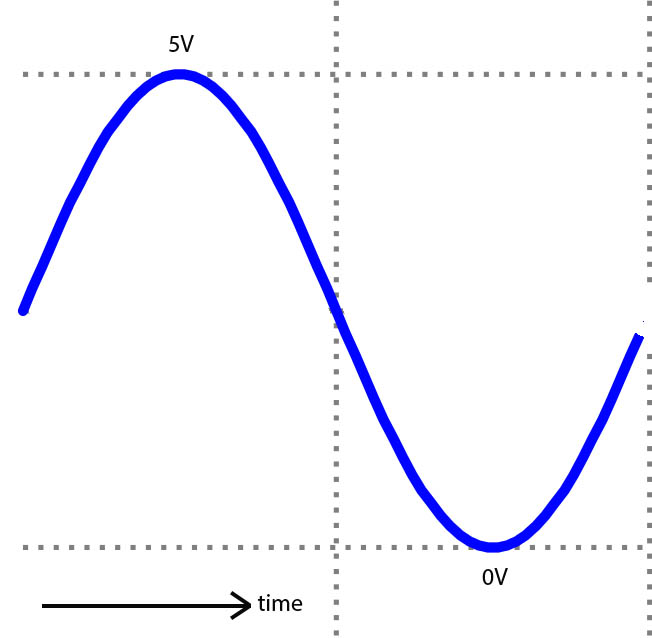
For simplicity, a sine wave often represents an analog signal. Let’s assume that a sensor produces a signal like this:
The analog-to-digital port, or simply analog port, takes samples from this signal at specific time intervals. These intervals are called sampling time. See illustration below:
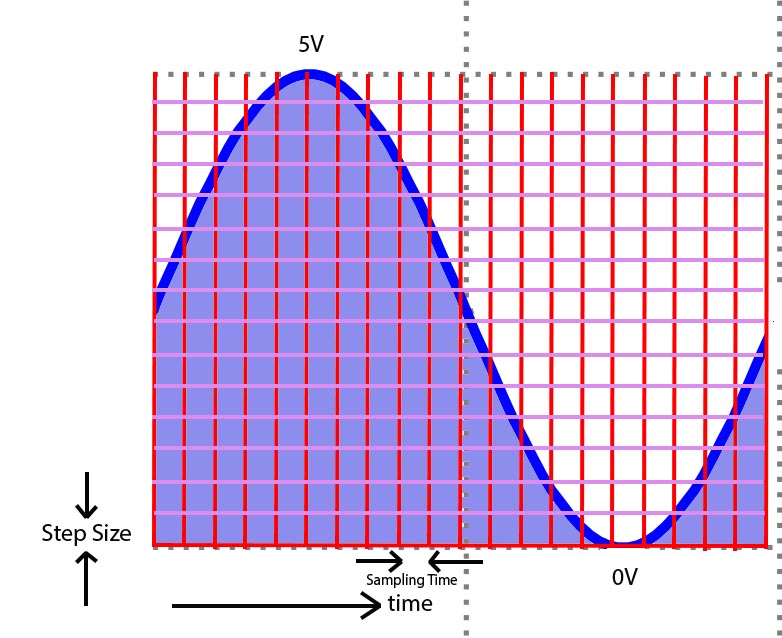
For every sample, the signal level is compared to a level called a step size. A number equal to the steps multiplied by the step size represents the analog signal on the given interval.
Resolution and Step Size
The step size is dependent on the resolution which is often measured in bits. The Arduino has a 10-bit ADC by default. This means there are 210 possible steps that the analog signal can be represented. With some math, we can calculate the step size of the Arduino’s ADC as:
Where Vref is 5V unless you change it by placing a different voltage level (not exceeding 5V!) to the Arduino’s Aref pin. This would give a step size of 4.88 mV. This is also the lowest sensor voltage the Arduino can receive!
Voltage Reference
You can also set the ADC reference by code using:
analogReference(REF);
Where REF can be any of the following:
- DEFAULT: the default analog reference of 5 volts (on 5V Arduino boards) or 3.3 volts (on 3.3V Arduino boards)
- INTERNAL: a built-in reference, equal to 1.1 volts on the ATmega168 or ATmega328P and 2.56 volts on the ATmega8 (not available on the Arduino Mega)
- INTERNAL1V1: a built-in 1.1V reference (Arduino Mega only)
- INTERNAL2V56: a built-in 2.56V reference (Arduino Mega only)
- EXTERNAL: the voltage to the AREF pin (0 to 5V only) is the reference voltage.
So for example, if you would like to have a reference voltage of 1.8 V, then you will be using:
analogReference(EXTERNAL);
and then attach a 1.8 V source on the AREF pin.
Now let's go back to the default 5 V reference. Let’s say that the analog port reads a 1.5V signal. The number 307 represents this signal because:
Arduino Sensor Simple Code
You can confirm the calculations through an actual code. The Arduino uses the function analogRead() to read signals on any of the analog ports (A0 to A5).
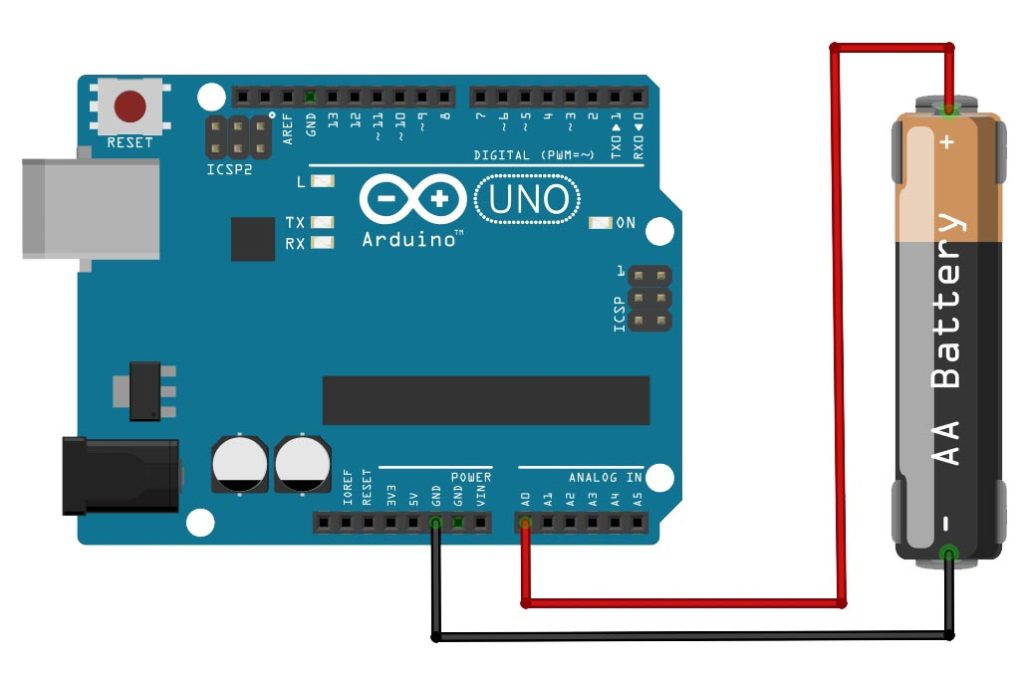
Grab a AAA battery and attach its positive terminal to the A0 pin and then its negative terminal to the GND pin like this:
The open File -> Examples -> Basics -> AnalogReadSerial:
void setup() {
 // initialize serial communication at 9600 bits per second:
 Serial.begin(9600);
}

// the loop routine runs over and over again forever:
void loop() {
 // read the input on analog pin 0:
 int sensorValue = analogRead(A0);
 // print out the value you read:
 Serial.println(sensorValue);
 delay(1);        // delay in between reads for stability
}
Open the serial monitor (CTRL+SHIFT+M) and the analog value of the battery voltage is now on the screen!
An Arduino Temperature Sensor
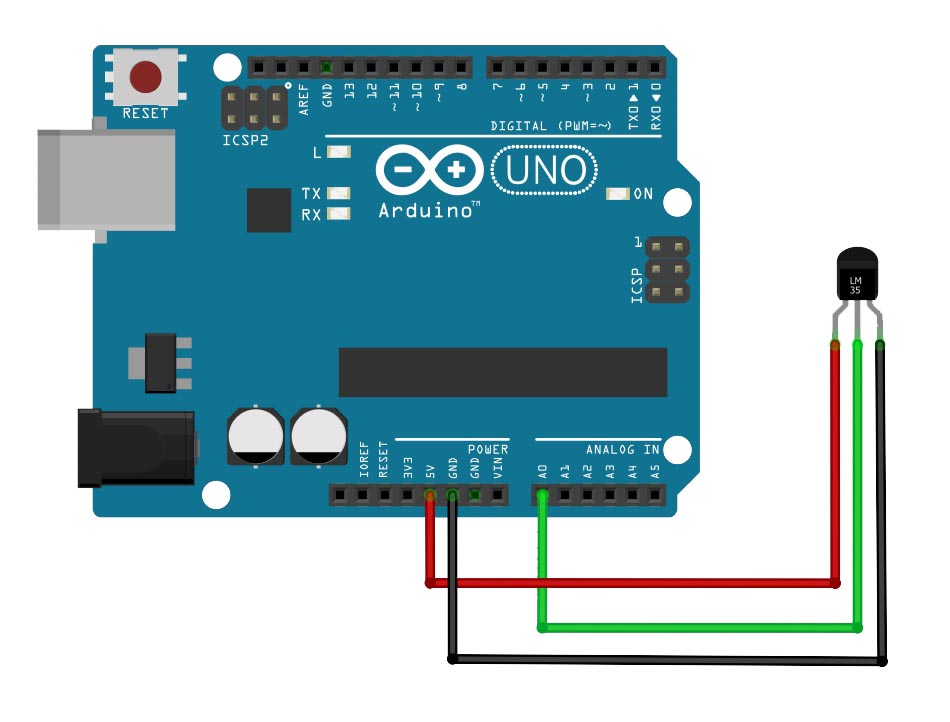
Now let’s use a real sensor and have it connected to the Arduino. I’m talking about the classic LM35 temperature sensor which outputs 10 mV per degree celsius.
We connect its output pin to A0 like this:
To display the temperature in Celsius on the serial monitor, we need to modify the AnalogReadSerial sketch like this:
// the setup routine runs once when you press reset:
void setup() {
 // initialize serial communication at 9600 bits per second:
 Serial.begin(9600);
}

// the loop routine runs over and over again forever:
void loop() {
 // read the input on analog pin 0:
 int sensorValue = analogRead(A0);
 double tempCelsius = sensorValue * (4.88/10);
 // print out the value you read:
 Serial.println(tempCelsius);
 delay(1);        // delay in between reads for stability
}
Noticed the addition of the variable tempCelsius and the formula used to calculate it. Since the LM35 outputs 10 mV per degree celsius and the ADC resolution is 1 step per 4.88 mV then the analog value can be calculated by ratio and proportion:
The LM35 is only one of the hundreds of sensors out there. Explore, code, and build Arduino projects!

