
One way to connect a microcontroller to another microcontroller is through the serial port. Here I will show you how to use the Beaglebone Black serial port to connect to the Arduino UNO.
Preliminaries
Beaglebone Black Serial Device Tree Overlay
In order to use the Beaglebone Black's serial port, you need the device tree overlays BB-UART1 and BB-UART2 for the serial port 1 and 2 respectively. I'll be using the BB-UART1-00A0.dts:
/*
 * Copyright (C) 2013 CircuitCo
 *
 * Virtual cape for UART1 on connector pins P9.24 P9.26
 *
 * This program is free software; you can redistribute it and/or modify
 * it under the terms of the GNU General Public License version 2 as
 * published by the Free Software Foundation.
 */
/dts-v1/;
/plugin/;

/ {
	compatible = "ti,beaglebone", "ti,beaglebone-black";

	/* identification */
	part-number = "BB-UART1";
	version = "00A0";

	/* state the resources this cape uses */
	exclusive-use =
		/* the pin header uses */
		"P9.24",	/* uart1_txd */
		"P9.26",	/* uart1_rxd */
		/* the hardware ip uses */
		"uart1";

	fragment@0 {
		target = <&am33xx_pinmux>;
		__overlay__ {
			bb_uart1_pins: pinmux_bb_uart1_pins {
				pinctrl-single,pins = <
					0x184 0x20 /* P9.24 uart1_txd.uart1_txd  OUTPUT  */
					0x180 0x20 /* P9.26 uart1_rxd.uart1_rxd  INPUT  */
				>;
			};
		};
	};

	fragment@1 {
		target = <&uart2>;	/* really uart1 */
		__overlay__ {
			status = "okay";
			pinctrl-names = "default";
			pinctrl-0 = <&bb_uart1_pins>;
		};
	};
};
The overlay above specifies P9_24 and P9_26 as the transmit and receive pins for the serial port. Open nano and paste the overlay above and save it as BB-UART1-00A0.dts.
Creating Device Tree Binary Object
Next you need to compile it to create the binary object .dtbo. Here's how to do that:
dtc -O dtb -o BB-UART1-00A0.dtbo -b 0 -@ BB-UART1-00A0.dts
The compiled .dtbo file must be on /lib/firmware so move it there:
mv BB-ADC-00A0.dtbo /lib/firmware
You are now ready to move the overlay to the cape manager:
echo BB-UART1 > /sys/devices/platform/bone_capemgr/slots
If everything is successful so far, you should see this:
 0: PF----  -1
 1: PF----  -1
 2: PF----  -1
 3: PF----  -1
 4: P-O-L-   0 Override Board Name,00A0,Override Manuf,BB-UART1
root@arm:/#
When you try doing:
root@arm:/# cat /sys/devices/platform/bone_capemgr/slots
Note: Other things may be present on your cape manager slots.
Installing Minicom
Alright, the next thing we need is an app that will allow us to communicate with the serial port. Minicom is that app. Connect your BBB to the internet and download the minicom app:
apt-get install minicom
Once minicom is installed, fire it up using:
minicom -b 9600 -D /dev/ttyO1
-b is the command line option for specifying the baud rate which is why it is followed by 9,600 here. -D specifies the device which is in this case, tty01. For more command line options, just type
minicom --help
This is what it would look like in minicom starts:
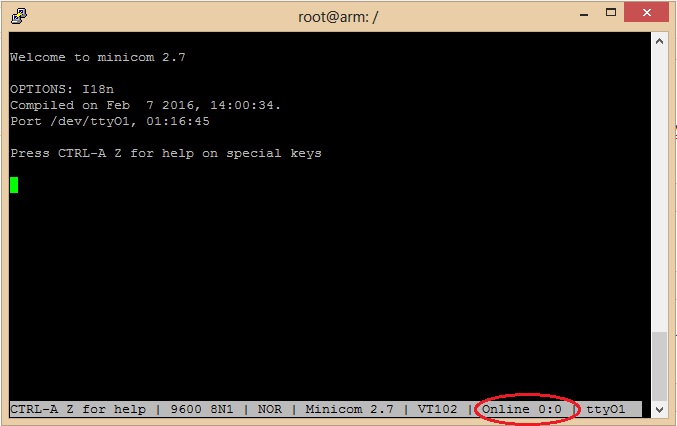
If the one I encircled showed offline instead even after you start typing, there must be something wrong with your serial port settings.
Anything you will type here will now be sent to the serial port 1 (tty01). You can turn on local echo so that you can see what you are typing on the minicom terminal. To do that, just hit CTRL A then E.
Wiring Diagrams
Connect the BBB to the Arduino UNO just like this:
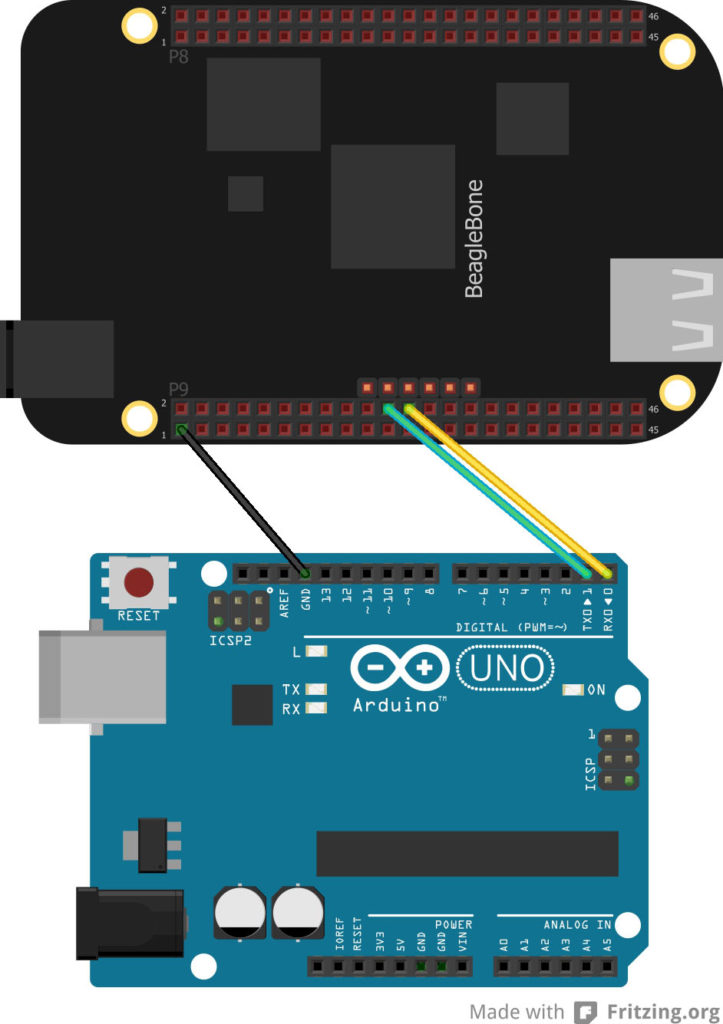
This wiring connection will use the Arduino as some sort of TTL to RS-232 converter so that we can see what we type on the minicom on the Arduino IDE's serial monitor.
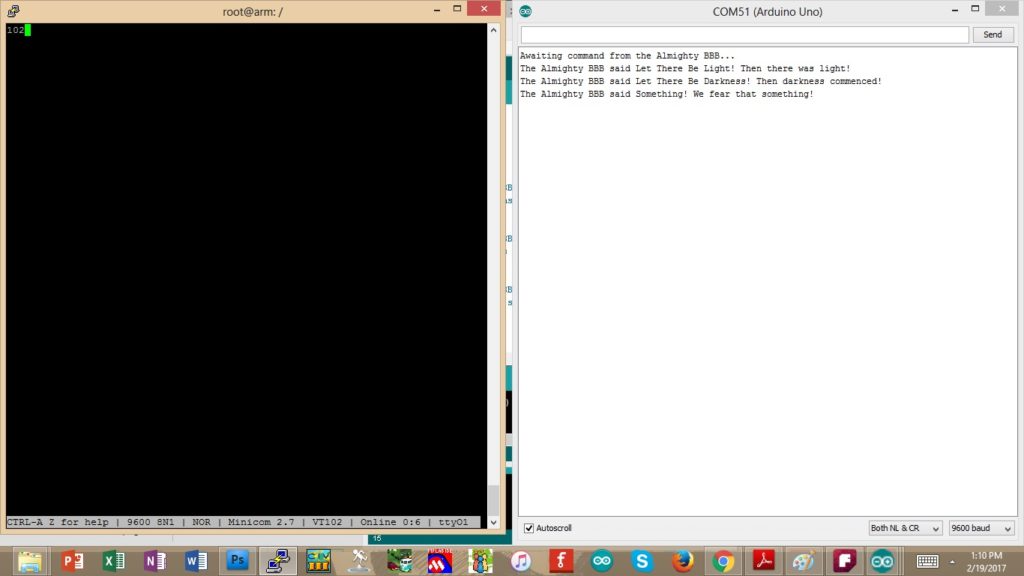
Here's what my screen looks like:
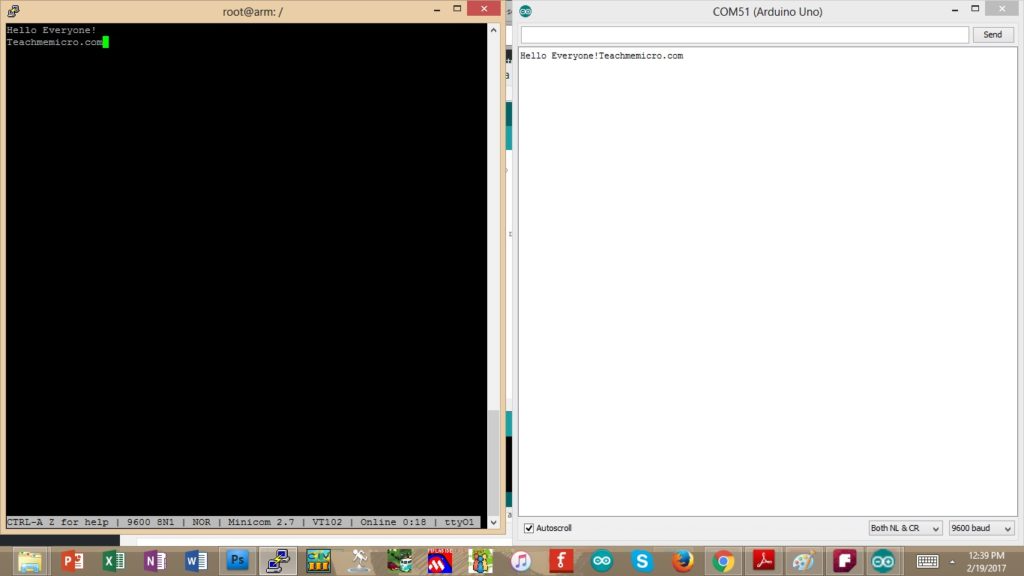
Everything I type on the minicom screen also appears on the Arduino IDE's serial monitor. I can also send strings from the serial monitor to the minicom terminal.
To exit minicom, hit CTRL A again then X.
The next thing we'll do is issue a command from the BBB to the Arduino via serial. We'll need to rewire the connection to this:
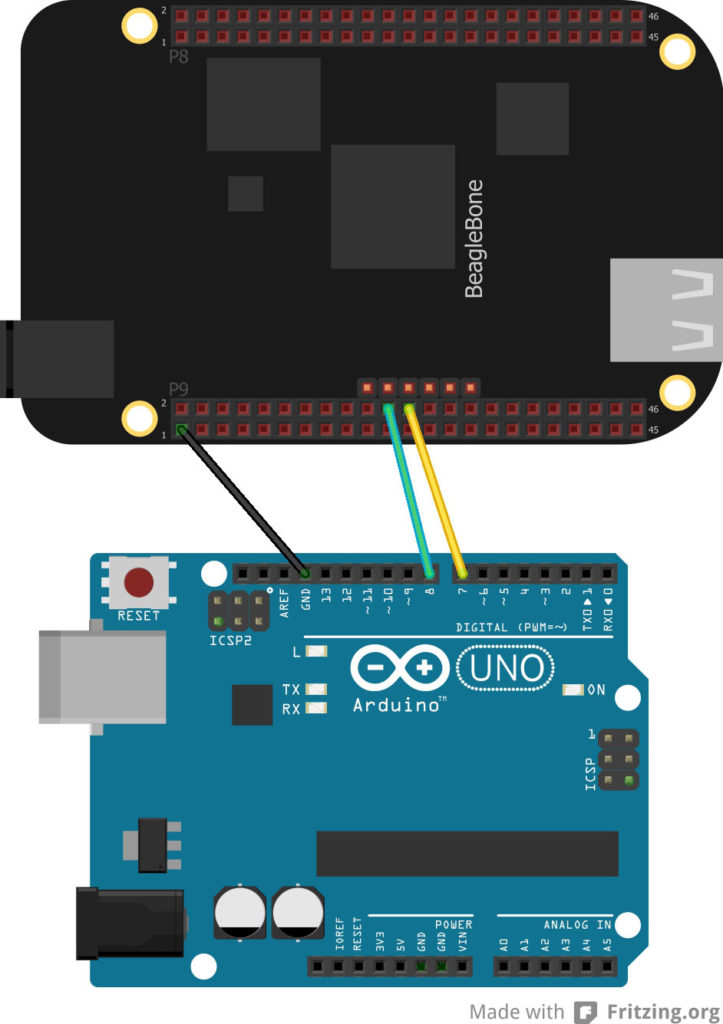
Moving the serial connection will allow me to still use the serial monitor while the BBB and Arduino are communicating.
Coding the Arduino
Here's the Arduino sketch:
/*Accept command from BBB via Serial
 *Turns on/off on-board LED
 *by OP from teachmemicro.com */

#include <SoftwareSerial.h>

SoftwareSerial mySerial(8, 7); // RX, TX
char inChar;
void setup()
{
  // Open serial communications and wait for port to open:
  Serial.begin(9600);
  Serial.println("Awaiting command from the Almighty BBB...");
  // set the data rate for the SoftwareSerial port
  mySerial.begin(9600);
  pinMode(13, OUTPUT);
}

void loop() // run over and over
{
  if (mySerial.available()){
    inChar = (char)mySerial.read();
    if(inChar=='1'){
      Serial.print("The Almighty BBB said Let There Be Light! ");
      Serial.println("Then there was light!");
      digitalWrite(13, HIGH);
    }else if(inChar =='0'){
      Serial.print("The Almighty BBB said Let There Be Darkness! ");
      Serial.println("Then darkness commenced!");
      digitalWrite(13, LOW);
    }else{
      Serial.print("The Almighty BBB said Something! ");
      Serial.println("We fear that something!");
   }
  }
}
What the sketch does is wait for either a "1" or a "0" from the BBB. If a "1" is received, the on-board LED lits up. If a "0" is received, the on-board LED turns off. You can open the serial monitor and look at the Arduino's response everytime a character is sent from the BBB.
TL, DR:
- First, create and compile the UART device tree overlay for the Beaglebone Black
- Second, move the compiled device tree overlay to the cape manager
- Third, install minicom
- Fourth, connect the Arduino to the Beaglebone Black
- Fifth, code the Arduino
- Finally, fire up minicom
If you have any questions or any project idea on Arduino and Beaglebone Black serial communication, drop a comment below!

