
For this article, I will show you how to use an ESP32 microcontroller as a magnetometer - a device that measures the direction and strength of a nearby magnet. In the absence of a nearby magnet, the device detects the Earth’s magnetic field. Hence, a compass is a type of magnetometer.
Here, I will read the data from the HMC5883L magnetometer breakout board, and have the heading shown in a web app accessible through WiFi. The device should connect to the same WiFi connection as the ESP32.
Materials
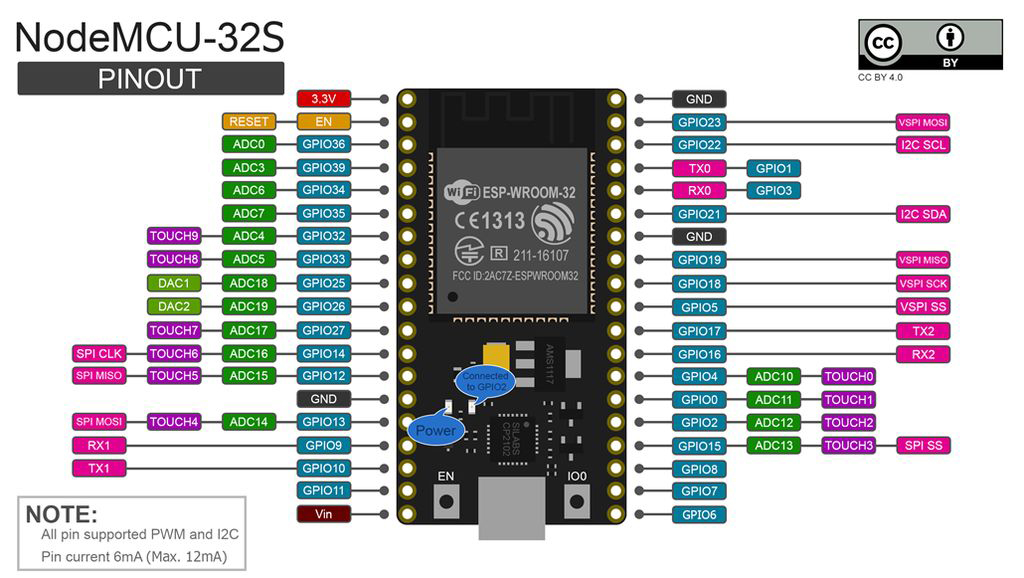
- ESP32 (NodeMCU-32S)
- HMC5883L Breakout Board
- Breadboard, Connecting Wires, Power Source
The ESP32 is a WiFi microcontroller and is a successor to the popular ESP8266. I created the code for the ESP32 using the Arduino IDE. Note that I am using the NodeMCU-32S which has a different pinout compared to other similarly looking ESP32 boards.
The Honeywell HMC5883L is a surface-mount, multi-chip module with a digital interface for applications such as low-cost compassing and magnetometry. It communicates via I2C and is able to provide magnetic flux density in three axes.
For this project, I am using the HMC5883L breakout board:
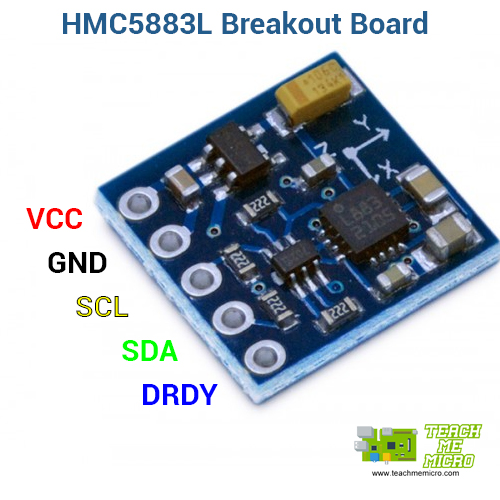
This breakout board makes the HMC5883L easier to interface with a microcontroller. The wiring diagram for this breakout board and the ESP32 is on the succeeding section.
Measuring Heading
As mentioned, this project shows the heading of the device. Heading is the angle from the true north. Given the magnetic flux densities in x and y axes, the heading is:
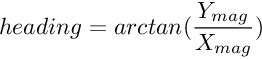
However, magnetometers detect magnetic north and not true north. This error, known as magnetic declination, depends on the location of the magnetometer. Hence, correct heading should account for this declination.

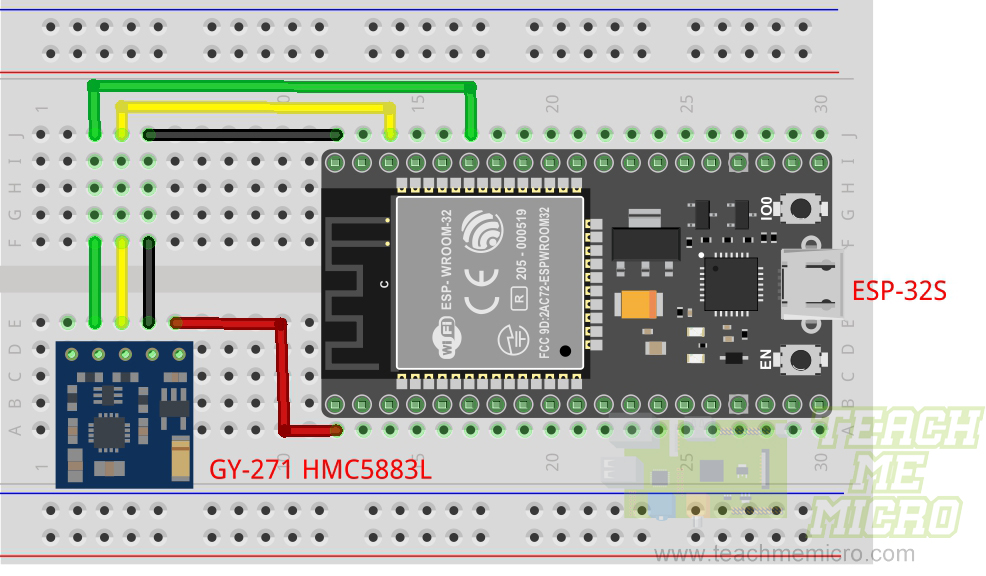
Wiring Diagram
Since the HMC5883L communicates via I2C, it connects to the SDA (GPIO21) and SCL (GPIO22) pins of the ESP32. Also, the HMC5883L needs a 3.3V power supply, hence it gets its power from the 3.3V pin of the ESP32.
Web App
The web app for this project contains an arrow that rotates according to the heading. A text field indicates the heading in degrees.
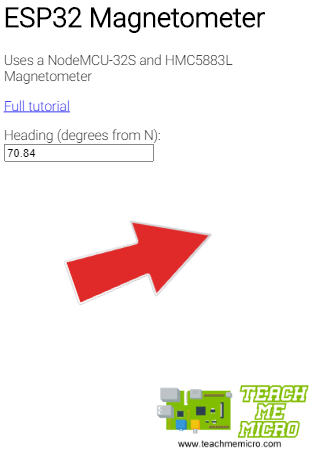
This web app contains both an HTML and JavaScript code. The HTML arranges all the elements in the app while the JavaScript is in charge of reading the data from the ESP32 and rotating the arrow.
The HTML code is inside the “mainpage.h” header while the JavaScript code is inside “jscript.h”.
Here is the <body> part of the HTML:
 <body>
         <h1>ESP32 Magnetometer</h1>
         <p>Uses a NodeMCU-32S and HMC5883L Magnetometer</p>
         <p><a href='https://www.teachmemicro.com/esp32-magnetometer-hmc5883l'>Full tutorial</a></p>
          <label for='heading-value'>Heading (degrees from N):</label> <input type='text' id='heading-value'>""</p>
           <img id='arrow' src='https://i.imgur.com/5buESn2.png'/>
           <img id='tmm-logo' src='https://i.imgur.com/G80eVhL.png' />
</body>
The heading value is displayed inside the <input> text element with ID ‘heading-value’. The arrow image has an ID ‘arrow’.
Here’s the JavaScript file:
$(document).ready(function(){
  setInterval(getData,1000);
  function getData(){
    $.ajax({
      type:"GET",
      url:"data","
      success: function(data){
         $('#heading-value').val(data);
         theta = data - 90;"
         $('#arrow').css({'transform' : 'rotate('+ theta +'deg)'});
      }
    }).done(function() {\r\n"
         console.log('ok'); "
    }}
});
The script utilizes JQuery library.
Here's how the script works: the function getData() every second through the setInterval() method. Once it executes, an AJAX request is made through a page on the ESP32 web server ‘data’. This page returns the heading value from the HM5883L. That heading value is then used to rotate the arrow using transform:rotate.
ESP32 Code
Much of the ESP32 code is the same as the ESP32 web server code. The relevant part is how the ESP32 reads and passes the HMC5883L data to the client.
The code requires Adafruit's Unified Sensor and HMC5883L libraries.
Looking at esp32-magnetometer.ino code, you’ll see this part:
server.on("/data", [](){
  delay(100);
  sensors_event_t event;
  mag.getEvent(&event);
  float heading = atan2(event.magnetic.y, event.magnetic.x);

  float declinationAngle = 0.0168;
  heading += declinationAngle;

  if(heading < 0)
     heading += 2*PI;
  if(heading > 2*PI)
     heading -= 2*PI;

  float headingDegrees = heading * 180/M_PI;
  text = (String)headingDegrees;
  server.send(200, "text/plain", text);
});
The ‘data’ page serves the AJAX requests from the javascript code. The data from HMC5883L is read and the heading is calculated every time this request is done.
Note than in the code above, the declination angle is considered. Go here to know the declination angle in your location.
The full code is in my repository.
Output Video
The "front" of the HMC5883L breakout board is where the x-axis points on the board. When this is pointed to the north, the arrow in the app points towards north. This corresponds to a heading of 0 degrees.

