
This project demonstrates how to read data from the DHT22 temperature and humidity sensor and send that data to the web using an ESP8266 via MQTT.
Setting Up
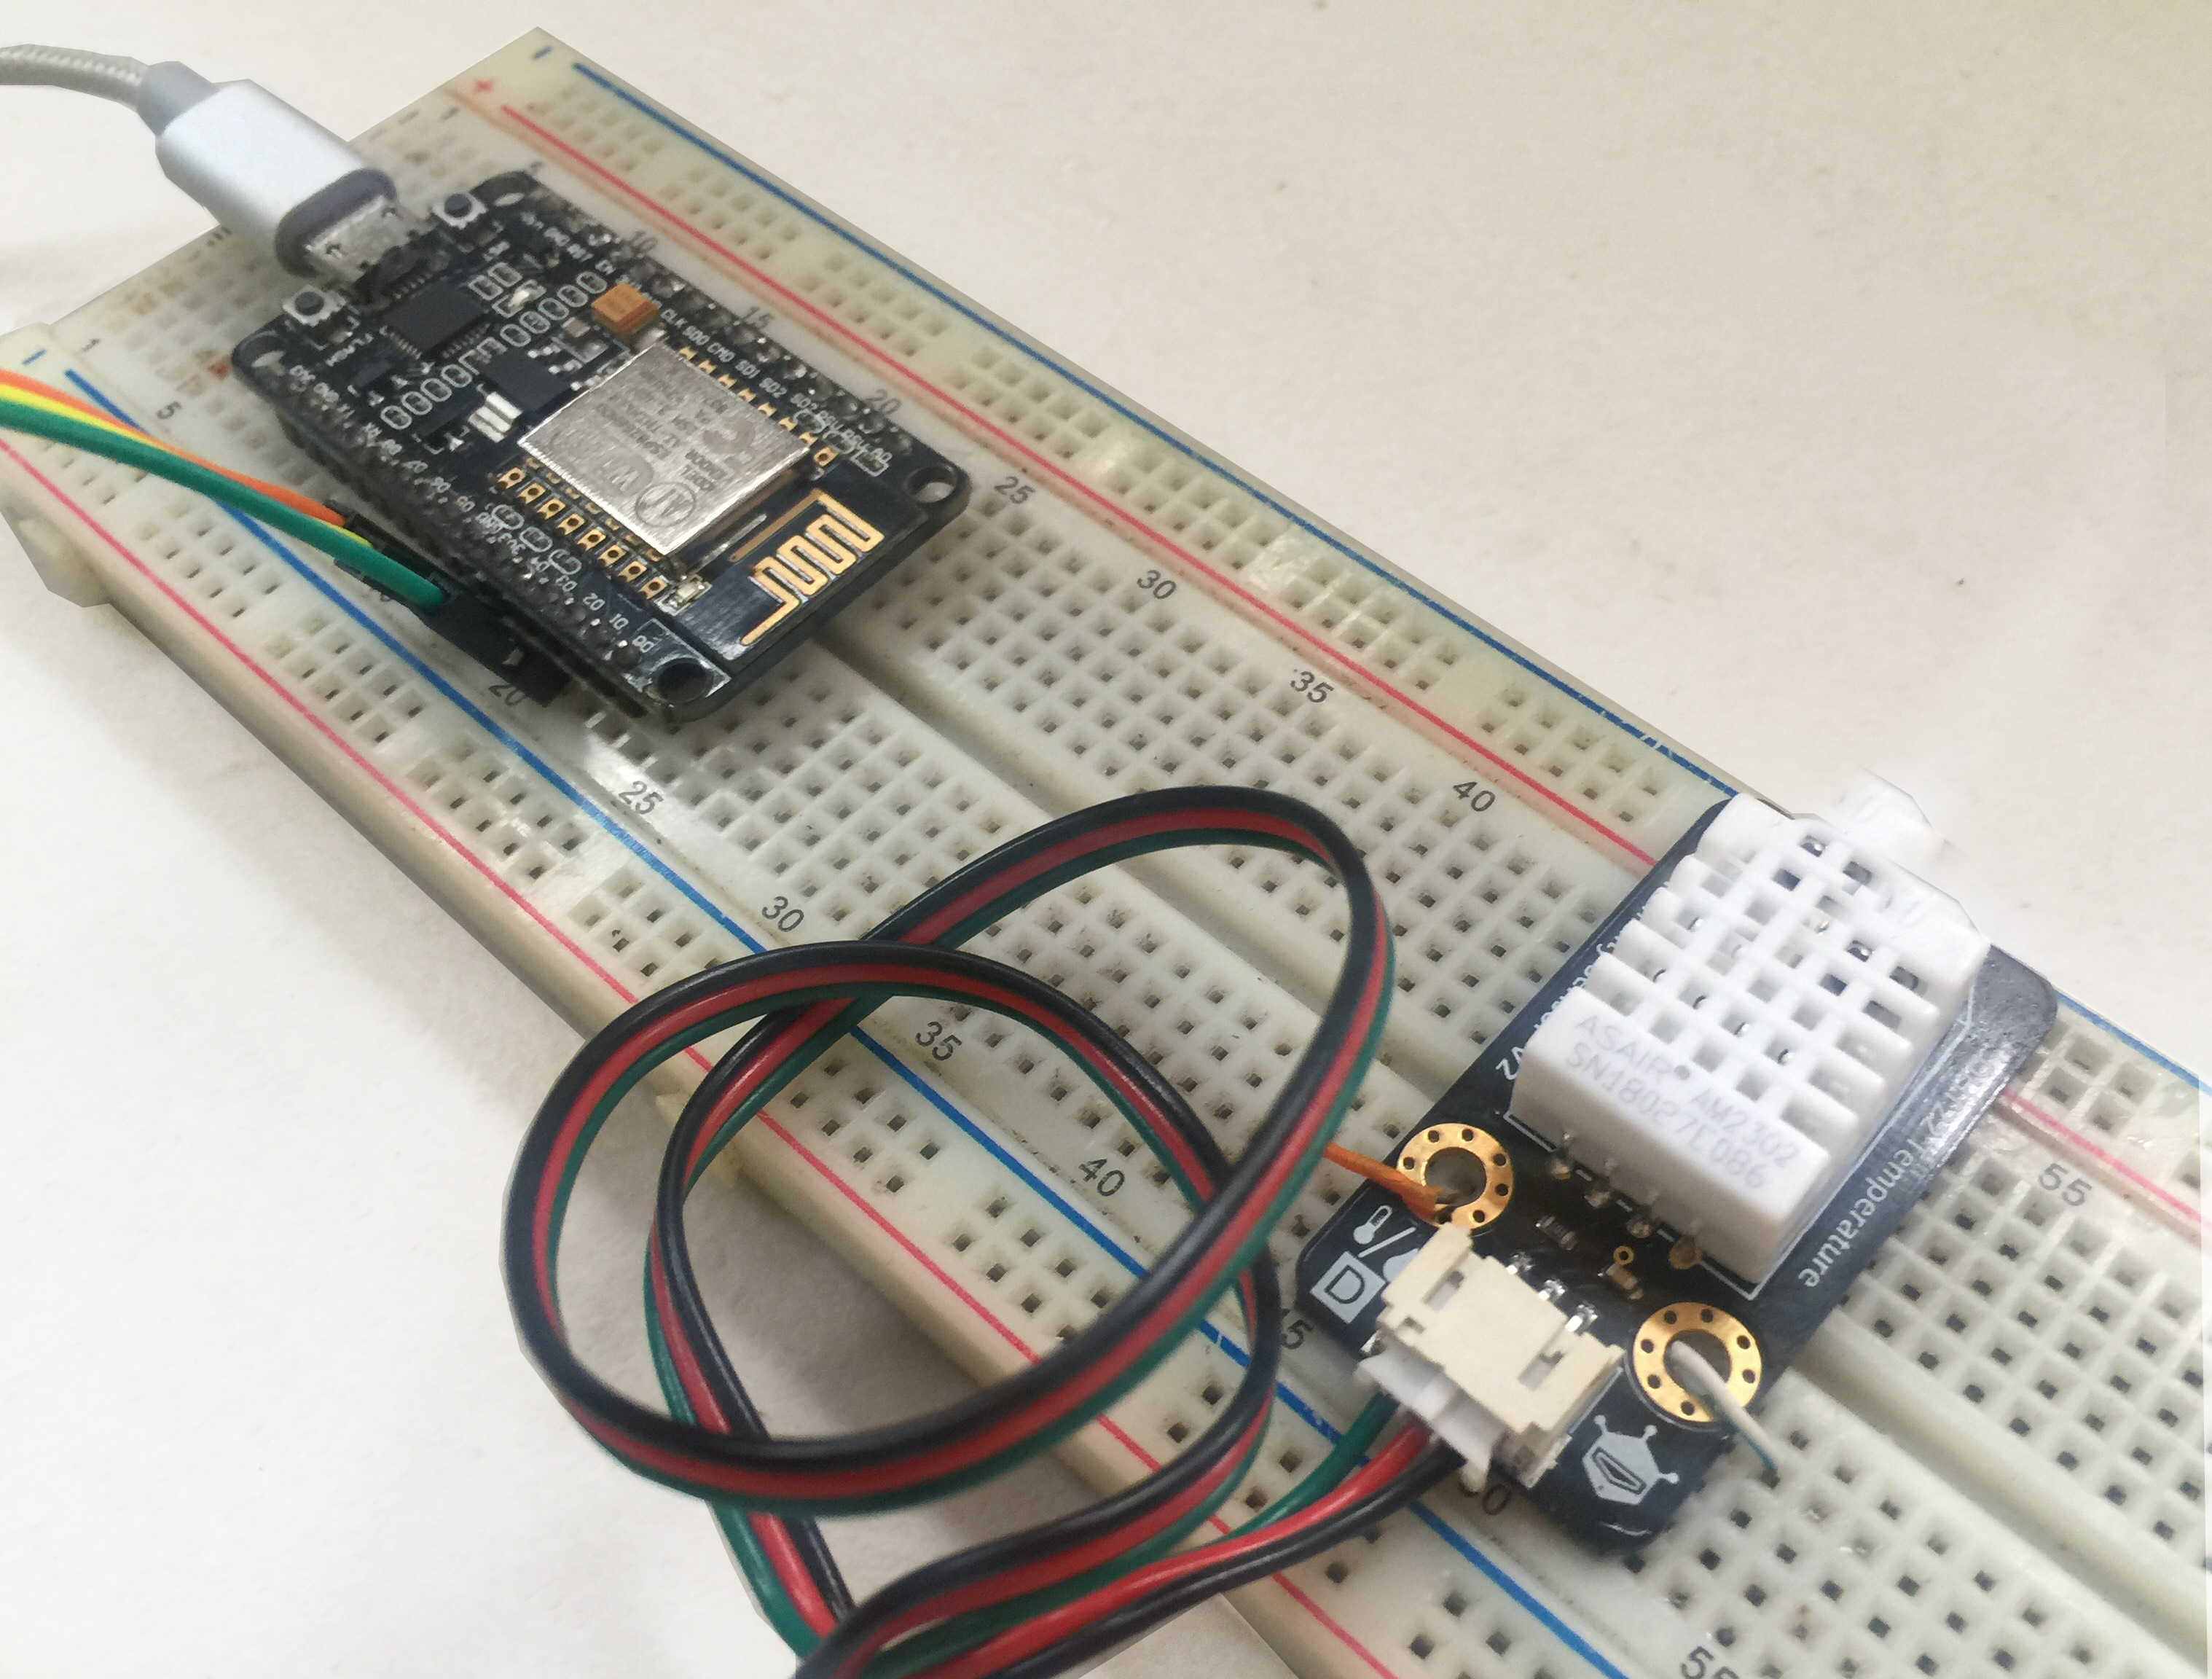
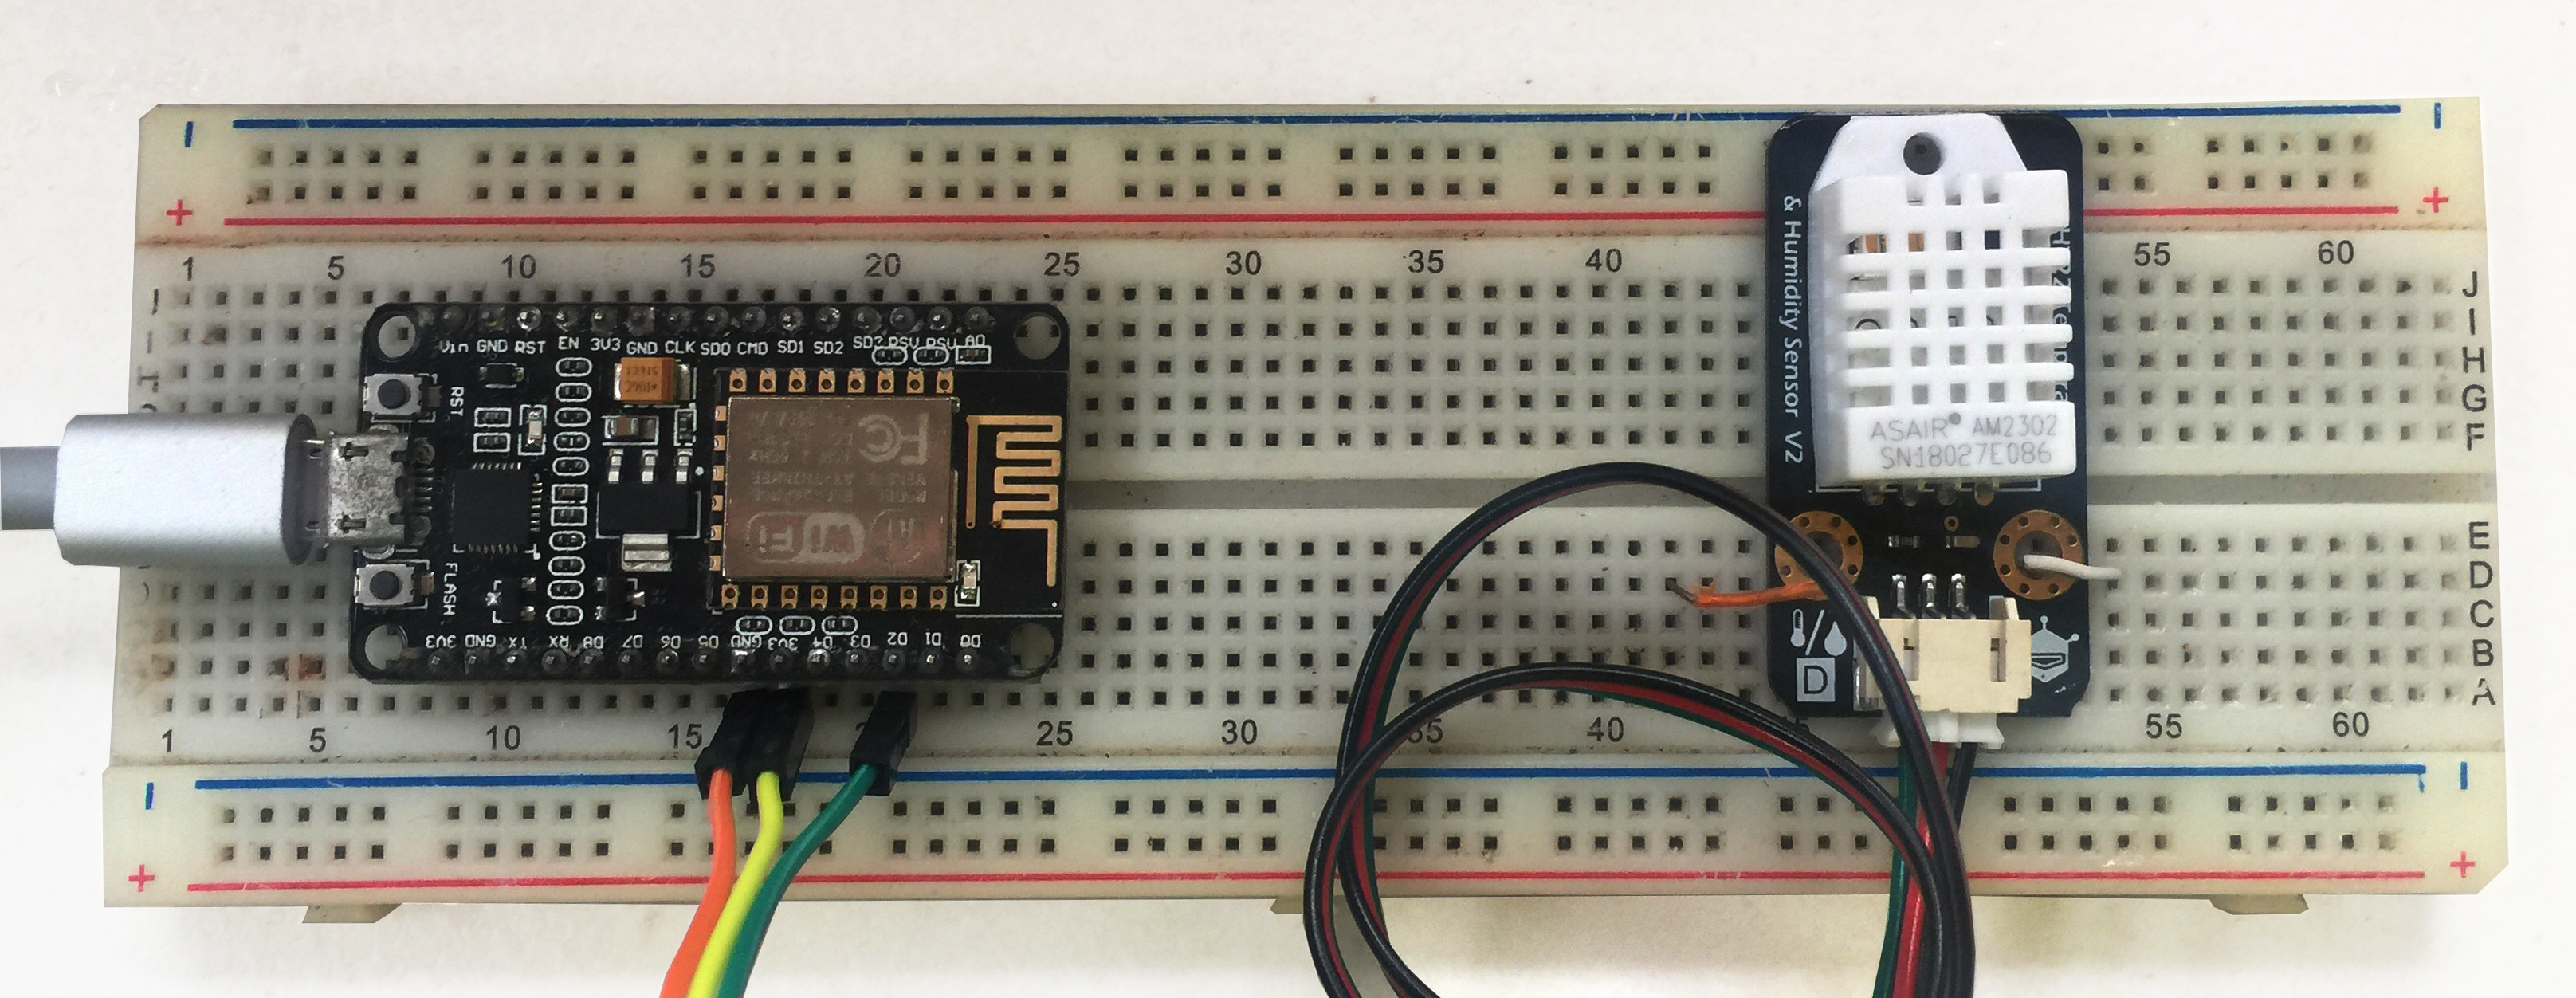
As already mentioned, this project uses the DHT22 and a NodeMCU ESP8266 board. The hardware connections are straightforward:
| DHT22 | NodeMCU |
|---|---|
| Dout | GPIO4 (D2) |
| VCC | 3.3V |
| GND | GND |
Here is a photo of my actual setup:
As for the firmware, I used the following libraries for the sketch:
- SimpleDHT library by winlinvip
- MQTT library by 256dpi
- ESP8266 Arduino Core (see Intro to NodeMCU for details)
Basically, all I did was read temperature and humidity data from the DHT22 and publish that data to shiftr’s MQTT broker service. You can use shiftr’s Try channel if you’re short on time but I recommend creating your own account. With that, you can create your own namespace and you will be provided with a Key and Password as shown:

Here, my Key is feceaf58 and my password is 5d0a52d449f797ca.
Sketch
Next, I modified the AdafruitHuzzahESP8266 example sketch that came with the MQTT library. I added a few lines for reading the data from the DHT22 and also inserted my own Key and password from above. Here is the full sketch:
#include <ESP8266WiFi.h>
#include <MQTT.h>
#include <SimpleDHT.h>

const char ssid[] = "<Your-WiFi-SSID>";
const char pass[] = "<Your-WiFi-Password>";
const char mqttkey[] = "<Your-MQTT-Key>";
const char mqttpw[] = "<Your-MQTT-Password>";

WiFiClient net;
MQTTClient client;

int pinDHT22 = 4;
SimpleDHT22 dht22(pinDHT22);
float temperature = 0;
float humidity = 0;


unsigned long lastMillis = 0;

void connect() {
  Serial.print("checking wifi...");
  while (WiFi.status() != WL_CONNECTED) {
    Serial.print(".");
    delay(1000);
  }
  Serial.println("WiFi Connected!");
  Serial.print("IP address: ");
  Serial.println(net.localIP());
  delay(2000);
  Serial.println("connecting to MQTT broker...");
  while (!client.connect("DHT22-NodeMCU", mqttkey, mqttpw)) {
    Serial.print(".");
    delay(1000);
  }

  Serial.println("\nconnected!");

  client.subscribe("/DHT22");
  // client.unsubscribe("/hello");
}

void messageReceived(String &topic, String &payload) {
  Serial.println("incoming: " + topic + " - " + payload);
}

void setup() {
  Serial.begin(115200);
  WiFi.begin(ssid, pass);

  // Note: Local domain names (e.g. "Computer.local" on OSX) are not supported by Arduino.
  // You need to set the IP address directly.
  client.begin("broker.shiftr.io",net);
  client.onMessage(messageReceived);

  connect();
}

void loop() {
  client.loop();
  delay(10);  // <- fixes some issues with WiFi stability
  int err = SimpleDHTErrSuccess;
  if ((err = dht22.read2(&temperature, &humidity, NULL)) != SimpleDHTErrSuccess) {
    Serial.print("Read DHT22 failed, err="); Serial.println(err);delay(2000);
    return;
  }

  Serial.print((float)temperature); Serial.print(" *C, ");
  Serial.print((float)humidity); Serial.println(" RH%");
  delay(2000);
  if (!client.connected()) {
    connect();
  }

  // publish a message roughly every second.
  if (millis() - lastMillis > 1000) {
    lastMillis = millis();
    client.publish("DHT22-NodeMCU/temperature", (String)temperature);
    client.publish("DHT22-NodeMCU/humidity", (String)humidity);
  }
}
Don’t forget to insert your own credentials on the sketch above!
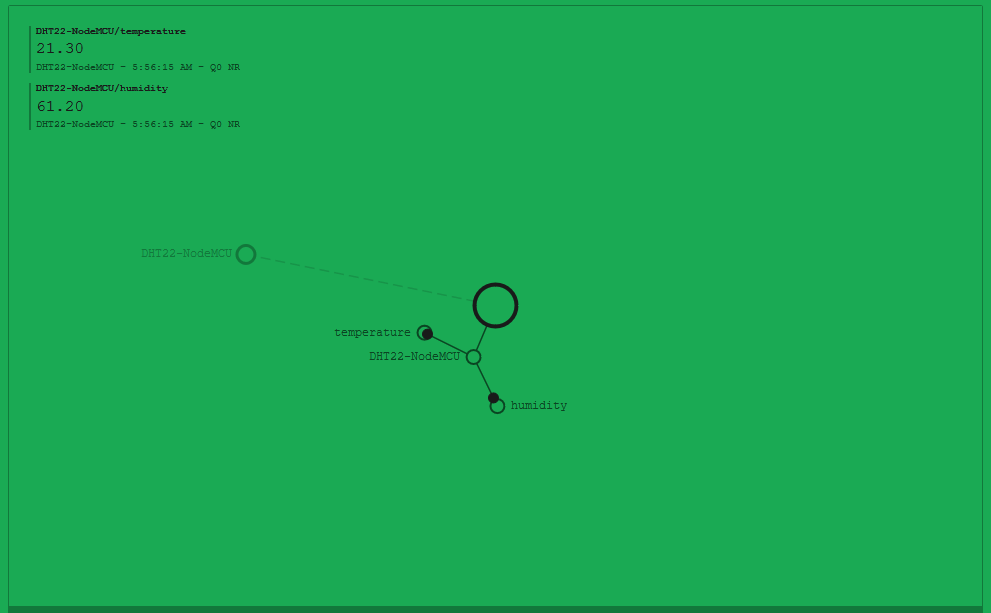
If the sketch is uploaded successfully to the NodeMCU, the Shiftr channel should now show the sent temperature and humidity data:
Embedding Data to Web Page
I’m not done yet! I want to embed the temperature and humidity data to my own web page and add a graph with the values vs. time.
Shiftr provides an example Javascript code for embedding MQTT data. What I did is modify that code so that it displays two messages from two topics:
$(function(){
  var client = mqtt.connect('mqtt://feceaf58:5d0a52d449f79c7a@broker.shiftr.io', {
    clientId: 'browser-client'
  });

  var temperature;
  var humidity;


  client.on('connect', function(){
    console.log('client has connected!');
  });

  client.subscribe('DHT22-NodeMCU/temperature');
  client.subscribe('DHT22-NodeMCU/humidity');

  client.on('message', function(topic, message) {
      if(topic === 'DHT22-NodeMCU/temperature'){
        temperature = message;
      }else if(topic === 'DHT22-NodeMCU/humidity'){
        humidity = message;
      }else{;}
   if(temperature && humidity){
    $('#temperature').text(temperature.toString());
    $('#humidity').text(humidity.toString());
    temperature =  undefined;
    humidity = undefined;
   }


  });

})
Then I used Dygraph for plotting the data against time. This library requires a Dygraph object with given properties.
var g = new Dygraph(document.getElementById("div_g"), data,
            {
                drawPoints: true,
                showRoller: true,
                valueRange: [0.0, 100, 100],
                labels: ['Time', 'Temperature', 'Humidity']
            });
Here, I created div_g HTML div element where the graph is located.
Here’s my full Javascript code:
$(function(){
  var client = mqtt.connect('mqtt://feceaf58:5d0a52d449f79c7a@broker.shiftr.io', {
    clientId: 'browser-client'
  });

  var temperature;
  var humidity;

  var data = [];
  var y;
  var z;

  var g = new Dygraph(document.getElementById("div_g"), data,
            {
                drawPoints: true,
                showRoller: true,
                valueRange: [0.0, 100, 100],
                labels: ['Time', 'Temperature', 'Humidity']
            });

  client.on('connect', function(){
    console.log('client has connected!');
  });

  client.subscribe('DHT22-NodeMCU/temperature');
  client.subscribe('DHT22-NodeMCU/humidity');

  client.on('message', function(topic, message) {
      if(topic === 'DHT22-NodeMCU/temperature'){
        temperature = message;
      }else if(topic === 'DHT22-NodeMCU/humidity'){
        humidity = message;
      }else{;}
   if(temperature && humidity){
    $('#temperature').text(temperature.toString());
    $('#humidity').text(humidity.toString());
    y = temperature.toString();
    z = humidity.toString();
    temperature =  undefined;
    humidity = undefined;
   }

    var x = new Date();  // current time
     console.log(y);
    console.log(z);
    data.push([x, y, z]);
    g.updateOptions( { 'file': data } );

  });

})
I saved this Javascript code as mqtt.js.
And here’s the HTML as well:
<html>
<title>NodeMCU Weather Monitor</title>
<head>
<script src="https://code.jquery.com/jquery-2.2.3.min.js"></script>
<script src="https://assets.shiftr.io/js/mqtt-2.9.0.js"></script>
<script src="https://dygraphs.com/dist/dygraph.js"></script>
<script src="mqtt.js" charset="utf-8"></script>
</head>
<body>
<div id="temp"><p><h3>Temperature (°C): </h3><p id="temperature"></p></p></div>
<div id="humid"><p><h3>Humidity (%RH): </h3><p id="humidity"></p></p></div>
<div id="div_g" style="width:600px; height:300px;"></div
</body>
</html>
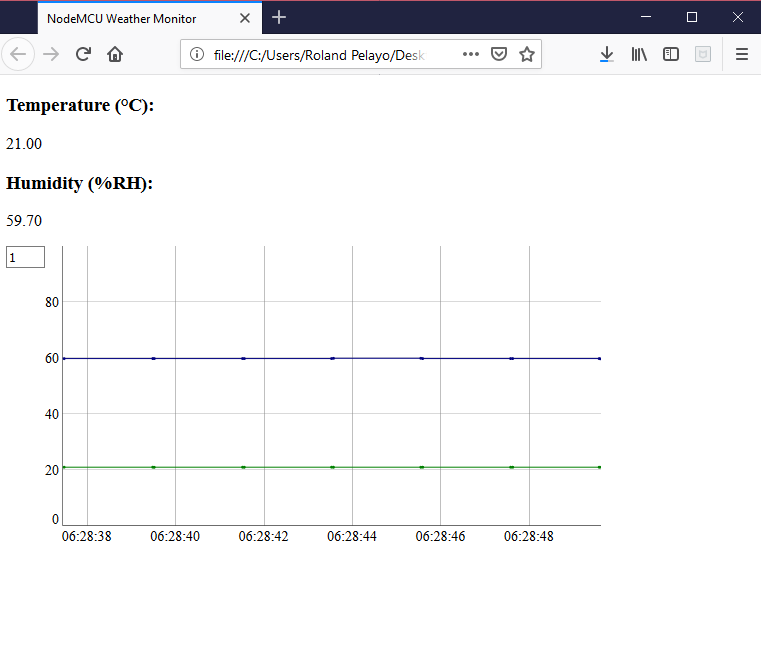
The web page lacks CSS so it’s kinda ugly. But it works!

