
You can in fact build your own motion sensor without spending too much. Motion sensors can be set up using ultrasonic transceivers, video cameras, or microwave signals. In this tutorial, I’ll show you how to use the PIR motion sensor with a microcontroller.
PIR is short for passive infrared which describes how the sensor operates; passive means the device doesn’t emit any energy. Basically, the sensor detects infrared radiation emitted by anything that is warm, including a person.
Most PIR sensors look like this:
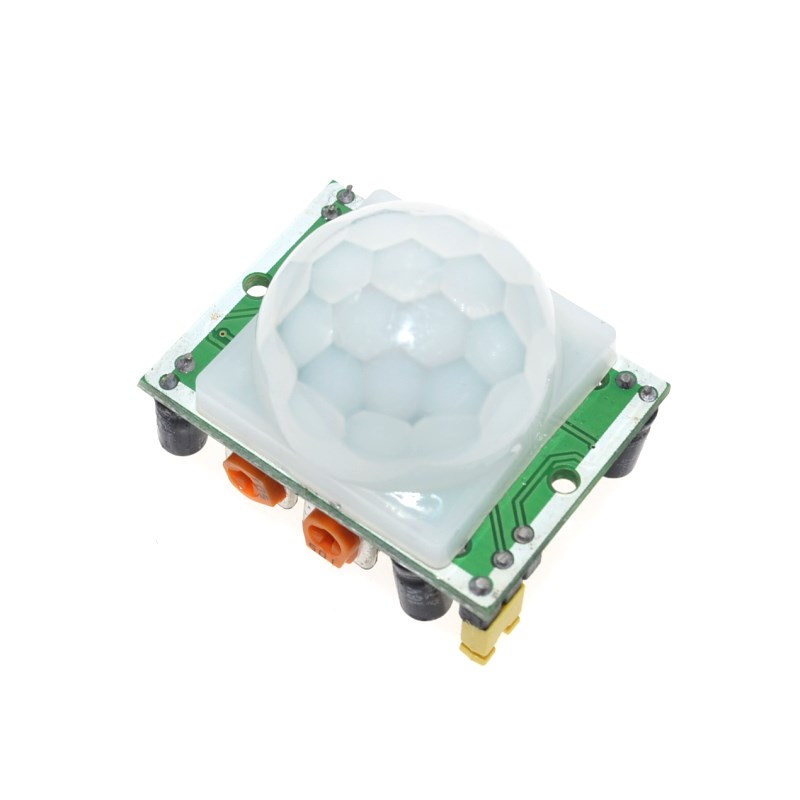
This is the HC-SR501 PIR motion sensor. The dome is called a Fresnel lens that focuses the infrared radiation towards the IR sensor in the middle. This is what the module looks like without the dome:

This PIR sensor has a detection range from 100 to 130 degrees and from 3 to 7 meters from the device.
Here’s what the underside looks like:
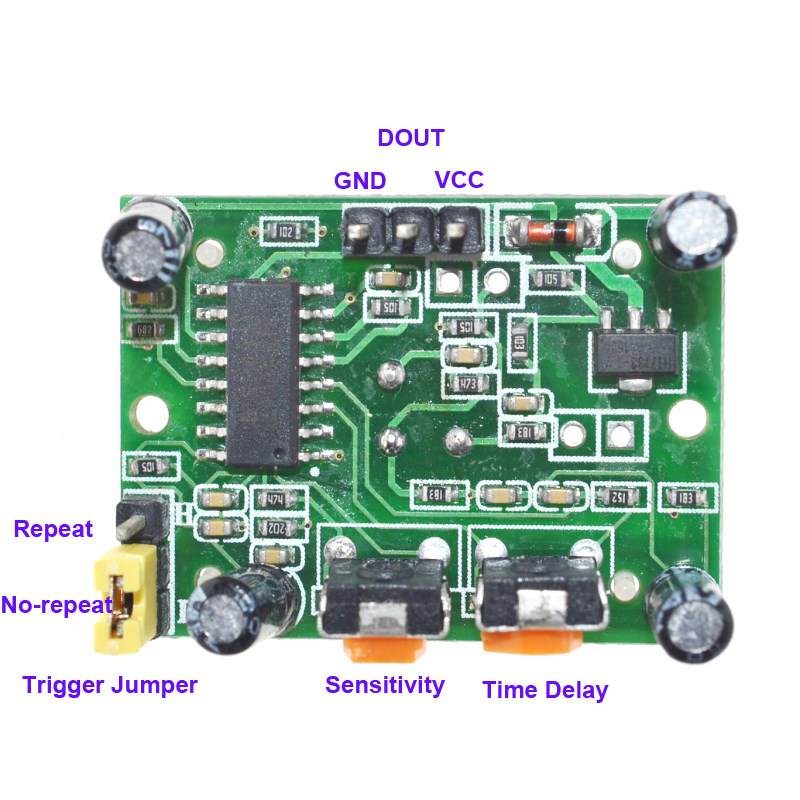
Here we see the three pins that would be connected to a microcontroller. The DOUT pin toggles high when a warm body is detected within the defined range. It will stay high depending on the time delay and trigger mode settings.
There’s the sensitivity adjust knob that can change the range from a minimum of 3 meters (fully clockwise) or a maximum of 7 meters (full counter-clockwise). The time delay knob adjusts how long will the DOUT pin stays high when the sensor is triggered. The minimum is 3 seconds (fully counter-clockwise) and the maximum is 5 minutes (fully clockwise).
The jumper on the left side sets the trigger mode to either repeatable or non-repeatable. When in repeatable mode, each detection resets the time delay. When in non-repeatable mode, the time delay begins immediately after detection and the next motion will be disregarded. It is worth mentioning that when the DOUT pin goes low after the time delay period, there is a 3 second window in which all motion will not be detected.
Here’s an example timeline if the HC-SR501 PIR sensor is set to non-repeatable mode, with a 3 second time delay:
| Motion detected | Any motion here will be undetected | Any motion here will be undetected | Start of three second window. Any motion here will be undetected | Any motion here will be undetected | Any motion here will be undetected | Motion detected |
| 1s | 2s | 3s | 4s | 5s | 6s | 7s |
| HIGH | HIGH | HIGH | LOW | LOW | LOW | HIGH |
Here’s an example timeline if the sensor is set to repeatable mode, with the same time delay:
| Motion detected | Motion
detected |
Any motion here will be detected and will extend the time delay | Any motion here will be detected and will extend the time delay | Start of three second window. Any motion here will be undetected | Any motion here will be undetected | Any motion here will be undetected |
| 1s | 2s | 3s | 4s | 5s | 6s | 7s |
| HIGH | HIGH | HIGH | HIGH | LOW | LOW | LOW |
Arduino Implementation
We only need to read the Arduino digital pin to which the DOUT pin of the HC-SR501 is connected to know if a motion is detected. Here’s an example sketch where the DOUT pin is connected to Arduino’s pin 2:
int pirPin = 2; // Input for HC-S501
int pirVal; // Place to store read PIR Value

void setup() {
   Serial.begin(9600);
   pinMode(pirPin, INPUT);
}

void loop() {
  pirVal = digitalRead(pirPin);
  if(pirVal){
    Serial.println(“Motion detected!”);
    delay(3000);                                //wait for three seconds
  }
}
PIC Implementation
A similar code for the PIC using XC8 can be implemented, where the DOUT pin is connected to RB0. Here, an LED connected to RB1 lights up when motion is detected:
#define _XTAL_FREQ 4000000
#include

int main(){
    TRISB0 = 1;
    TRISB1 = 0;
    while(1){
        if(RB0){
            RB1 = RB0;
            __delay_ms(3000);
        }else{
            RB1 = 0;
        }
    }
}

