
I2C is a popular device protocol in communicating with microcontrollers. However, this protocol is not limited to Arduino, PIC and STM32; the Raspberry Pi can also use I2C.
If you are a beginner in the protocol, I suggest you read my primer on I2C.
I am using Raspberry 4 Model B in this tutorial running Raspian 10 Buster. Some parts of this tutorial may not apply to your version of Raspberry Pi. To know your Raspbian version, run this on the shell:
cat /etc/os-release
Enabling I2C
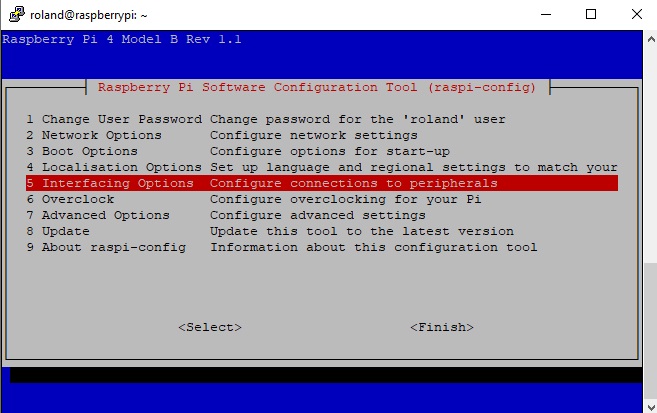
The first thing to do is to enable I2C for the RPi as it’s disabled by default. To do this, run raspi-config on shell:
sudo raspi-config
Select 5 Interfacing Options:
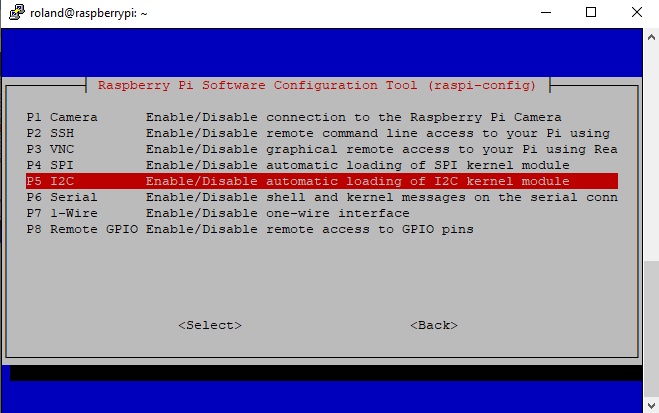
Then select P5 I2C:
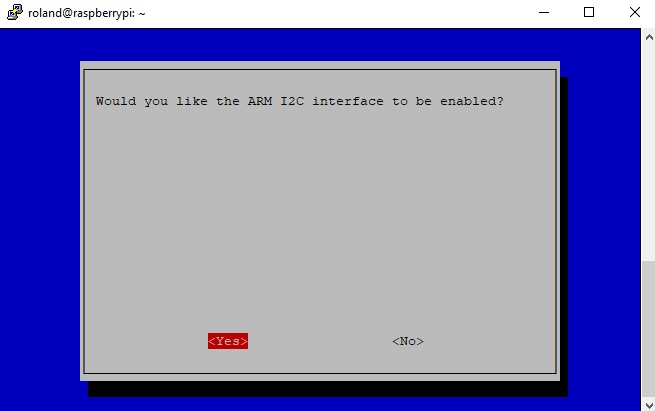
Select Yes:
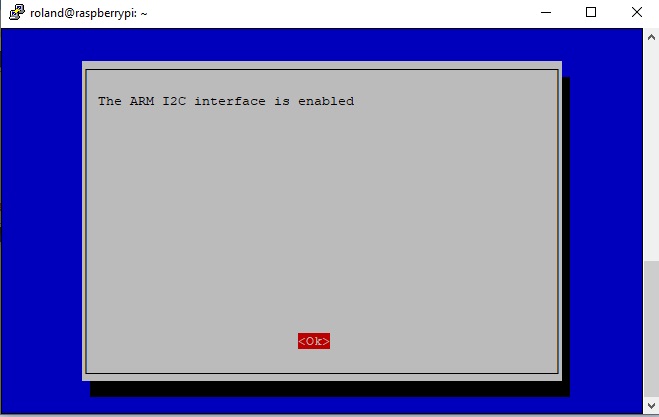
If this shows then I2C is now usable in your Raspberry Pi:
If you’re using the Raspberry Pi in Desktop mode or VNC, you can enable I2C this way:
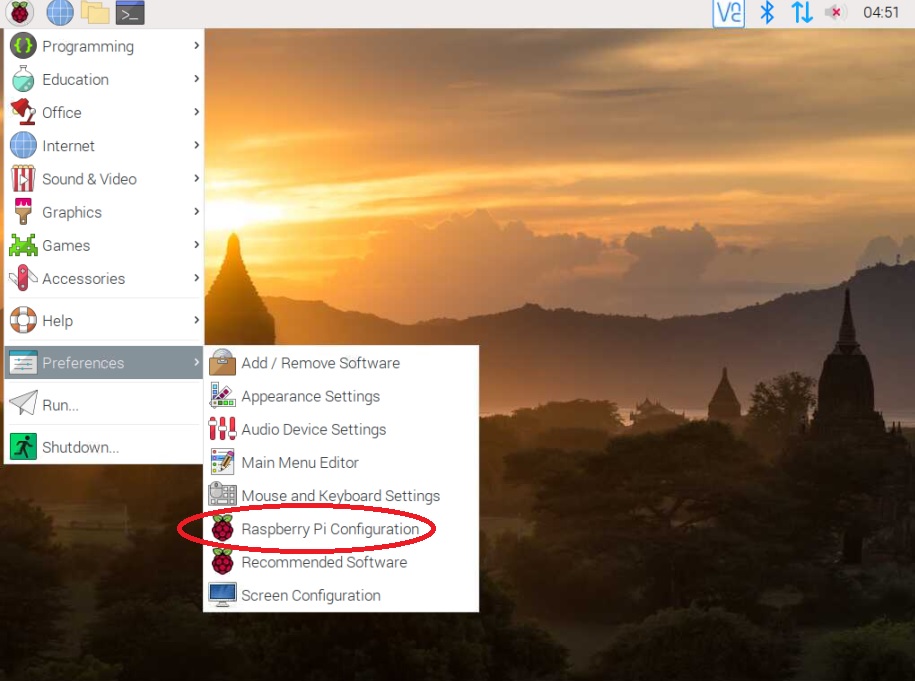
Click the Raspberry Pi icon to reveal the menu. Under Preferences, select Raspberry Pi Configuration:
The Raspberry Pi Configuration window appears. Click the I2C Enabled radio button and click OK.
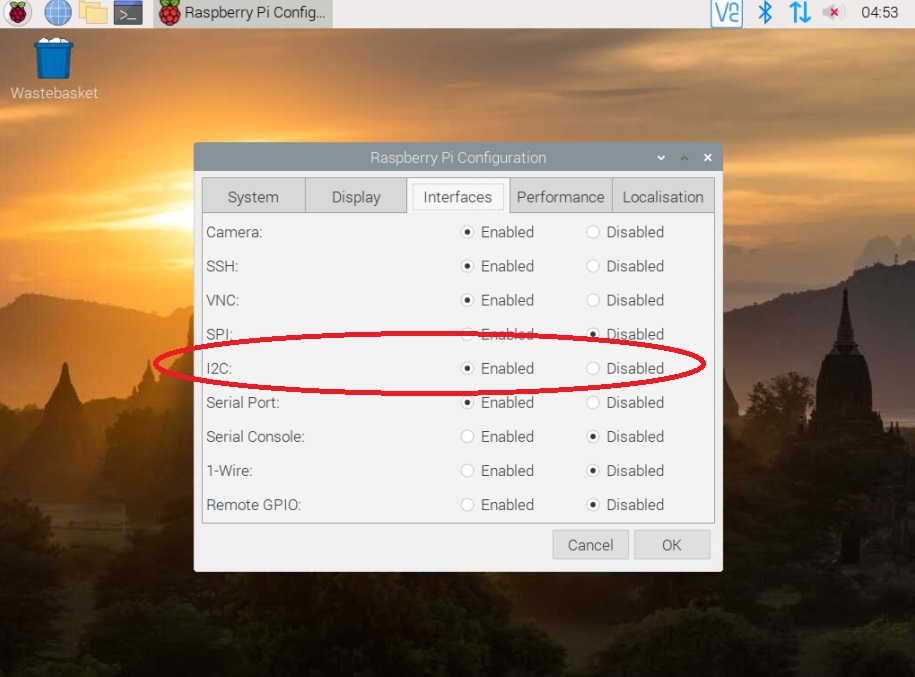
That should enable the I2C for your Raspberry Pi.
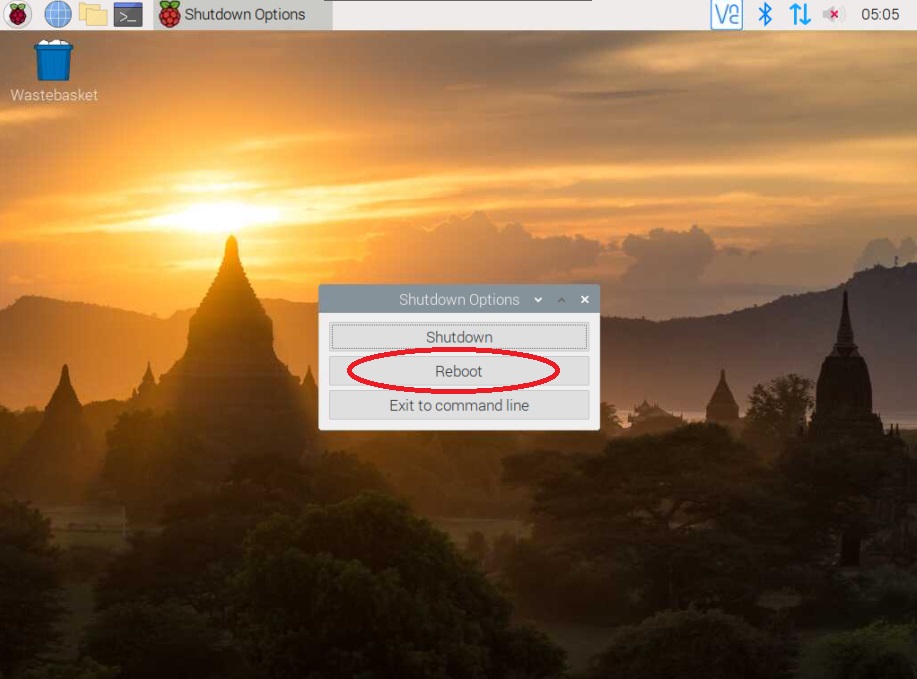
I recommend rebooting your Pi after enabling I2C in any of these methods.
sudo reboot
or if in Desktop:

Raspberry Pi I2C Pins
The I2C pins SDA and SCL are in pins 3 and 5 of the Raspberry Pi’s header:
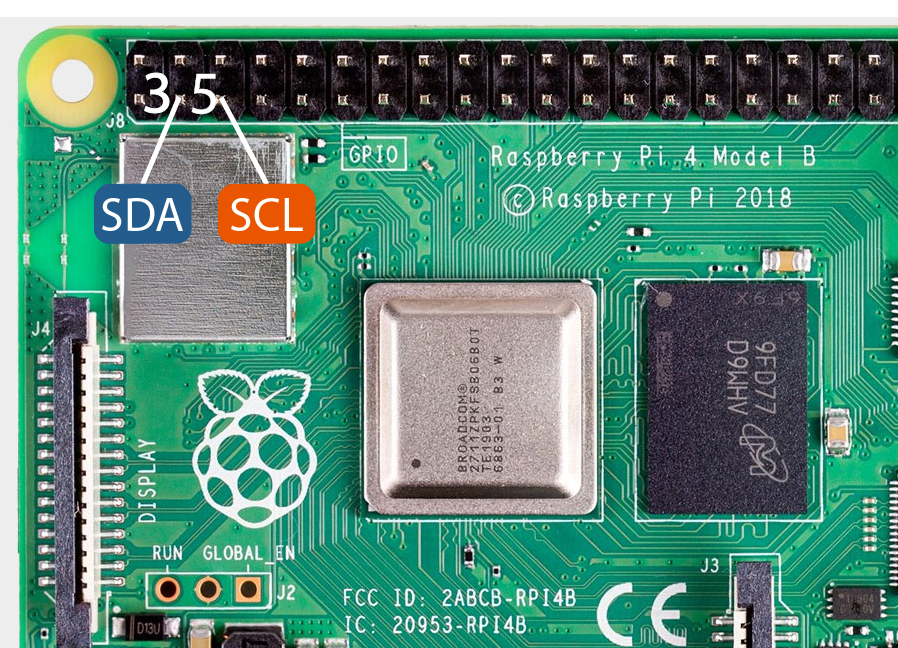
This is I2C port 1 or simply I2C-1. There is another set of I2C pins (I2C-0) at 27 and 28 but they are reserved for communicating with EEPROMs found in Raspberry Pi HATs.
Note that these pins already have a 1.8 kilo-ohm pull-up resistors in them.
I2C Programming Using Python
The main library for I2C programming with Python is SMBUS. However prior to programming, you must check if the device is recognized by the Raspberry Pi. One thing you can do is use:
sudo apt-get install -y i2c-tools
This will install tools needed to access the I2C bus via shell. One of those tools is:
sudo i2cdetect -y 1
This will show you a list of connected devices and their address. This is an example output when an MPU6050 attaches to the Raspberry Pi’s I2C bus:
roland@raspberrypi:~ $ sudo i2cdetect -y 1
[sudo] password for roland:
     0  1  2  3  4  5  6  7  8  9  a  b  c  d  e  f
00: -- -- -- -- -- -- -- -- -- -- -- -- -- -- -- --
10: -- -- -- -- -- -- -- -- -- -- -- -- -- -- -- --
20: -- -- -- -- -- -- -- -- -- -- -- -- -- -- -- --
30: -- -- -- -- -- -- -- -- -- -- -- -- -- -- -- --
40: -- -- -- -- -- -- -- -- -- -- -- -- -- -- -- --
50: -- -- -- -- UU UU UU UU -- -- -- -- -- -- -- --
60: -- -- -- -- -- -- -- -- -- 68 -- -- -- -- -- --
70: -- -- -- -- -- -- -- --
roland@raspberrypi:~ $
SMBUS already comes with the latest Python and Raspbian. But just in case, you can install SMBUS using command:
sudo apt-get install -y python-smbus
To use SMBUS, import and it create an object
import smbus
bus = smbus.SMBus(1)
The parameter (1) refers to the bus number.
You can then write a byte of data:
bus.write_byte_data(DEVICE_ADDRESS, DEVICE_REG, DEVICE_CMD)
Here, DEVICE_ADDRESS is the 7-bit I2C address of the device, DEVICE_REG is the address of the specific register inside the device you want to write to and DEVICE_CMD is the data you want to write to that register.
Conversely, to read a byte, use:
bus.read_byte_data(DEVICE_ADDRESS, DEVICE_REG)
You can also write data without specifying which register using:
bus.write_byte(DEVICE_ADDRESS, DEVICE_CMD)
Similarly, to read data without specifying the register, use:
bus.read_byte(DEVICE_ADDRESS)
I will be building a project where a Raspberry Pi communicates via I2C to a device so I hope you come back for that. Thanks for reading!

