
The serial port is a common way to “talk” to devices and is a feature that most microcontrollers and computers have. This Raspberry Pi Serial tutorial teaches you how to utilize the board’s UART feature in order to connect to a PC or to other microcontrollers and peripherals.
Introduction to Raspberry Pi Serial Ports
The Raspberry Pi UART transmit (TXD) and receive (RXD) pins are assigned to GPIO14 and GPIO15 respectively:
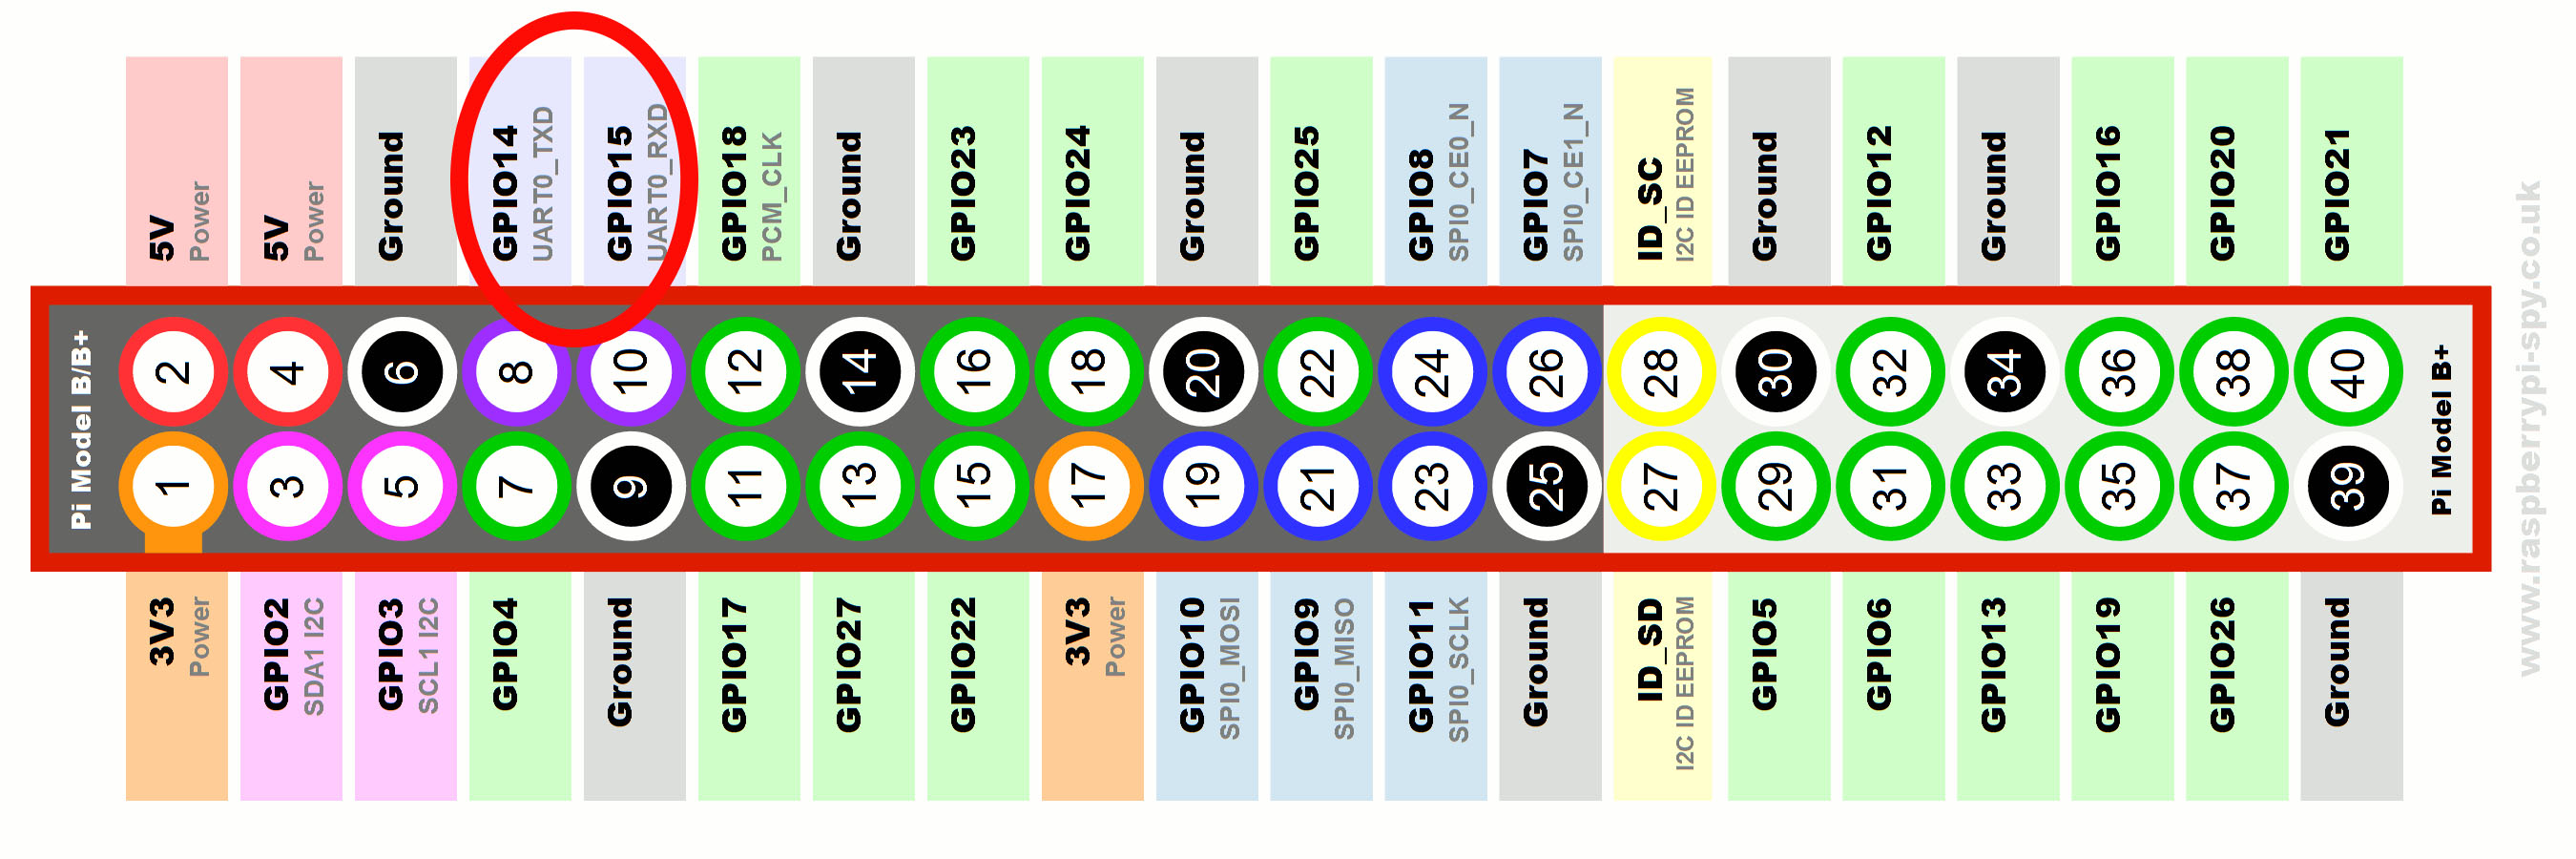
Note that these pins use 3.3V logic levels so you can’t connect them directly to devices that uses 5V like an Arduino UNO or a PC.
Technically, the Raspberry Pi has two UARTs: PL011 UART and mini UART. However, you only have one pair of TXD and RXD pins to work with.
The PL011 UART is the main UART for models without Bluetooth feature and is tied directly to the Linux console output. This means you can send Linux commands from your PC to the Raspberry Pi on this UART.
On the other hand, the mini UART becomes the Linux console UART for models with Bluetooth like the Raspberry Pi 3 and Raspberry Pi Zero W. For these models, the PL011 UART is tied directly to the Bluetooth module.
Whichever UART is assigned to the Linux console is accessible through /dev/serial0. Each UART can be accessed individually via /dev/ttyS0 for the mini UART and /dev/ttyAMA0 for the PL011 UART.
Generally, the PL011 UART is more reliable than the mini UART because the latter has smaller FIFOs [], lacks flow control and has its baud rate reliant on the VPU clock speed.
Connecting a Raspberry Pi to PC using UART
To connect the Raspberry Pi to a PC via UART, you will need a USB Serial Cable that supports 3.3V.

As seen on the image above, this cable has four female wires that can be plugged into the Raspberry Pi. The red wire is to be connected to +5V, black wire to GND, green wire to TXD and white wire to RXD.
This particular cable is powered by a PL2303 chip and is compatible with Windows XP/Vista/7/8/10. The driver for this cable can be downloaded from Prolific’s download page.
You can now use Putty’s serial terminal to talk to the Raspberry Pi via UART. By default, the Pi’s UART uses the following parameters: 115200 baud, 8 bits, no parity, 1 stop bit and no flow control.
Open Putty and tick the “Serial” radio button. You only need to specify the COM port and speed since Putty uses the same parameters above by default:

Here’s what to do if you don’t know what COM port number you’re USB Serial Cable is assigned to:
1. Press Windows Key + R to open the Run dialog and type devmgmt.msc. Press enter to open Device Manager
2. Click the arrow on Ports (COM & LPT) to reveal all the COM ports on your PC. If your USB serial cable is connected, it should show.
Once everything is ready, click the Open button on Putty to use the Linux console via UART!
Using the UART to Communicate with Other Devices
You can’t use the /dev/serial0 UART to communicate with other devices if it’s tied to the console. Luckily, there is a way to unlink this port from the Linux console. Just follow these steps:
1. On terminal, run sudo raspi-config
2. Select 8 Advanced Options
3. Select A8 Serial
4. Choose <No> when asked “Would you like a login shell to be accessible over serial?”
5. Choose <Ok> and reboot
If you followed the steps above correctly, you can now use the Raspberry Pi UART to talk to microcontrollers, GPS devices or other serial-enabled peripherals!
Here’s a simple python script that sends “Hello” to an Arduino UNO via serial.
 #!/usr/bin/env python

 import time
 import serial

 ser = serial.Serial(
     port='/dev/serial0',
     baudrate = 9600,
     parity=serial.PARITY_NONE,
     stopbits=serial.STOPBITS_ONE,
     bytesize=serial.EIGHTBITS,
     timeout=1
 )

 while 1:
     ser.write('Hello\n')
     time.sleep(1)
Here I used Python’s serial library which is one of the built-in libraries. The serial port is initialized through the lines:
 ser = serial.Serial(
     port='/dev/serial0',
     baudrate = 9600,
     parity=serial.PARITY_NONE,
     stopbits=serial.STOPBITS_ONE,
     bytesize=serial.EIGHTBITS,
     timeout=1
 )
Here the Raspberry Pi serial port parameters are specified.
Writing to the serial port simply requires the .write() function:
ser.write('Hello\n')
I also added a line feed character (\n) at the end of “Hello”.
Note that you need a logic level converter for this because of the different voltage levels! Follow this wiring diagram:
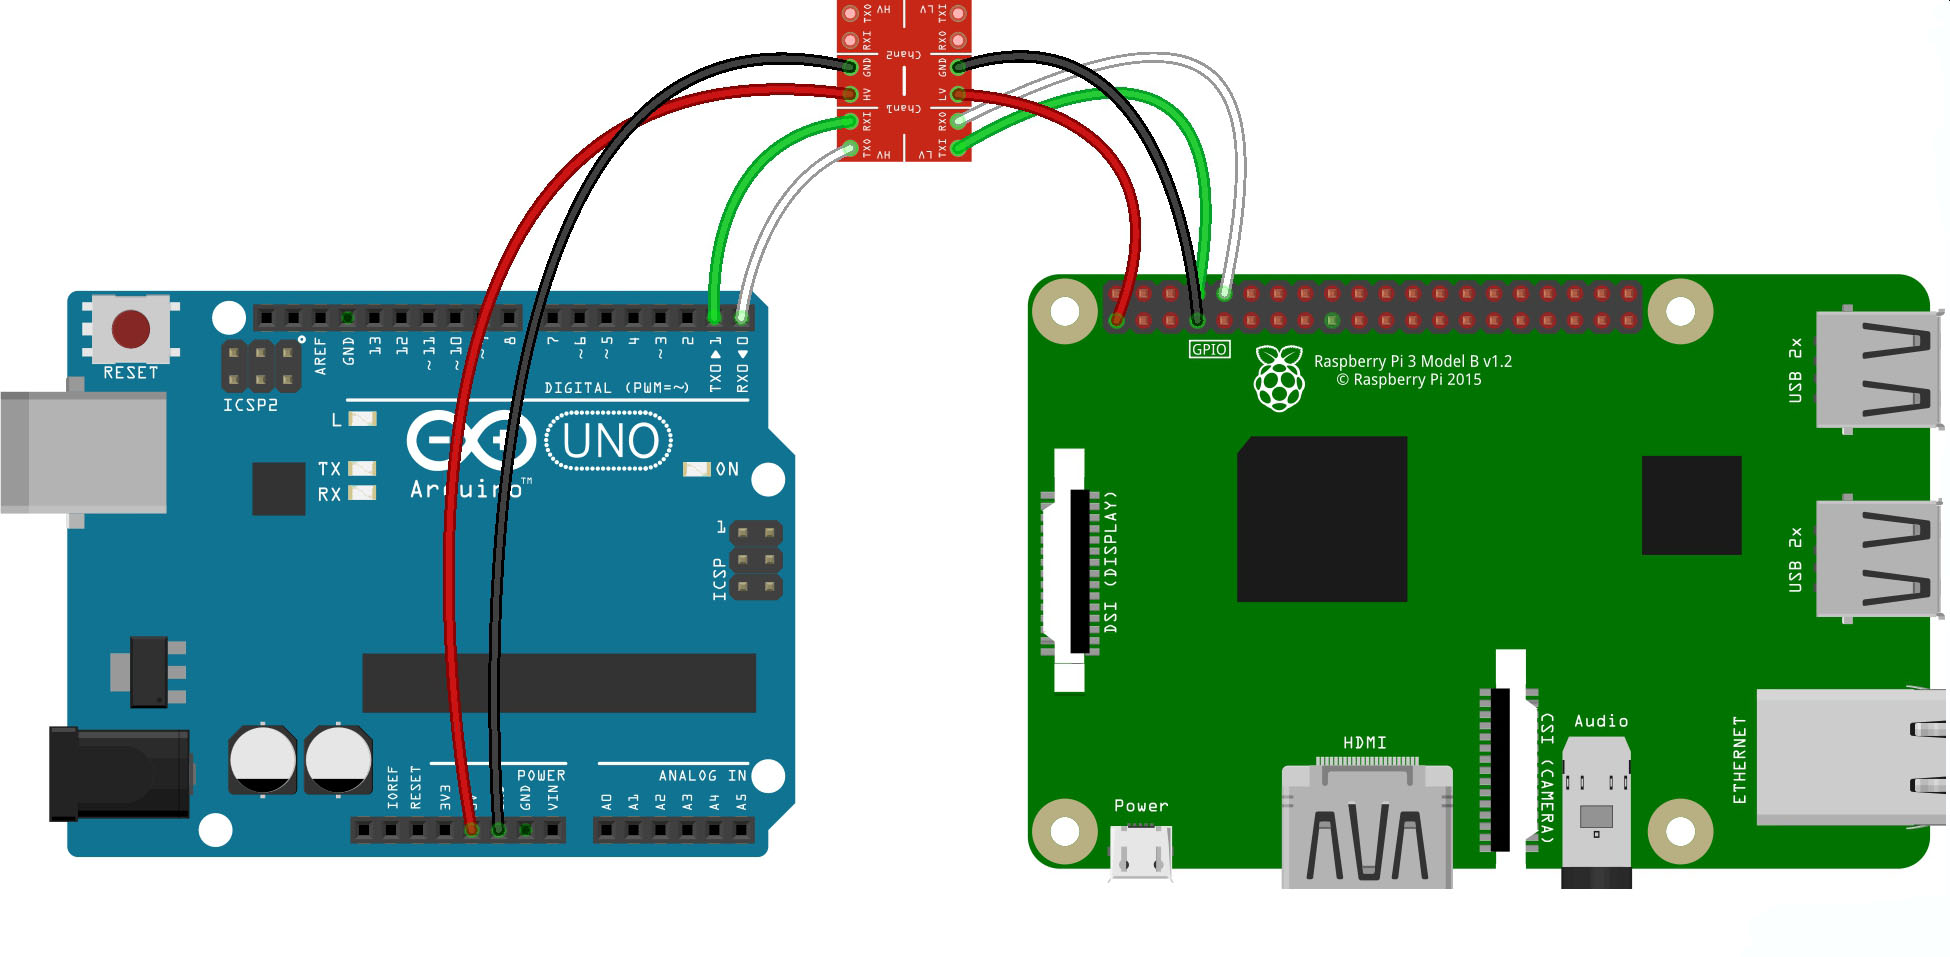
You also need to load the SerialEvent sketch to the Arduino UNO. Go to File > Examples > 04.Communication > SerialEvent.
To view the message from the Raspberry Pi, open the serial monitor on the Arduino IDE and set the baud rate to 9600.
I hope you found this Raspberry Pi Serial tutorial useful! Next up, I will explore how to use the Raspberry Pi’s SPI feature.

