

An ultrasonic sensor is a common tool for measuring the distance of an object in front of it. While I recommend using an Arduino with ultrasonic sensor to achieve real-time results, it is still possible to use the sensor with a Raspberry Pi. This tutorial shows you how to build a Raspberry Pi ultrasonic sensor featuring the HC-SR04 for distance measuring.
Ultrasonic Sensor Basics
The term “ultrasonic” means beyond the sound that humans can hear; the human ear can only detect sound up to 20000 Hz. The HC-SR04 ultrasonic sensor featured here emits 40000 Hz.
Physics taught us that sound is vibration traveling through air. When the ultrasound from the sensor bumps into an object, it reflects back to the sensor. The time between signal emission and reflection (echo) is useful for calculating the distance:
The velocity of sound in air is 343 metres per second. Thus,
The formula above gives the distance (in meters) of the object in front of the sensor.
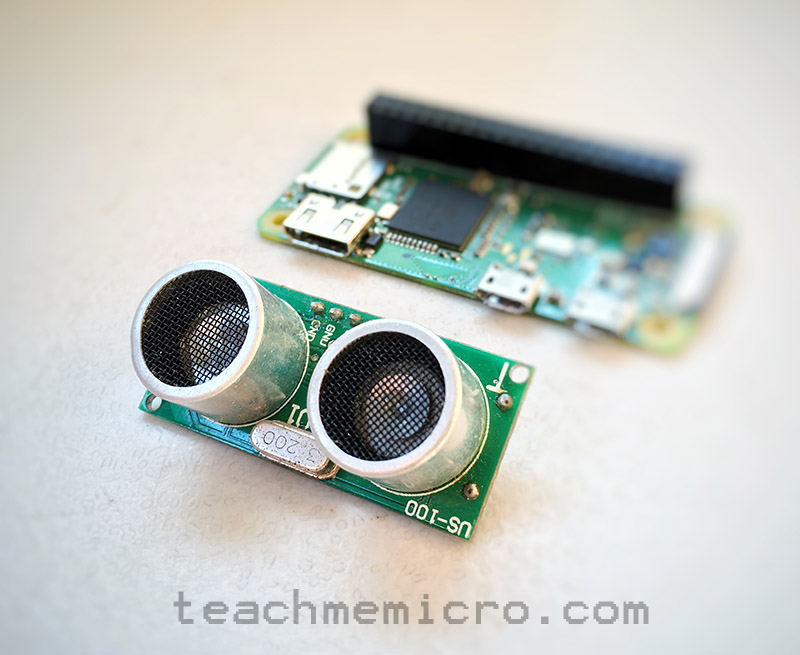
The HC-SR04 ultrasonic sensor contains four pins as shown:
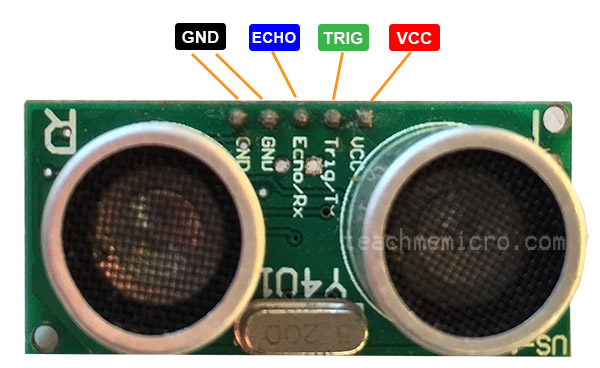
Note that the blue-colored module works exactly the same as the one in the picture.
The HC-SR04 sensor draws 5V at 15 mA and can detect objects within 2 cm up to 4 m. Also, the viewing angle of this sensor is 15 degrees.
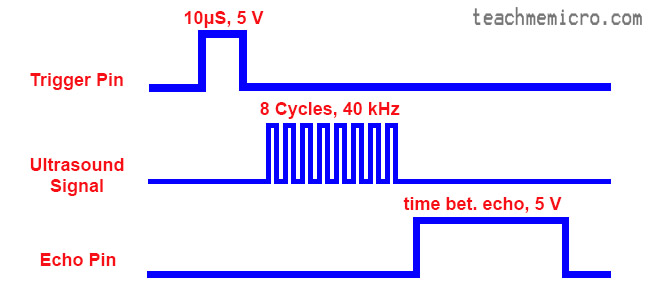
In order for the sensor to start sending ultrasound, a 10 μs pulse is sent to the trigger pin. The ultrasound signal consists of 8 cycles of 40000 Hz. After the signal emission, the echo pin will go high then will go low upon detection of the echo. Below is the timing diagram for the signals:
Using the Ultrasonic Sensor with Raspberry Pi
Hardware
The Raspberry Pi GPIO pins use 3.3V signal levels. The trigger pin of the ultrasonic sensor will still work with 3.3V. However, the echo pin, which gives 5 V, will damage the GPIO pin of the Raspberry Pi. Therefore, the 5V must be reduced to 3.3V through a voltage divider network.
Below is an example wiring diagram for connecting the ultrasonic sensor to a Raspberry Pi:
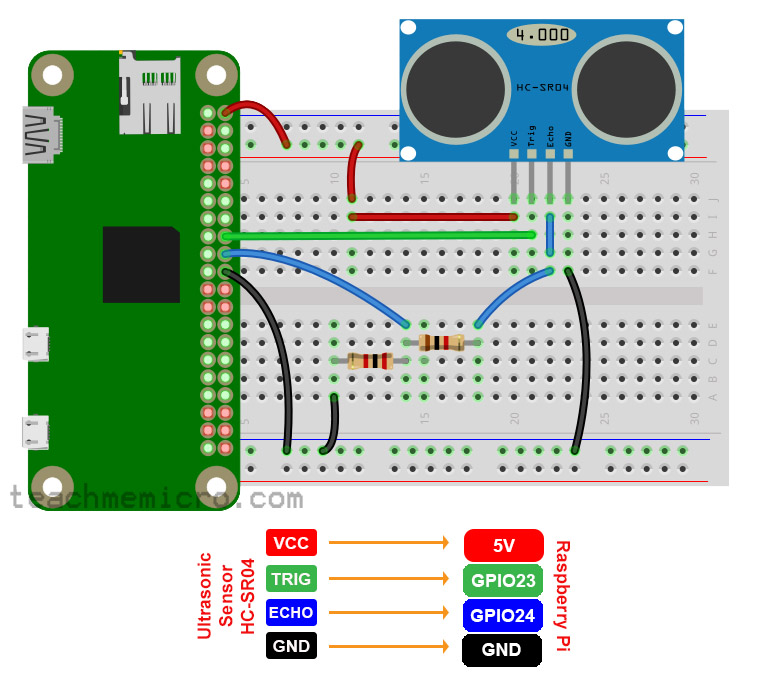
Note that while a Raspberry Pi Zero is in the diagram, the wiring connection still works for a Raspberry Pi 2 or 3.
Here, a 1k ohm resistor and a 2k ohm resistor creates a voltage divider network which reduces the voltage from the echo pin from 5 V to 3.3 V. The formula is simply:
Software
We will be using Python 2 for our code. To generate a pulse of 10 μs on the trigger pin, we simply make the pin high, wait for 10 μs and then make the pin low:
GPIO.output(triggerPin, True)
time.sleep(0.00001)
GPIO.output(triggerPin, False)
Then we note when the echo pin goes low:
while GPIO.input(echoPin)==0:
     pulseStart = time.time()
And also we take note of when the echo pin goes high:
while GPIO.input(echoPin)==1:
     pulseEnd = time.time()
The pulse width of the echo pin, which is the time between transmission and reception of the ultrasound, is now:
pulseDuration = pulseEnd - pulseStart
The pulse duration will be in seconds since the function time.time() returns values in seconds. The distance of the object to where the ultrasound was reflected can now be known:
distance = 34300 * time / 2
Here, we used 34300 cm/s instead of 343 m/s because of the given range of the sensor (2 cm to 4 m only). Of course, we divide the time by 2 since we only want the time when the signal is emitted and when it hits the object, not when the signal is reflected back.
We can simplify this to:
distance = 17150 * time
Here is now the full python code which gives the distance of the object in centimeters:
import RPi.GPIO as GPIO
import time
GPIO.setmode(GPIO.BCM)

triggerPin = 23
echoPin = 24

GPIO.setup(triggerPin,GPIO.OUT)
GPIO.setup(echoPin,GPIO.IN)

#make this infinite loop
while True:
     GPIO.output(triggerPin, False)
     time.sleep(2)

#generate 10us pulse
     GPIO.output(triggerPin, True)
     time.sleep(0.00001)
     GPIO.output(triggerPin, False)

#note the start of the pulse at echo pin
     while GPIO.input(echoPin)==0:
          pulseStart = time.time()

#note the end of the pulse at echo pin
     while GPIO.input(echoPin)==1:
          pulseEnd = time.time()

     pulseDuration = pulseEnd - pulseStart

     distance = pulseDuration * 17150

#round off to 2 decimal places
     distance = round(distance, 2)

     print("Distance: %s cm") %distance

GPIO.cleanup()
Was this tutorial helpful? Kindly drop a comment below!

