
A flex sensor can be used with a microcontroller to detect or measure bending. In this tutorial, I will show how to interface this sensor with an Arduino UNO and discuss some possible flex sensor applications and projects.
What is a Flex Sensor?
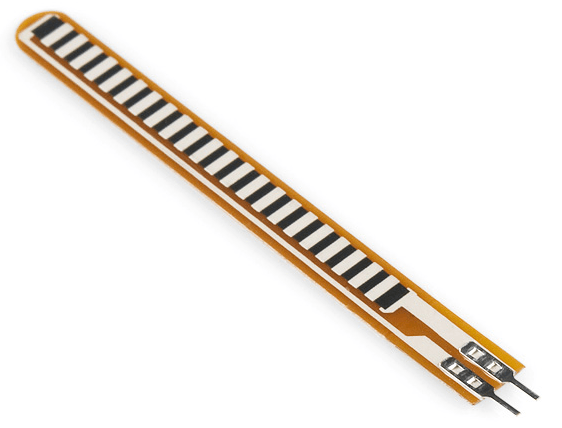
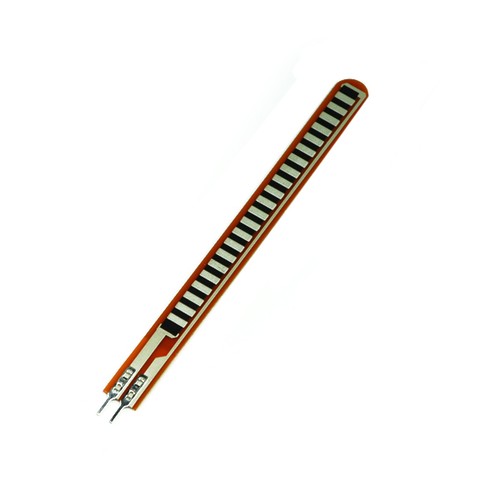
A flex sensor is a device that varies its resistance when bent in one direction. This sensor has different types: conductive ink-based, fibre-optic or capacitive. For hobby microcontroller systems, the conductive ink-based (or simply conductive) sensor is common, and is shown below:
 As its name suggests, a conductive ink-based flex sensor uses a special ink whose resistance varies when bent. The ink may contain carbon or silver to make it conductive. The spacing between carbon particles are larger when bent and closer when straight which results in a change of resistance:
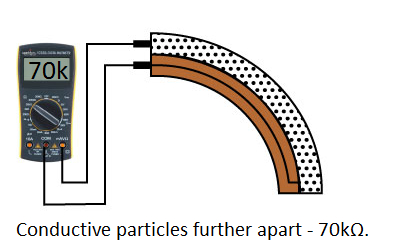
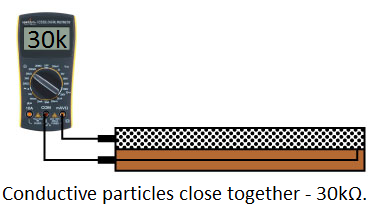
In the diagram above, the flex sensor resistance is 30kΩ when straightened and 70kΩ when bent at an angle of 90 degrees. Flex sensor resistance is not the same for all devices, so determine you own flex sensor's resistance using an ohmmeter before writing code.
Conductive bend sensors are unipolar sensors, which means the change of resistance is true only if you bend it in one direction. Bending it to the other direction does not change its resistance.
Arduino Interface Circuit
Just like most resistive sensors (like a thermistor), the best way to connect this sensor is through a voltage divider as shown:
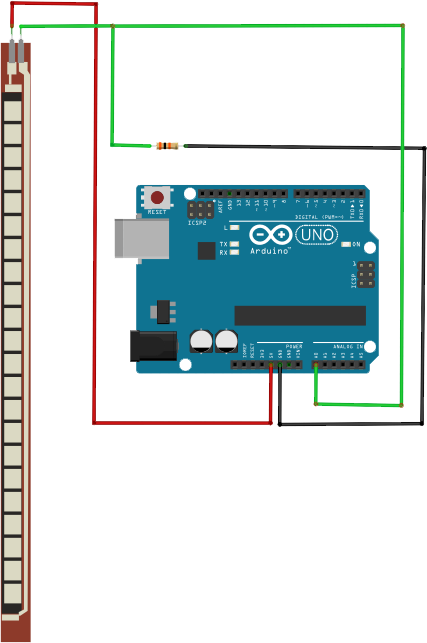
With the setup above, the A0 pin receives an increasing voltage as the bend on the sensor is increasing.
Here is an example Arduino sketch:
int flex_pin = A0;

void setup(){
	pinMode(flex_pin, OUTPUT);
	Serial.begin(9600);
}
void loop()
{
  // Read the ADC, and calculate voltage and resistance from it
  int flex_value = analogRead(flex_pin);
  float flex_res = (1023-flex_value) / (flex_value * series_R);
  Serial.println("Resistance: " + String(flexR) + " ohms");

  // Use the calculated resistance to estimate the sensor's
  // bend angle:
  float angle = map(flexR, straight_R, bent_R,
                   0, 90.0);
  Serial.println("Bend: " + String(angle) + " degrees");
  Serial.println();

  delay(500);
}
Here, series_R is the resistance of the series resistor. It’s advisable to use a resistor that is the same as the resistance of the sensor when flat to increase sensitivity. You also need the resistance of the sensor when straight (straight_R) or when bent fully (bent_R).
Flex Sensor Applications
A bend sensor makes controlling things way cooler. For example, you could control lights by bending as shown in this video:
You can also attach the sensor to a glove and do cool stuff like control a robotic arm:
Both projects above scales the flex sensor resistance to PWM values similar to the Knob sketch of the Servo library. For example, if we would modify the sketch above using the same sensor resistance of 30kΩ to 70kΩ, then this could be how a servo motor could be controlled:
 float angle = map(flexR, straight_R, bent_R, 0, 90.0);
 myservo.write(angle);
 delay(15);
What other microcontroller project could you build using this sensor?

