
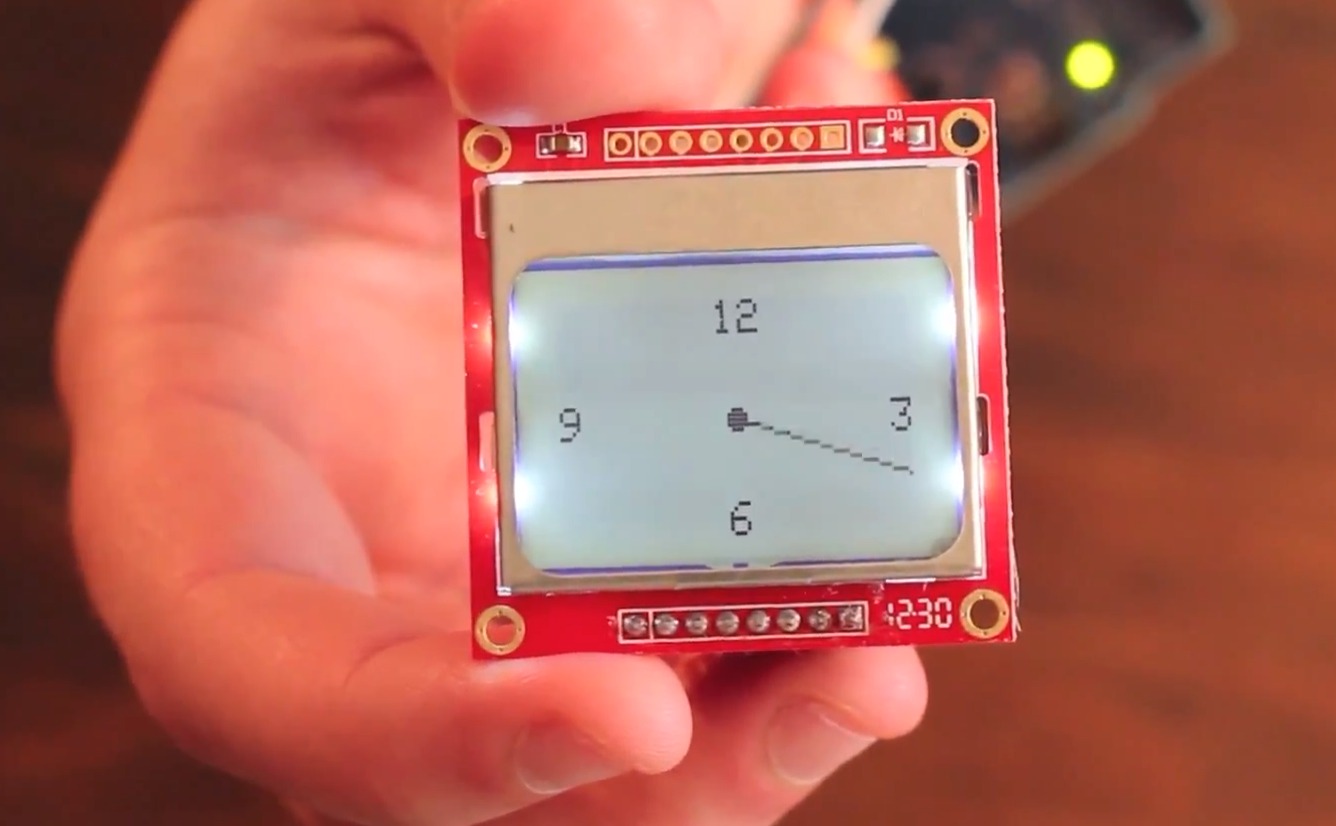
In this post, I’ll share with you how I got the Nokia 3310 LCD to run using a PIC16F877A microcontroller. How to use the Nokia 3310 LCD with the Arduino has been covered before. This one is more challenging because I had to create a library for the XC8 compiler. Read on if you’re interested.
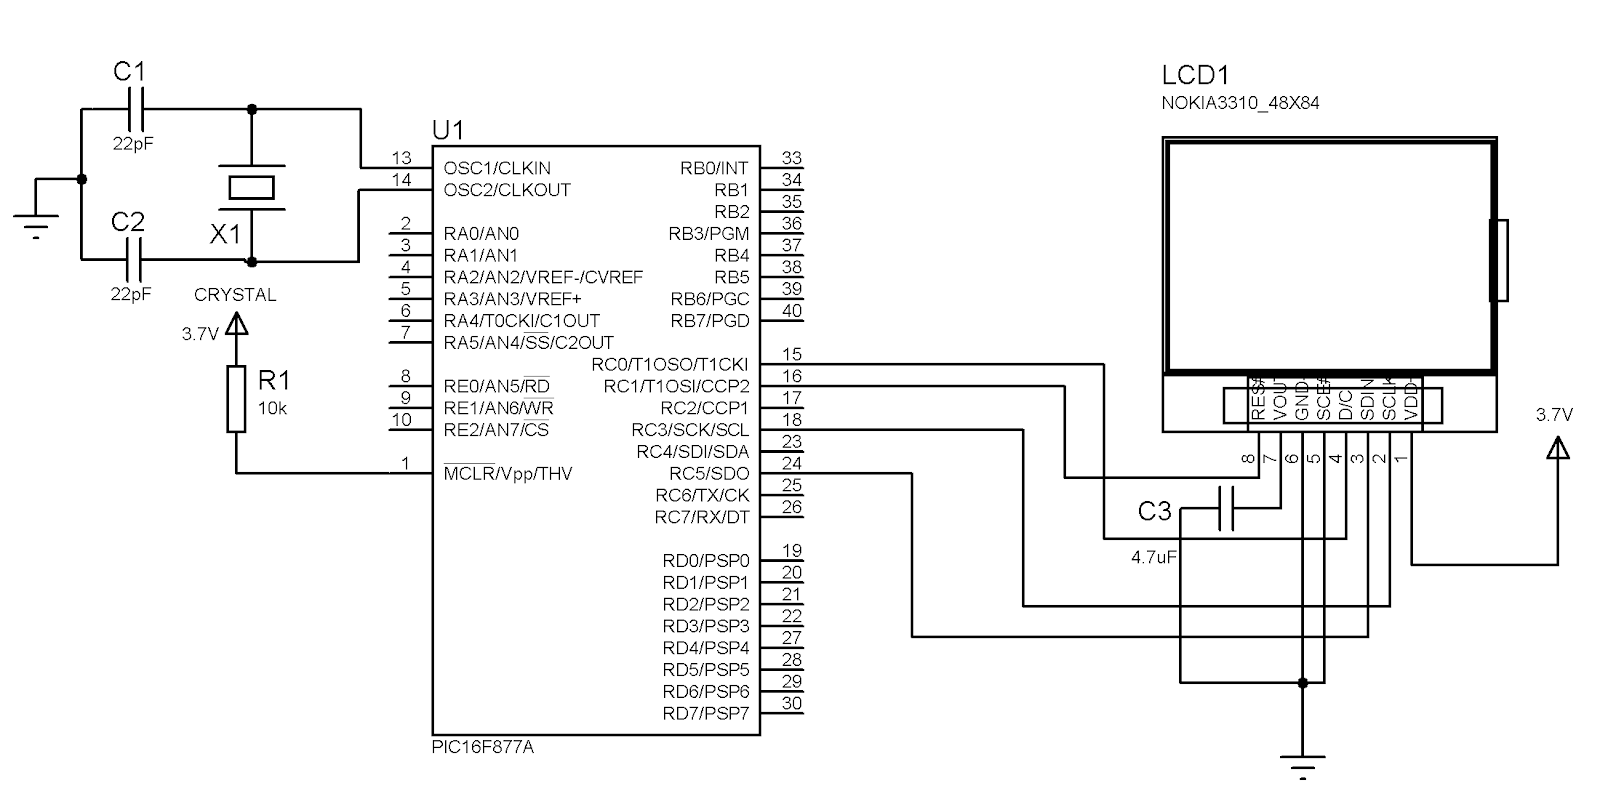
I utilized the library used in the SPI PIC16F877A library to connect with the LCD. Here’s the schematic diagram:
Some Discussion
The PCD8544, which is the controller on the Nokia 3310 LCD, accepts two types of input: data or command. The D/C pin is used to indicate if a data or command is sent by clearing or setting it. In this schematic above, the D/C pin is connected to RC0. I used two functions for command and data:
void command(char c){
   RC0 = 0;
   spiWrite(c);
   __delay_ms(1);
}

void data(char c){
   RC0 = 1;
   spiWrite(c);
   __delay_ms(1);
}
Before we can use the LCD normally, there is a set of commands to be sent to it. Explaining each command would be too extensive for this post so I’d rather suggest you read the PCD8544 datasheet. Anyway, the byte sequence is:
- 0x21 - use extended instruction set
- 0x14 - set bias
- 0xA8 - set contrast
- 0x20 - function set
- 0x48 - use normal display mode
Setting the location of the character to be written on the display requires byte 0x80 or’d with the column and 0x40 or’d with the row. For example, if you want to write starting on the second line of the third column then this byte should be sent first:
0x80 | 2

0x40 | 1
To clear the screen, I just send 0’s as data to the whole screen.
The Whole Code
As mentioned, you need the SPI library before you can run this code. Place that file on the header folder of your project and also this PCD8544.h file.
A simple “hello world” text on the LCD would take only this shortcode:
#define _XTAL_FREQ 4000000
#include <xc.h>
#include "pcd8544.h"

void main(void) {
   lcdBegin();
   lcdClear();
   lcdCursor(0, 0);
   lcdPrint("Hello World!");
   while(1){;}
}
I hope this post was useful to you! Happy coding!

