
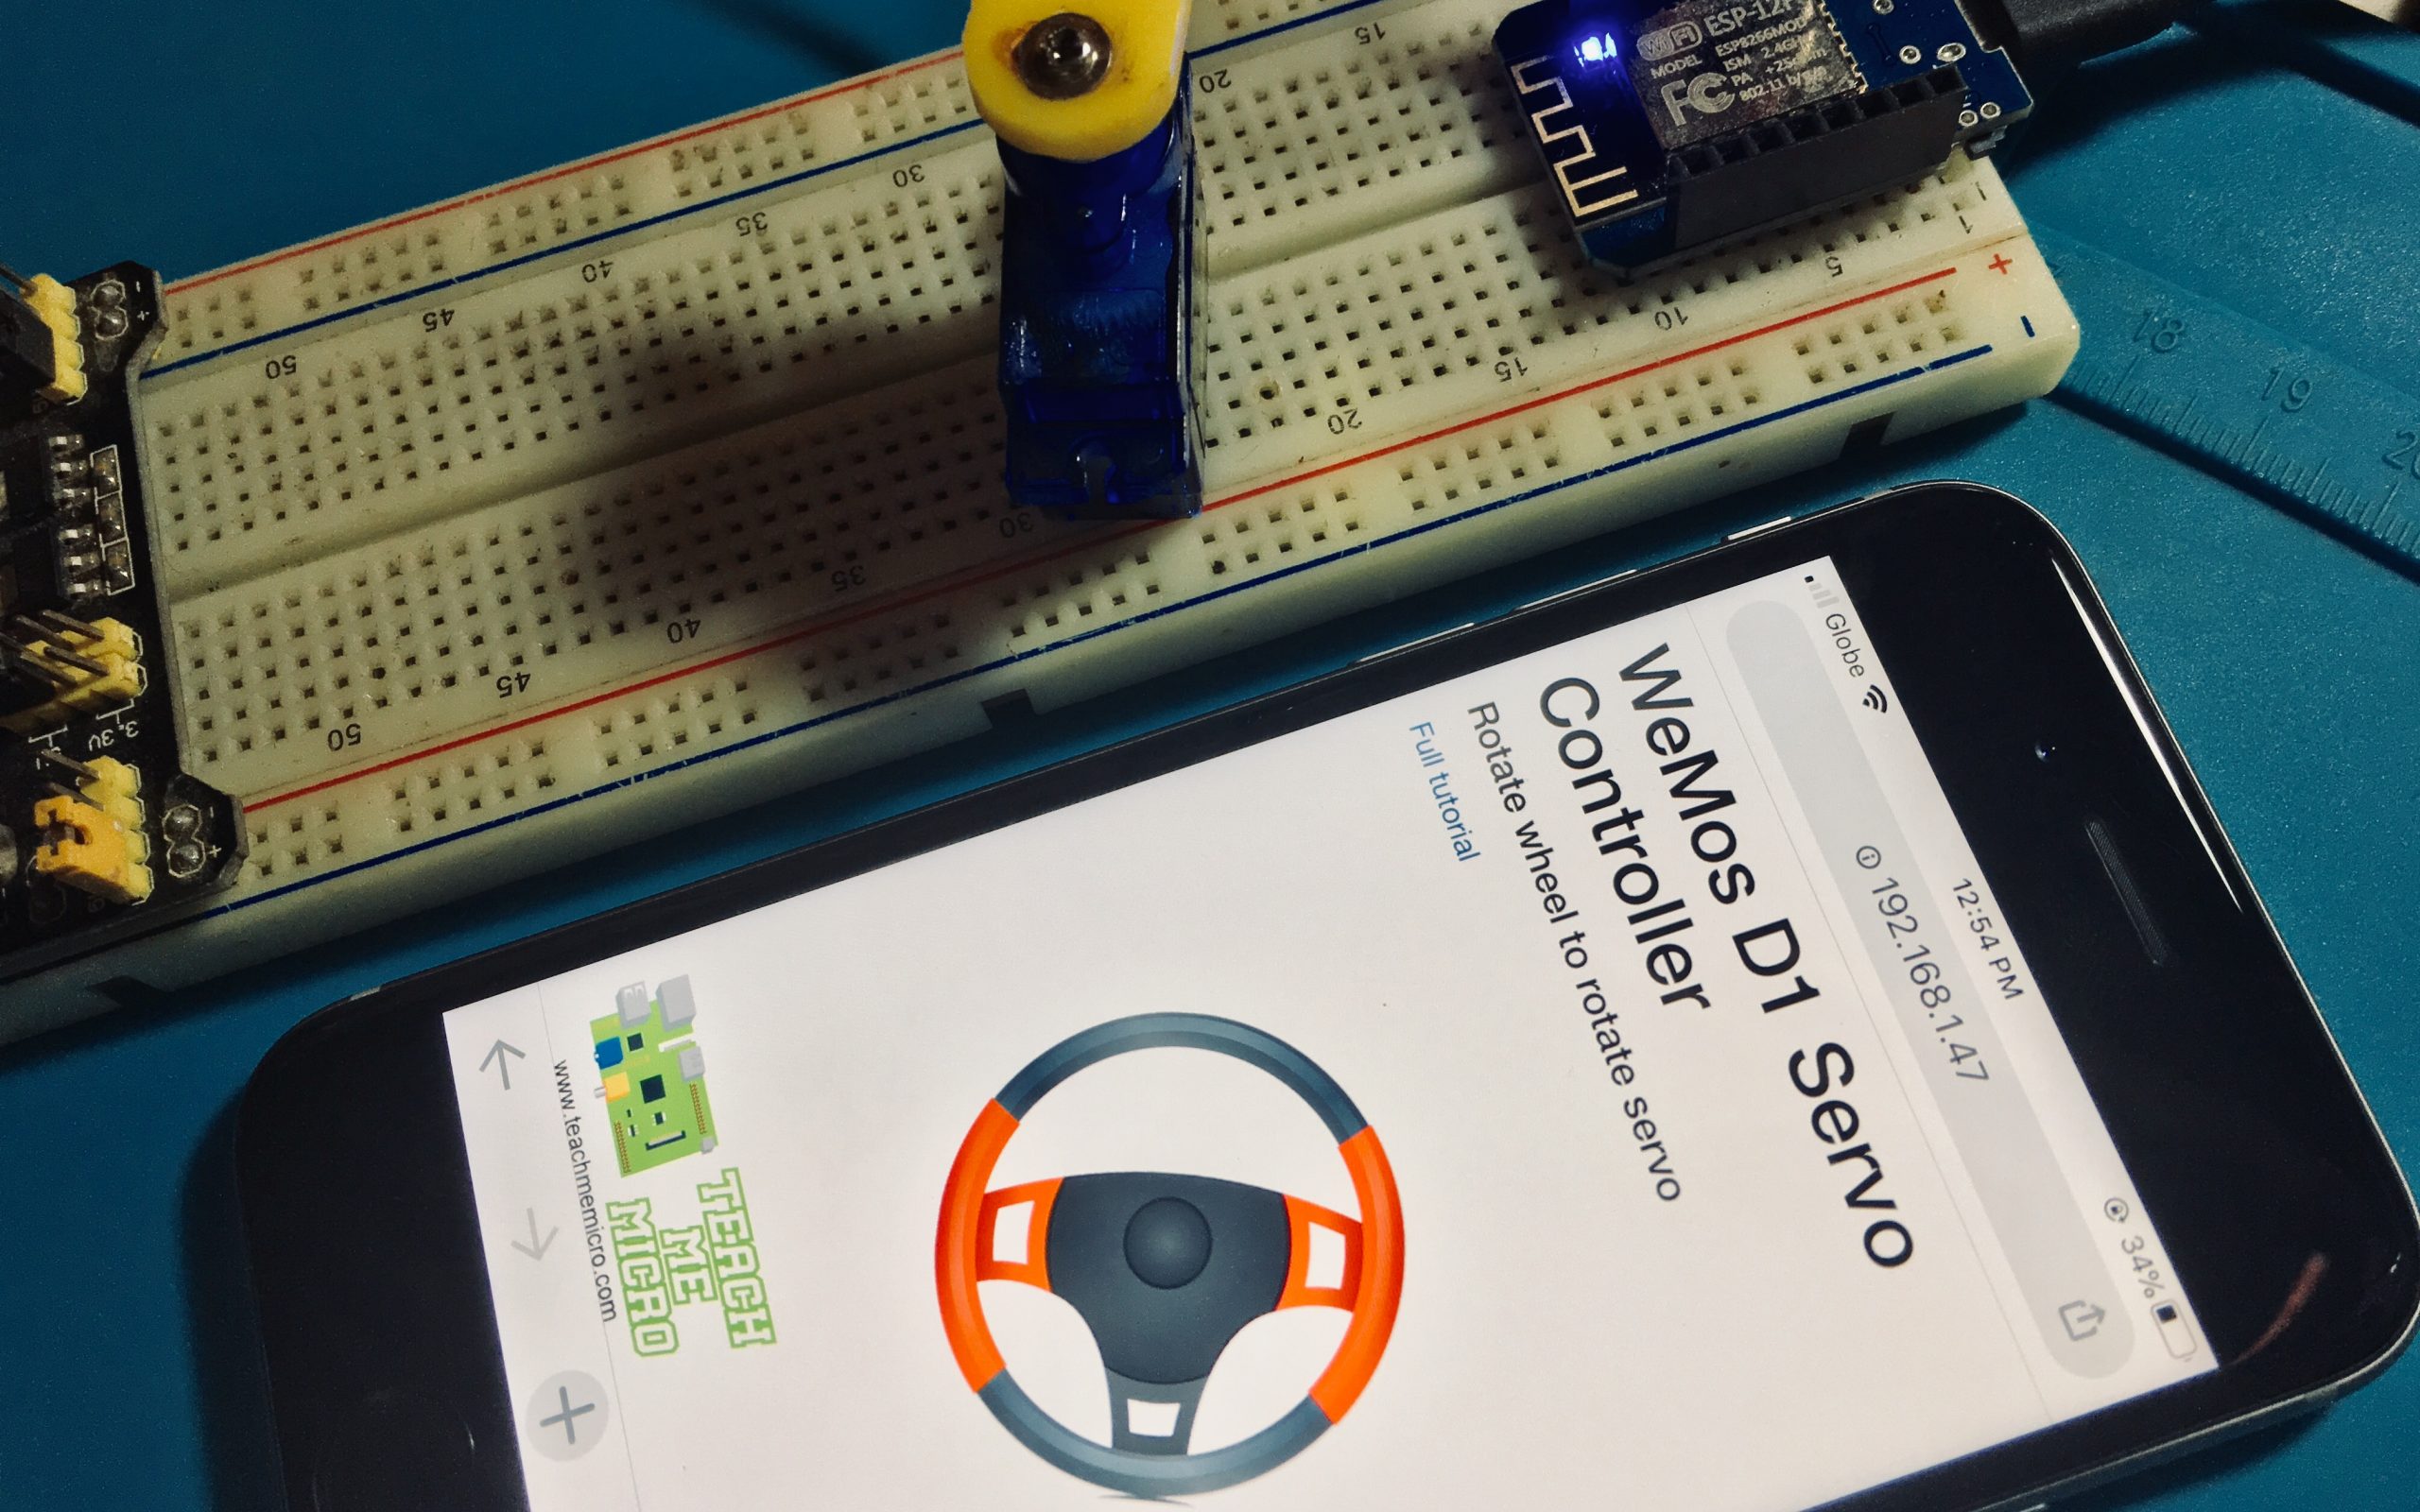
In this article, I will guide you to the steps on how to build a WiFi servo controller project using the WeMos D1 Mini ESP8266 breakout board.
Materials
- WeMos D1 Mini
- Tower Pro SG90 Micro Servo
- Connecting wires, power source
The WeMos D1 Mini is one of the smallest breakout boards for the ESP8266. In this project, I will write the code for the WeMos D1 using the Arduino IDE.
All digital pins of the WeMos D1 Mini support PWM so there’s a lot of options in connecting the servo motor. I will presume that you already know how a servo motor works with a microcontroller.
The SG90 servo motor was chosen primarily because of its lower power consumption. I haven’t tried a larger servo motor but I presume using it, with the WeMos D1 on WiFi, will strain the device.
Wiring Diagram
The WeMos D1 Mini connects to the servo motor as shown:
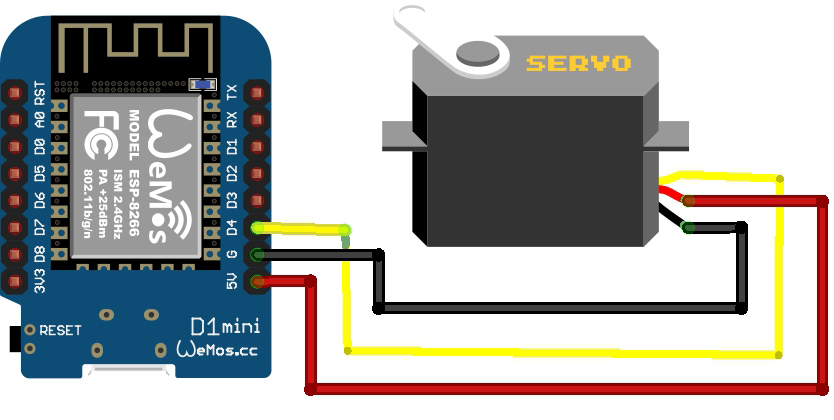
As previously mentioned, all digital pins of the WeMos D1 Mini supports PWM. I chose D4 because it’s the closest one to the power pins.
WiFi Servo Controller App
Most WiFi servo controllers I see use buttons to move the servo motor arm between positions. For this project, I decided to use a rotating wheel to move the servo motor arm.
To achieve this, I need to use JQuery UI to make the wheel rotatable and then AJAX to send the angle of the wheel to be read by the WeMos D1 server. JQuery UI is for desktop web applications so I also needed to add a plugin for the app to work on touch devices. Finally, I also used bootstrap to position the elements on the app.
All in all, these were the needed Javascript libraries:
<script src='https://ajax.googleapis.com/ajax/libs/jquery/2.1.1/jquery.min.js'></script>
<script type='text/javascript' src='https://code.jquery.com/ui/1.11.4/jquery-ui.js'></script>
<script type='text/javascript' src='https://www.jqueryscript.net/demo/jQuery-UI-Rotatable-Elements/jquery.ui.rotatable.js'></script>
<script src='https://cdnjs.cloudflare.com/ajax/libs/jqueryui-touch-punch/0.2.3/jquery.ui.touch-punch.min.js'></script>
<script src='https://maxcdn.bootstrapcdn.com/bootstrap/3.4.1/js/bootstrap.min.js'></script>
These are all in the <head> tag of the app.
Here’s the HTML code for the <body> of the app:
<div class='container'>
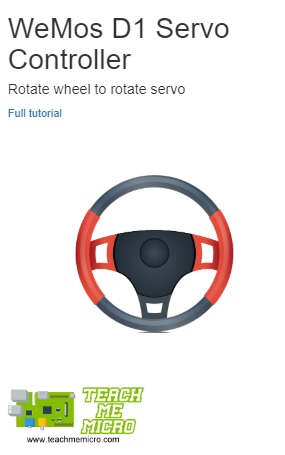
<h1>WeMos D1 Servo Controller</h1> "
<h4>Rotate wheel to rotate servo</h4>"
<a href='https://www.teachmemicro.com/wifi-servo-controller-using-wemos-d1-mini'>Full tutorial</a>"
<div class='row'>
<div class='col-xs-12'>
<div id='wheel'></div>
</div>
<div class='col-xs-12'>
<img id='tmm-logo' src='https://i.imgur.com/G80eVhL.png' />
</div>
</div>
</div>
The wheel is the background image of the ‘wheel’ <div>. It is tied to a JQuery script and is rotatable thanks to the Rotatable library. Here’s the script:
$(document).ready(function(){
            $('#wheel').draggable({handle: '.ui-rotatable-handle'}).rotatable({
               rotate: function(e, ui){
               var degrees = ui.angle.current * 180/Math.PI;
               if ( degrees > 90 ) {
                  ui.angle.current = Math.PI/2;
               } else if ( degrees < -90) {
                  ui.angle.current = -1*Math.PI/2;
               }
               degrees = degrees + 90;
               console.log(degrees);
               var s = String(degrees);
            $.ajax({
               type: 'POST',
               url: 'dataHandler',
               data: s,
               contentType: 'application/x-www-form-urlencoded'
            });
           },snap: true   //for the wheel to snap at discrete angles
          });
});;
Every time the wheel rotates, the angle in radians is returned. Degrees is easier to imagine so I converted it:
$('#wheel').draggable({handle: '.ui-rotatable-handle'}).rotatable({
               rotate: function(e, ui){
               var degrees = ui.angle.current * 180/Math.PI;
               ...
Since servo motors rotate from 0 to 180 degrees, I also needed to limit the rotation of the wheel.
  if ( degrees > 90 ) {
      ui.angle.current = Math.PI/2;
  } else if ( degrees < -90) {
      ui.angle.current = -1*Math.PI/2;
  }
  ...
Then I passed the angle to the server, converting it to 0 to 180 degrees to match that of the Arduino library.
    ...
    degrees = degrees + 90;
    console.log(degrees);    //for debugging on the browser
    var s = String(degrees);
    $.ajax({
         type: 'POST',
         url: 'dataHandler',
         data: s,
         contentType: 'application/x-www-form-urlencoded'
    });
Arduino Code/Sketch
Besides the main Arduino sketch, the project includes the headers “mainpage.h” and “jscript.h”. Both header files contain PROGMEM constants containing the HTML and Javascript for the app. I believe it’s easier to debug if they are separated from the main Arduino code.
As for the Arduino sketch, I used the same code snippets for establishing a WiFi server. The relevant parts are:
//Home page. Contents of 'page' is in mainpage.h
server.on("/", []() {
  server.send(200, "text/html", page);
});
//JavaScript! Contents of 'javascript' is in jscript.h
server.on("/jscript.js", []() {
  server.send(200, "text/javascript", javascript);
});
//POST data handler
server.on("/dataHandler",HTTP_POST,dataHandler);
//start web server
server.begin();
//Just stating things
Serial.println("HTTP server started");
}
When a client visits the home page (the IP address of the WeMos D1), the client sees the contents of the ‘page’ constant which is the HTML of the app. The ‘page’ constant is inside ‘mainpage.h’.
In the HTML, a line calls jscript.js:
<script type='text/javascript' src='jscript.js'></script>
Since jscript.js is a file inside the server, it must pass the client to the relevant file. This is done by passing the contents of the constant ‘javascript’ which is inside ‘jscript.h’
//JavaScript! Contents of 'javascript' is in jscript.h
server.on("/jscript.js", []() {
  server.send(200, "text/javascript", javascript);
});
Finally, since the AJAX call inside the script was a POST request, the server must also handle it:
//POST data handler
server.on("/dataHandler",HTTP_POST,dataHandler);
dataHandler is a function for handling the data from the POST request:
void dataHandler(){
  String angle = server.arg("plain");
  Serial.print("Received: ");
  Serial.println(angle);
  server.sendHeader("Location","/");
  server.send(303);
  int pos = angle.toInt();
  myservo.write(pos);
  delay(15);
}
The angle from the AJAX POST is read through:
String angle = server.arg("plain");
For debugging, I printed the received angle to the serial monitor:
Serial.print("Received: ");
Serial.println(angle);
According to protocol, servers must respond to the client after a POST request, thus:
server.sendHeader("Location","/");
server.send(303);
This is simply sending back the client to the home page with status 303.
The received angle is a string, so it’s converted to int and then used to rotate the servo motor:
int pos = angle.toInt();
myservo.write(pos);
delay(15);
The full code can be downloaded in my repository.
Output Video
Once the code is uploaded to the WeMos D1 Mini, the serial monitor will give its IP address. The app is viewable through that IP address using a web browser.
Honestly, I was expecting an almost real-time reaction by the servo motor but it can’t be helped; the ESP8266 has processing limitations as a web server. Using a small delay between turns seems to overwhelm the ESP8266. I presume the ESP32 will have a much better reaction time.
Edit: Surprisingly, using the app on a desktop computer results in a much faster reaction time. So maybe the phone is having trouble connecting through WiFi.
Nevertheless, I hope someone found this WiFi servo controller project useful. For questions, or suggestions, kindly drop a comment below.

