
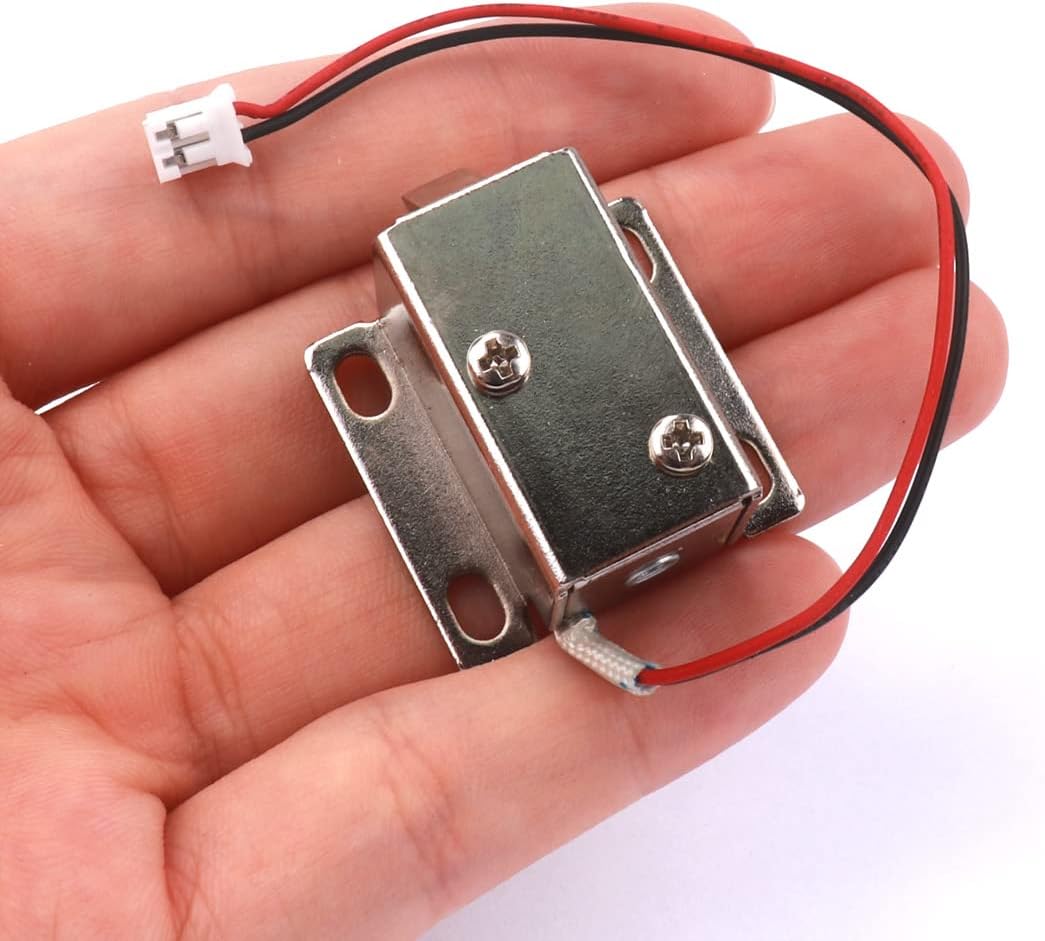
A solenoid lock is an electric actuator that converts electrical signals to motion. It is commonly found in electronically controlled doors and drawers. Using the solenoid lock with a microcontroller is easy and, if you’re a beginner, this project is just for you.
The ESP32 has become the microcontroller of choice for WiFi-capable projects. The first reason for this is that it’s cheaper than most alternatives; the second is because it’s widely available; and the third is because it has many users and references to use.
For this project, we will control a solenoid lock via a web browser. The web browser must be on a computer or smartphone on the same network as the ESP32. A web page is hosted by the ESP32 and on this page is a toggle switch for opening or closing the solenoid lock.
Bill of Materials
It is common for solenoid locks to operate at 12V which means you will need a separate power supply for it (not to mention its high current requirement).
How Solenoid Locks Work
A solenoid works through electromagnetism: current flowing to a coil of wire produces a magnetic force that moves the soft iron core. The direction of movement of the core relative to the direction of the current is often illustrated by the right-hand rule.
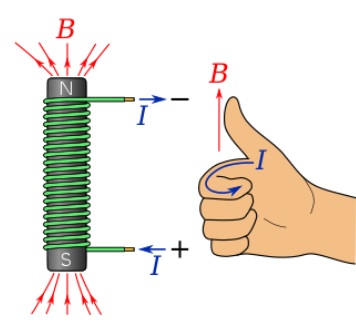
Here, B represents the magnetic field and I represents the current flowing on the wire. If the current is flowing counter-clockwise, assuming a freely moving core is inside the coils, the magnetic field will tend to move the core according to the direction of the magnetic field.
ESP32 Microcontroller Overview
The ESP32 is one of the more popular microcontrollers with wireless features such as Bluetooth and WiFi. Its ever-growing number of users has made tons of code libraries, making it easy to use. Connecting to a WiFi connection takes only a few lines of code. Users can then easily write a web page and have the ESP32 host it.
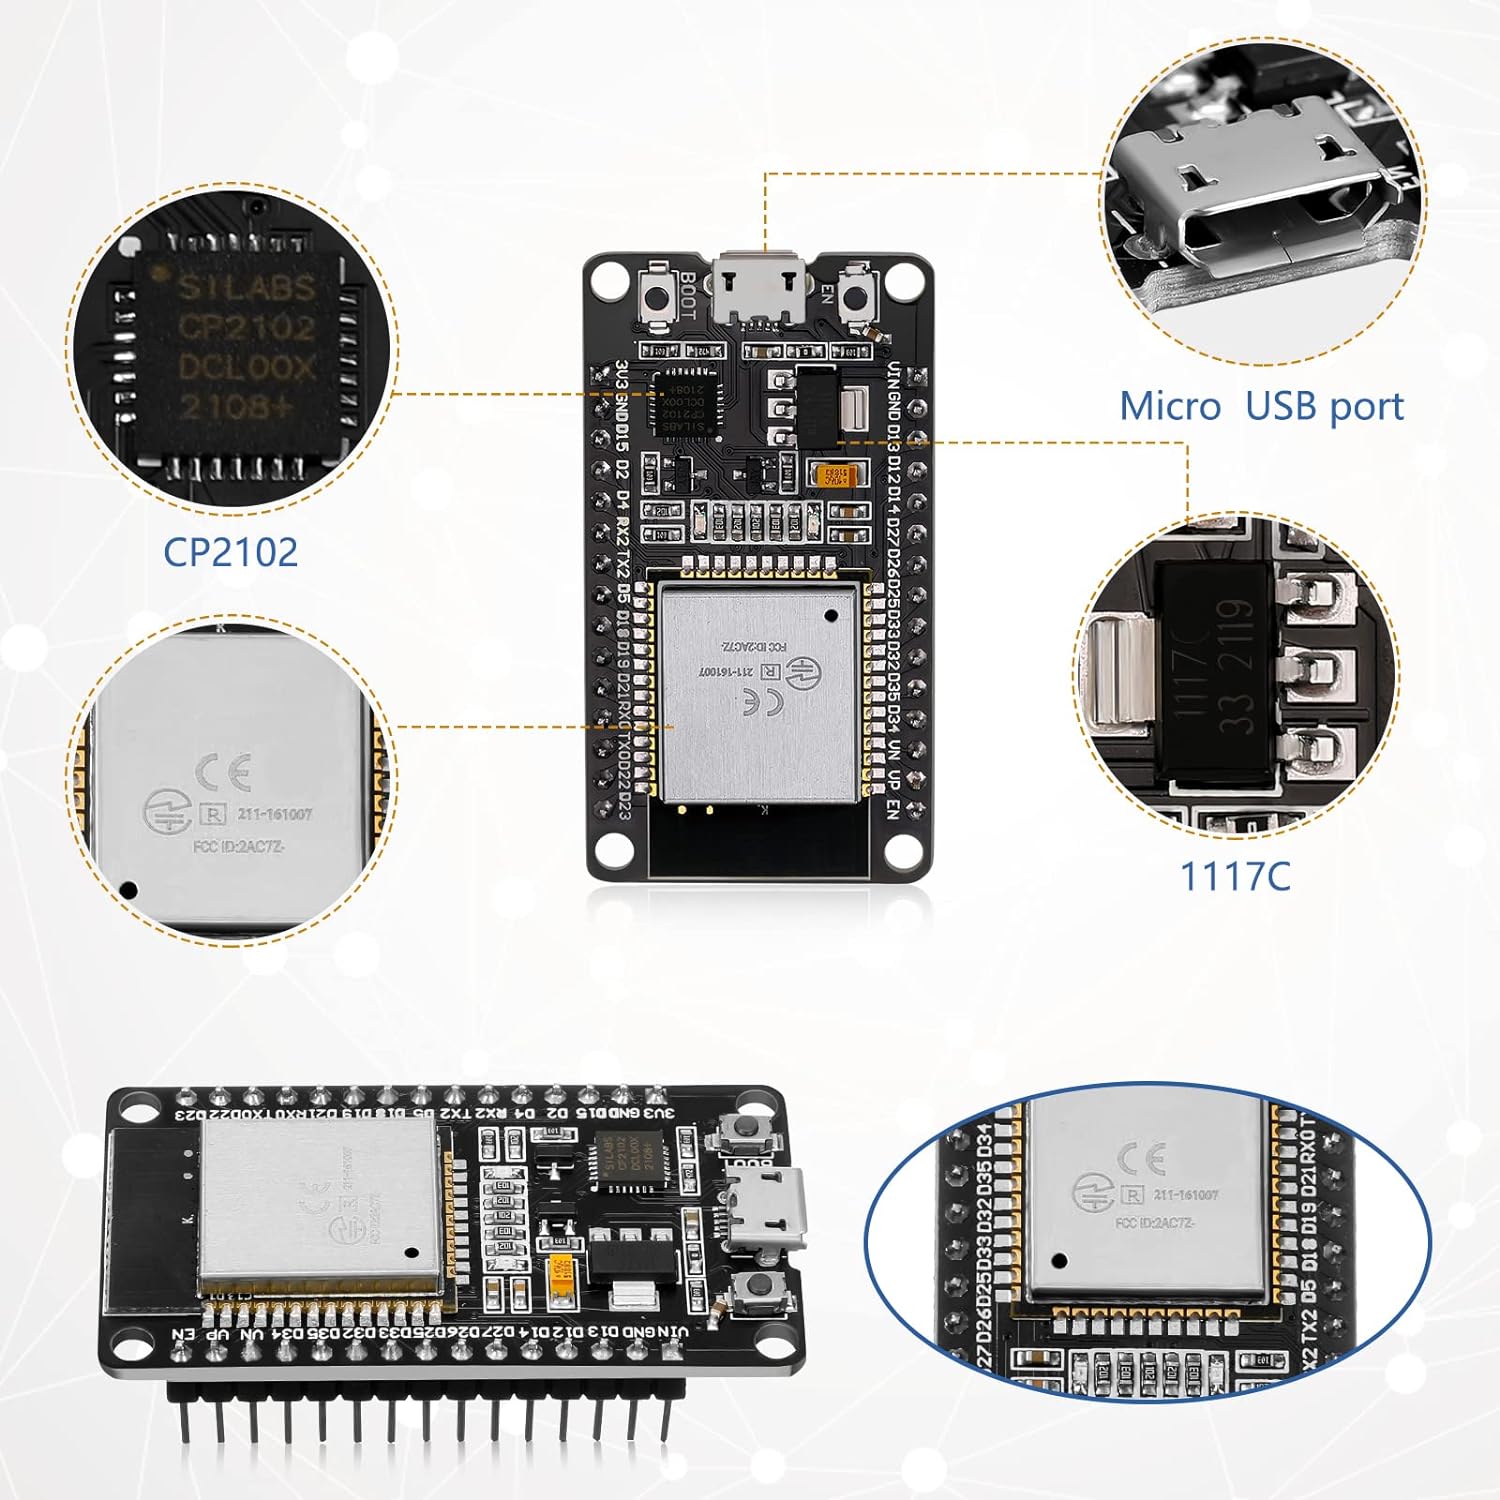
Besides its wireless networking capabilities, the ESP32 also consumes little power, making it ideal for battery-operated locks. It is also a dual-core microprocessor, which means it can handle multitasking if needed.
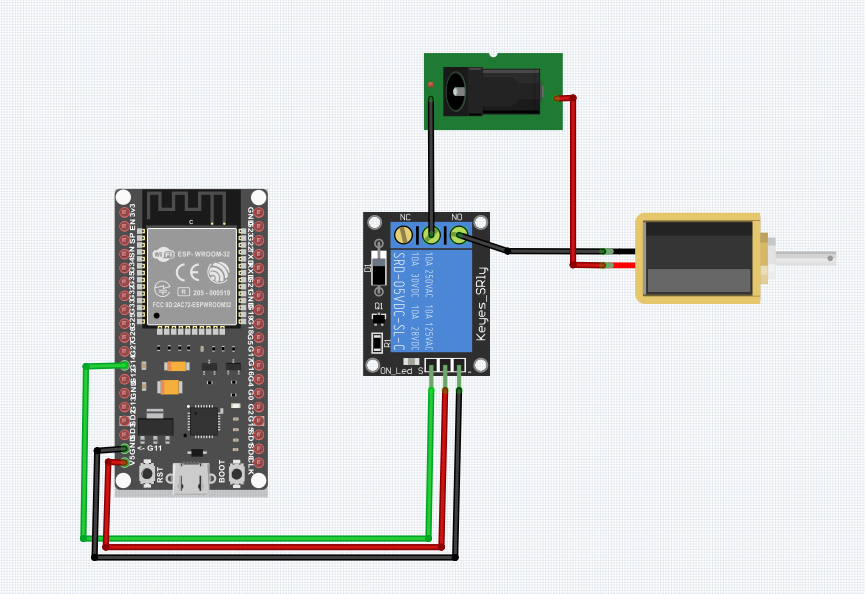
Wiring Diagram
Solenoid locks require a high current to actuate. It needs 12V to achieve that amount of current. As the ESP32 can’t provide that much power to the solenoid, an external source is required.
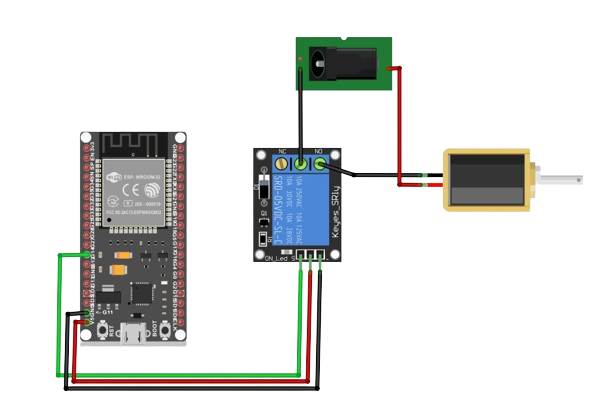
As shown in the diagram above, a high on GPIO14 triggers the relay, shorting the NO pin to the common pin already connected to the source’s ground.
How the Code Works
The ESP32 hosts a server that contains a web page with a switch for controlling the solenoid lock. Of course, it needs to connect first to a WiFi connection.
Provide your own WiFi's SSID and password on these lines:
//provide your own WiFi SSID and password
const char* ssid = "<Insert Your WiFi SSID>";
const char* password = "<Insert Your WiFi Password>";
The HTML for the web page is inside the header file “mainpage.h”.
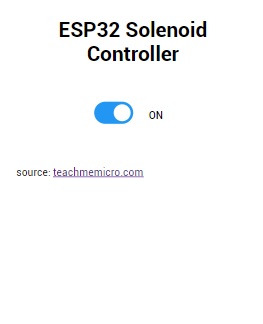
We use AJAX to tie the switch action to the backend. When the switch is on, the server calls the “switchState” page. This page requires an argument equal to the state of the switch (true = on, false = off). The ESP32 then toggles GPIO14 according to that argument.
Javascript portion of the web page:
<script>
   var checkbox = document.getElementById('myCheckbox');

   // Attach a change event listener to the checkbox
   checkbox.addEventListener('change', function() {
      var state = checkbox.checked;
      if(state == true){
        document.getElementById('switch').innerHTML = 'ON';
      }else{
        document.getElementById('switch').innerHTML = 'OFF';
      }

      var xhr = new XMLHttpRequest();
      xhr.open('GET', '/switchState?state=' + state,true);
      xhr.send();
   });

</script>
How ESP32 Handles Requests:
//Handle when user toggles the switch
 server.on("/switchState", []() {
    if(server.method() == HTTP_GET){

      //Print the state of the switch in Serial Monitor
      Serial.println(server.arg(0));

      if(server.arg(0).equals("true")) //if switch is true, turn on solenoid
        digitalWrite(solenoid, HIGH);
      else                             //if switch is false, turn off solenoid
        digitalWrite(solenoid, LOW);
    }

   server.send(200, "text/html", ""); //send empty string to client, so that browser stays on homepage

  });
The header “ESPnDNS” is there to assign a local name to our server instead of accessing it via an IP address. Thus, to access the web page, go to any browser on a phone or PC with the same WiFi connection as the ESP32 and visit “local.esp32”.
Accessing via IP still works; the IP address of the ESP32 prints out if it’s connected to your computer. Just open the Arduino IDE’s Serial Monitor.
You can download the full sketch from this repository.


