
There is, in fact, a way to create a NodeMCU ESP8266 WiFi jammer although technically, this is a deauther and not really a jammer. A jammer sends out noise on the WiFi frequency spectrum (2.4 GHz) while the program in this tutorial sends packets that disrupt the normal functions of your WiFi router. So if the aim is to block WiFi to users, this will do.
Disclaimer: This tutorial aims to bring awareness to security vulnerabilities of the 802.11 WiFi standard and not to promote mischievousness. The author doesn’t take responsibility for whatever further application this tutorial may result in.
Install the ESP Core for Arduino and Edit A File
We will be using the ESP8266 core for Arduino IDE in this tutorial. If you haven’t installed this already, go over to my Introduction to NodeMCU tutorial to show you how.
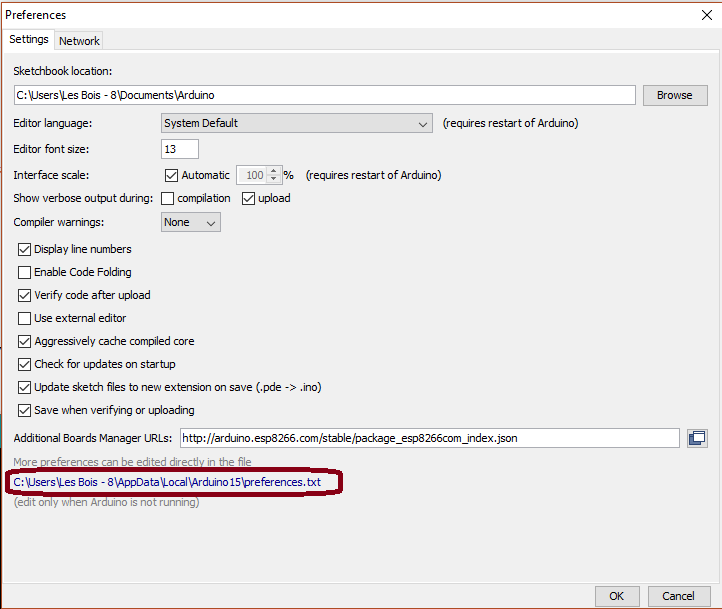
Once you have the core installed, go to File > Preferences. Click on the preferences path:
This will open a file dialog window. Go to packages > esp8266 > hardware > esp8266 > 2.3.0 > tools > sdk > include and open the user_interface.h file. Scroll to the bottom of the file and just before the #endif, add these lines:
typedef void (*freedom_outside_cb_t)(uint8 status);int wifi_register_send_pkt_freedom_cb(freedom_outside_cb_t cb);void wifi_unregister_send_pkt_freedom_cb(void);int wifi_send_pkt_freedom(uint8 *buf, int len, bool sys_seq);
Save the file and close the Arduino IDE.
Download the Deauther Project
Next, download the deauther project from Stefan Kremser’s (spacehuhn) Github repository.
Open the sketch found at esp8266_deauther-master\esp8266_deauther\.
Note that the sketch contains a lot of headers so don’t just copy this. Download the entire library! Also, Stefan has made his own board with a lot of features not found on a NodeMCU. This causes the sketch to have errors when uploaded. The solution is to add these libraries:
Upload the sketch, selecting the correct NodeMCU board beforehand.
Running the NodeMCU WiFi Jammer
Open the serial monitor and this should show up:
Mounting SPIFFS...OK
Switched to Channel 1
Settings loaded from /settings.json
Settings saved in /settings.json
Device names loaded from /names.json
SSIDs loaded from /ssids.json
Scan results saved in /scan.json
Serial interface enabled
Started AP
[WiFi] Path: '/web', Mode: 'AP', SSID: 'pwned', password: 'deauther', channel: '1', hidden: false, captive-portal: true
STARTED! \o/
v2.0.5
Executing /autostart.txt
Done executing script
Now, use your smartphone or computer and connect to the NodeMCU AP showed above (SSID: pwned, password: deauther)
Now, go to 192.168.4.1 using the smartphone or computer connected to the NodeMCU. Click the “Attacks” tab:
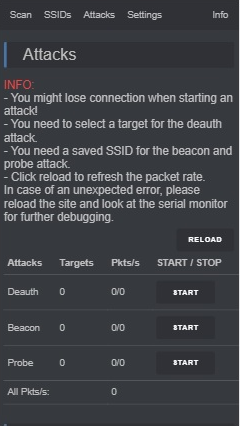
Click the start button on the Deauth row to start the attack. Note that the AP stops so you may end up losing this user interface. Nevertheless, all the WiFi devices connected to the chosen SSID should now be disconnected.


Need wifi jummer