RFID Login System with Raspberry Pi

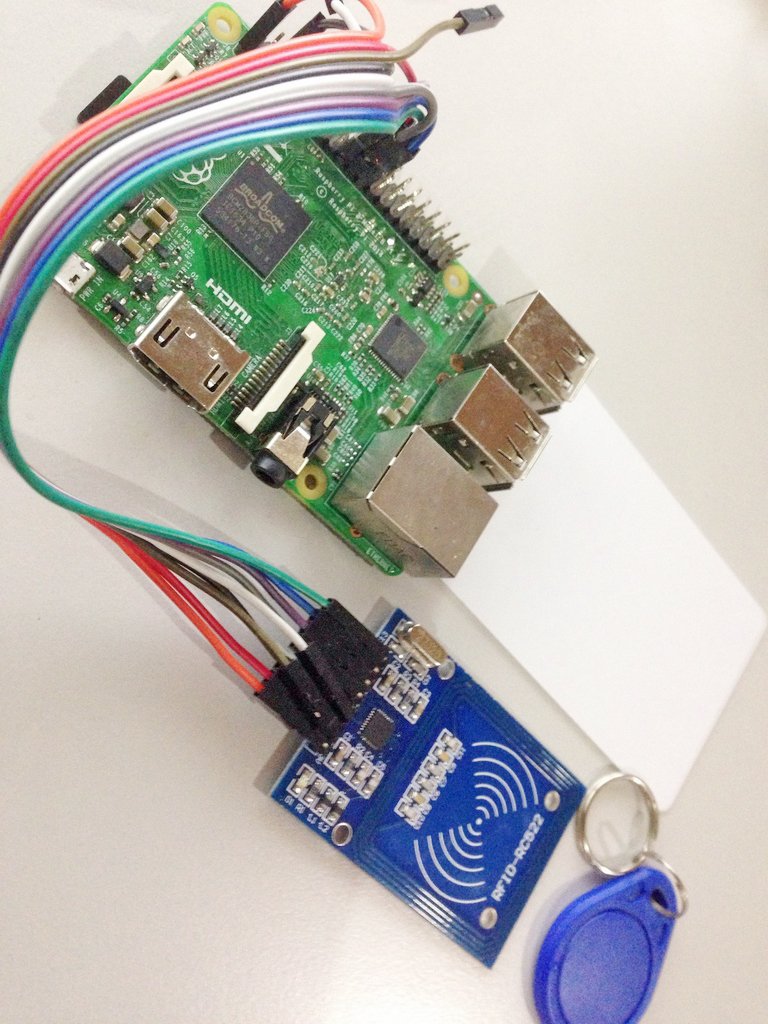
Wouldn't it be cool if you built your own card login system just like in hotels? Because RFID modules are now easy to get, this is now very possible. This Raspberry Pi RFID project of mine is a simple login system that reads cards and tags. Every time a user taps his or her card, his name and current date and time are saved to an SQL database. This project could be useful for login systems in establishments. And by using a Raspberry Pi, a lot of possible features could be added.
Materials
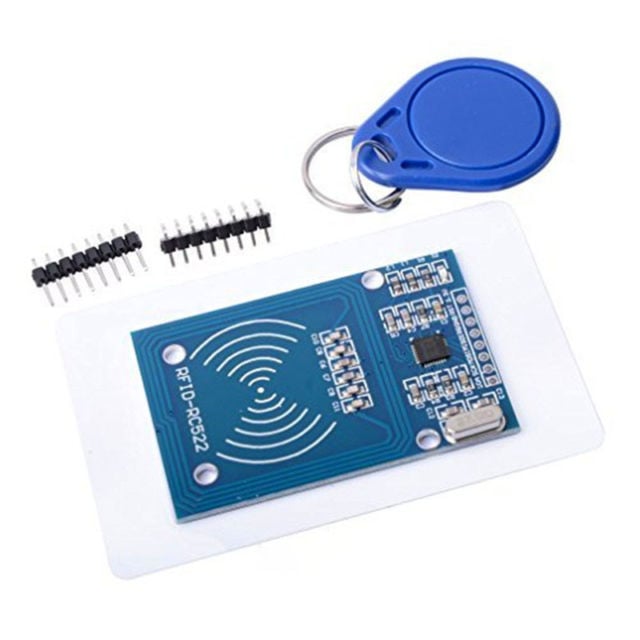
I will be using the popular MFRC522 RFID module:

My module comes with a card and a tag plus some male headers. This module can be interfaced using UART, I2C, or SPI. I will be using SPI with Python for this project following this RFID Raspberry Pi tutorial.
Powering the project is a Raspberry Pi 2 B+. However, it's compatible with older and newer PIs as long as they are running the latest Raspbian Stretch (March 2018).
Other necessary things needed for this project are female-to-female jumper wires and an internet connection.
Building Instructions
Enable SPI
As mentioned, I communicated with the RFID module through SPI. Since SPI is not enabled by default on the RPi, I needed to turn it on via raspi-config:
sudo raspi-config
In the raspi-config interface, I selected Interfacing Options and then selected SPI. After answering yes to the prompt, I rebooted the RPi to save changes.
sudo reboot
I needed to check if SPI is indeed enabled. This is done by opening config.txt
sudo /boot/config.txt
Then I searched for the line that says:
dtparam=spi=on
If this line is commented out, then SPI is now enabled.
SPI for Python
There are a number of handy python libraries for using the SPI interface. I used SPI-Py. To download this library, just enter the commands:
git clone https://github.com/lthiery/SPI-Py.git
Once downloaded, cd to the folder and run the included setup.py script
cd SPI-Py sudo python setup.py install
This installs the SPI-Py library and is now usable in the Python environment.
Installing the RFID Library
My Raspberry Pi is now SPI-ready! Next, I installed the RFID library by Mario Gomez.
git clone https://github.com/mxgxw/MFRC522-python.git
This library uses the following connection:

I've created a Fritzing diagram for those who prefer it:

To test if everything's working as expected, I ran the included Read.py script:
python Read.py
Tapping the included RFID card shows the UID, size, and data for a specific sector for that card. It looks like this:
Card read UID: 22,81,46,91
Size: 8
Sector 8 [0, 0, 0, 0, 0, 0, 0, 0, 0, 0, 0, 0, 0, 0, 0, 0]
This library allows me to view sector 8 which has 16 bytes of free space. I can use this space to save data but for now, I will be only using the UID as a unique identifier for the card.
Installing MySQL to Save Data
To complete my login system, I need to install mySQL and modify the Read.py code so that the time and name of the user are saved to a database every time the card is tapped into the module.
Here's how I installed mySQL server:
sudo apt-get install mysql-server --fix-missing
Once installed, I needed to create a database with two tables: user and log. The user table records all RFID card uid and the corresponding user names. The log table records the time and date when a user taps a card.
After the database and tables were created, I inserted dummy data into the user table.
| uid           | fname   | lname    |
|---------------|---------|----------|
| 22,81,46,91   | Reed    | William  |
| 189,202,5,139 | Bird    | Clarence |
| 144,99,134,21 | Johnson | Earl     |
To be able to access the mySQL database through Python, I installed python-mysqldb:
sudo apt-get install python-mysqldb
That's about it for the software prerequisites. Since the system logs the current date and time, my Raspberry Pi must be synced with my local time. This is done automatically in newer Raspbian distributions. I followed these steps:
1. sudo raspi-config
2. Internationalization options
3. Change Time Zone
4. Select geographical area
5. Select city or region.
6. Reboot your pi.
Now, I just needed to edit Read.py to this:
#!/usr/bin/env python
# -*- coding: utf8 -*-
# # Copyright 2018 Roland Pelayo
# # This file is based on Read.py from MFRC522-Python library by Mario Gomez
# MFRC522-Python is a simple Python implementation for
# the MFRC522 NFC Card Reader for the Raspberry Pi.
import RPi.GPIO as GPIO
import MFRC522
import signal
import MySQLdb
from time import gmtime, strftime
from datetime import date
continue_reading = True

# String variables for names
firstname = ""
lastname = ""

# Create DB object
db = MySQLdb.connect("localhost","root", "", "rfiddb")

# Capture SIGINT for cleanup when the script is aborted
def end_read(signal,frame):
     global continue_reading
     print "Ctrl+C captured, ending read."
     continue_reading = False
     GPIO.cleanup()

# Hook the SIGINT
signal.signal(signal.SIGINT, end_read)

# Create an object of the class MFRC522
MIFAREReader = MFRC522.MFRC522()

# Welcome message
print "Welcome to the MFRC522 data read example"
print "Press Ctrl-C to stop."

# This loop keeps checking for chips. If one is near it will get the UID and authenticate
while continue_reading:
# Scan for cards
     (status,TagType) = MIFAREReader.MFRC522_Request(MIFAREReader.PICC_REQIDL)
# If a card is found
     if status == MIFAREReader.MI_OK:
        print "Card detected"
pass

# Get the UID of the card
     (status,uid) = MIFAREReader.MFRC522_Anticoll()
# If we have the UID, continue
     if status == MIFAREReader.MI_OK:
# Print UID
        _uid = str(uid[0]) + "," + str(uid[1]) + "," + str(uid[2]) + "," + str(uid[3]) print _uid
# Create DB cursor
        cur = db.cursor();
# Check if UID is in DB
        cur.execute("SELECT * FROM users WHERE uid = %s" , (_uid,))
# Read data
        for row in cur.fetchall():
           firstname = str(row[1])
           lastname = str(row[2])
# Read time and date
           _currTime = strftime("%H:%M:%S",gmtime())
           _currDate = date.today().strftime("%Y-%m-%d")
# Send out a greeting to print name and date
           print "Hello " + firstname + " " + lastname print _currDate + " " + _currTime
# Insert every login into database
        try:
          try:
               cur.execute("INSERT INTO log (uid,fname,lname,_date,_time) VALUES (%s,%s,%s,%s,%s)", (_uid,firstname,lastname,_currDate,_currTime))
               db.commit()
          except (db.Error, db.Warning) as e:
               print(e)
          finally:
               print "Successful"
               cur.close()
# This is the default key for authentication
        key = [0xFF,0xFF,0xFF,0xFF,0xFF,0xFF]
# Select the scanned tag
        MIFAREReader.MFRC522_SelectTag(uid)
# Authenticate
        status = MIFAREReader.MFRC522_Auth(MIFAREReader.PICC_AUTHENT1A, 8, key, uid)
# Check if authenticated
        if status == MIFAREReader.MI_OK:
           MIFAREReader.MFRC522_Read(8)
           MIFAREReader.MFRC522_StopCrypto1()
        else:
           print "Authentication error"
           db.close()
There are other things printed on the terminal that are not useful for this project. Thus, I decided to edit the MFRC522.py script. You can download my version of this script on my repository.
If you want to replicate this project, all the files are found here. Just follow all the steps here for the software requirements. Note that the edited Read.py is now named Login.Py. To run, just cd to the folder I linked to and run this command:
sudo python Login.py
I've created a video showing the steps for running the project. Note that it's assumed that you have already installed the software prerequisites as presented above.


