
The ESP32 expands the capabilities of the popular ESP8266 WiFi microcontroller by using a 32-bit microprocessor, and adding Bluetooth 4.2 among others. What possible projects can we build using this device? We will find out as we start our series for the ESP32.
Setting up the Arduino IDE
Our featured device can be programmed using different languages: Lua, Python, Java, Ruby, etc. This tutorial and the whole series, however, will focus on programming using the Arduino platform.
Here's how to program the ESP32 using the Arduino environment:
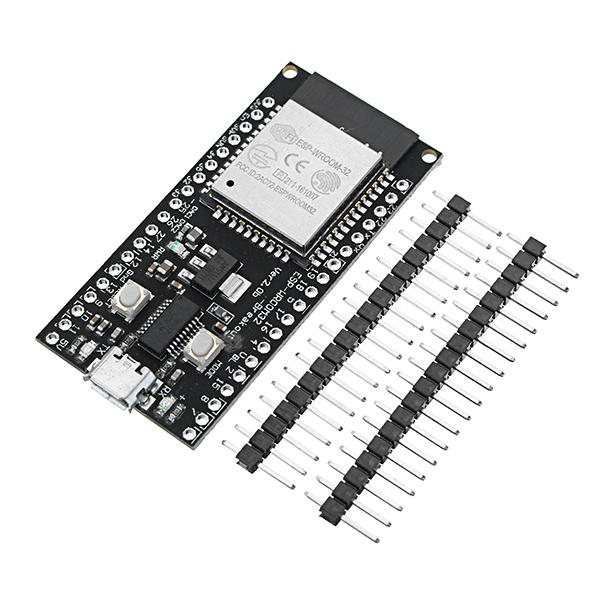
First, connect the board to your computer. Similar to the NodeMCU, the NodeMCU-32S board uses a microUSB port. If your computer doesn't recognize the board, download the Silabs CP2102x driver.
Next, fire up the Arduino IDE. The board is not readily recognized by the IDE so you need to provide that information through Boards Manager.
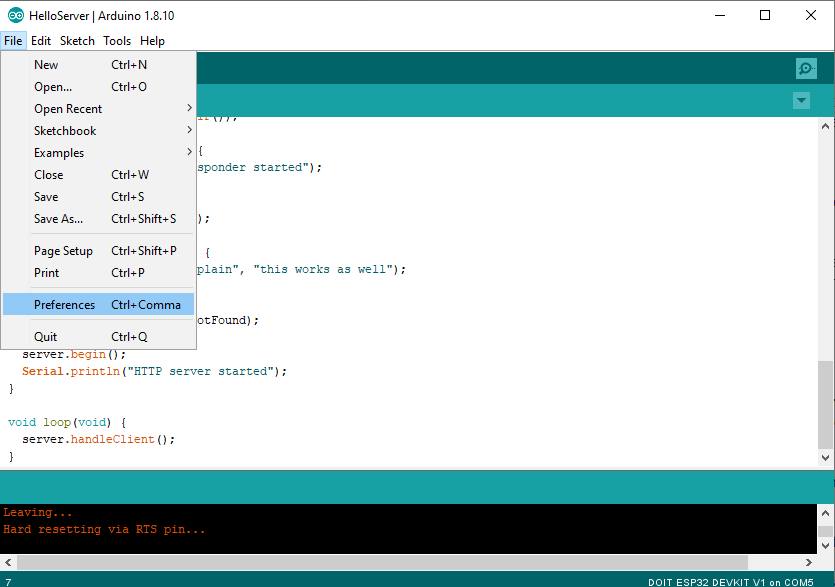
Go to File > Preferences:
On the additional boards manager field, paste: https://dl.espressif.com/dl/package_esp32_index.json. Click OK.
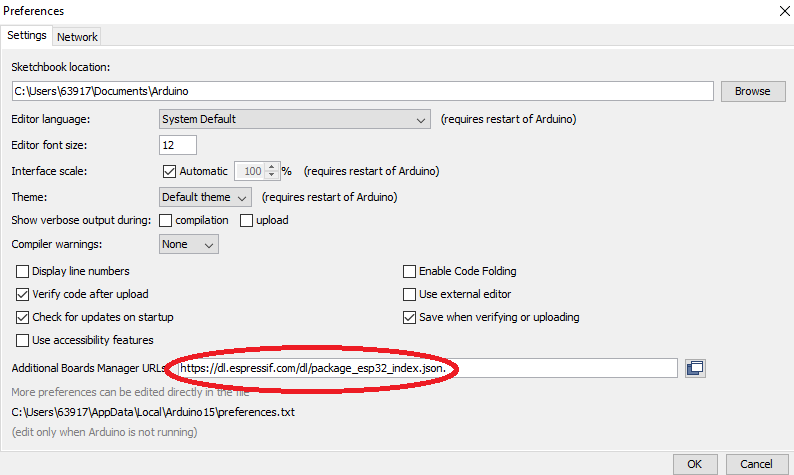
If you already have other board definitions, click the button on the right of the text field and add the json file url above on the next row.

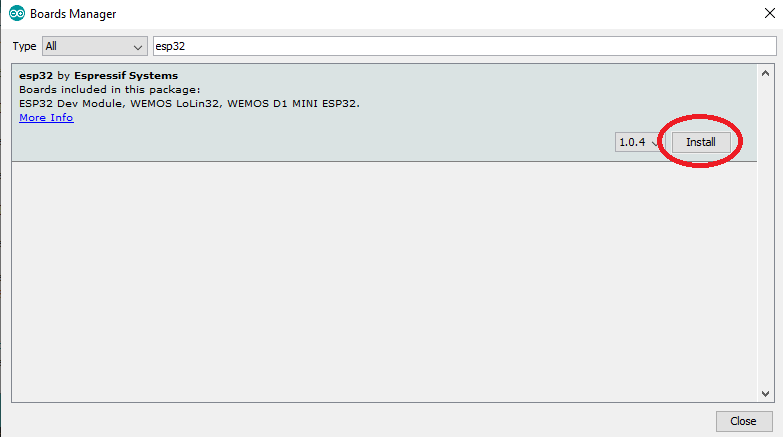
Next, go to Tools > Board > Boards Manager. On the search field, type "ESP32". One result should appear. Click the install button.
Once the board information is installed, you can now start using the device.
Uploading Arduino Sketch to ESP32
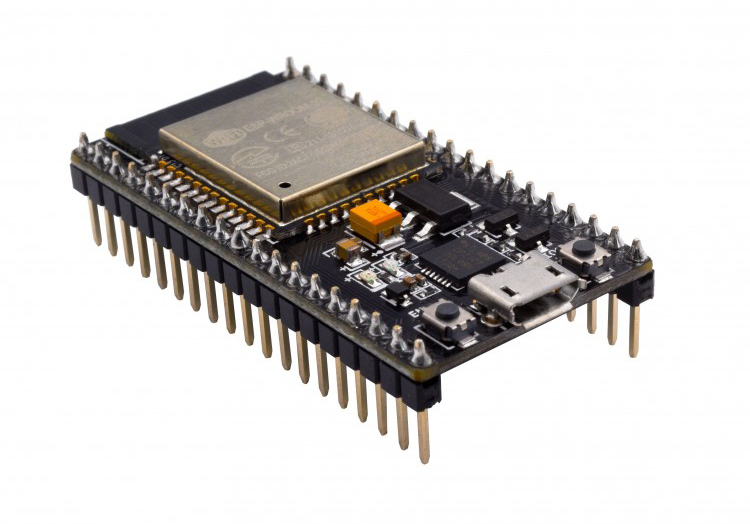
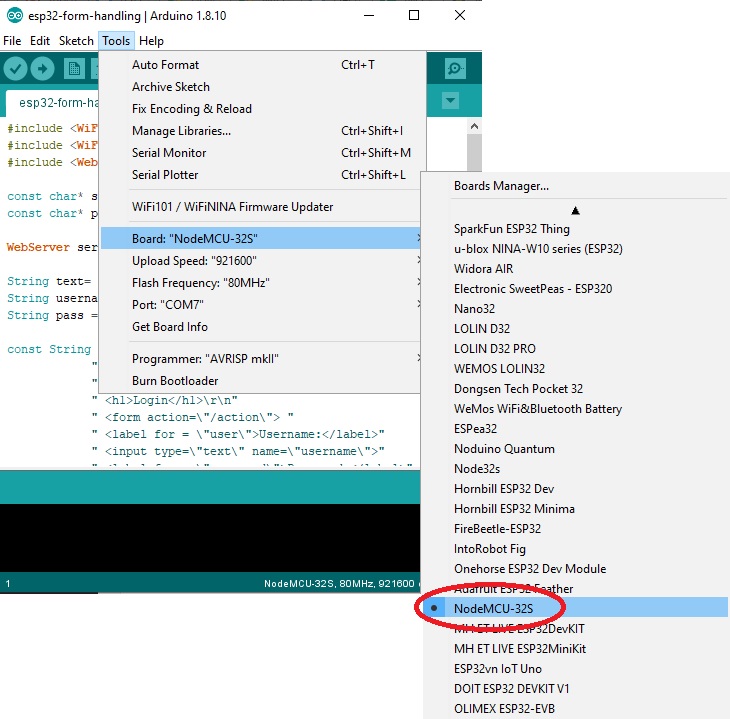
Before we can upload an Arduino sketch to the board, we must select the correct ESP32 development board as there are dozens of them. This tutorial uses the NodeMCU-32S board and it's among the options:
One way to know if all the required libraries have been installed is to try uploading a simple sketch. Open the Blink example via Files > Examples > 01.Basics > Blink.
Then, hold the boot button (the right button, USB port on the bottom):
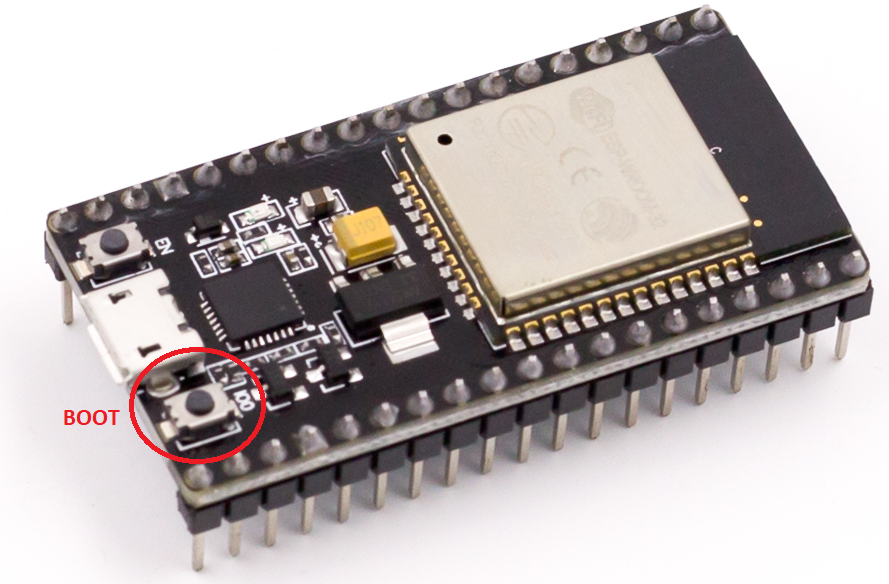
Check the status box below the Arduino IDE. Once it says connecting, release the boot button. The sketch should upload with no problem.
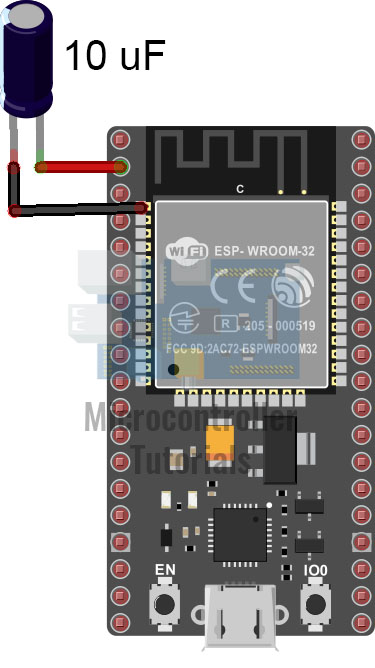
Holding down the BOOT button during upload is inconvenient. The workaround is to attach a 10uF electrolytic capacitor between the EN pin and the GND pin of the board. See image below:
To see the results of the new sketch, press the EN button (the other button). The blue LED should now flash once per second.
That's it! Now we can program the ESP32 board using the Arduino platform. Next, we will create a simple web server where we can view data from a sensor.

")

