
The Arduino was invented primarily for non-engineers but now, a lot of engineers are also into it. Using it in a fully-developed project is not a good look, yes, but it’s a lot quicker than building from scratch.
My only issue at the beginning is finding the best way to provide power to the Arduino board. You don’t want it always attached to your computer. Also, there are things to know depending on what needs to be controlled, driven, read, etc. And so I came up with this simple guide on how to power the Arduino.
USB port
This is the quickest way to power the Arduino and also the most convenient for debugging. Here, the power comes from your PC’s USB port and so is limited by the current coming out from it. USB 2.0 ports can produce a maximum of 500 mA while USB 3.0 ports produce a maximum of 900 mA.

An Arduino UNO Rev 3 board includes a resettable fuse with a limit of 500 mA so there’s no way of getting beyond that current. The Nano (Every and 2.3) has no fuse, only a Schottky diode that prevents current from the board from going to the USB port.
DC Barell Jack (Adapter)
If you have an adapter capable of 7 to 12 V, then this a good power source option. The UNO Rev 3 and Mega use an NCP1117 regulator at a fixed 5 V output with a maximum output current of 2.2 A. You can actually go up to 20 V, but it would lower your output current to just 1 A.

Of course, it’s also possible to use a 9V battery or two 18650s through the DC jack with the proper connectors.
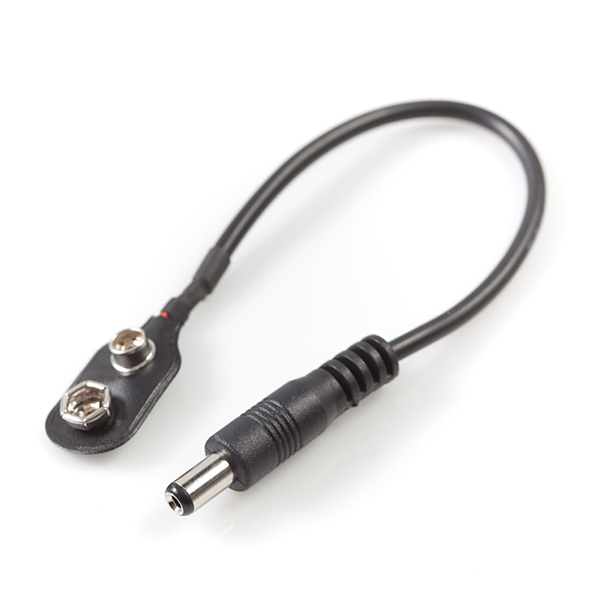
However, 9 V batteries are notorious for dying out easily; the longest-lasting one is only 1200 mAh. So that means if your Arduino is driving a load of 1.2 A, then your 9V battery is dead after an hour. 18650s, besides being rechargeable, provide higher current at longer times.
Thru the 5V pin
Projects with more than one voltage level might opt to power the Arduino through the 5V pin directly. This is possible as long as the 5V voltage is properly regulated. Connecting directly through the 5V pin bypasses the regulator and resettable fuse so there’s the risk of frying your board.

Using three 1.5V batteries will still turn on an Arduino board. This method is safer than using unregulated power sources (at the expense of lesser power, that is).
Thru the Vin pin

The Vin pin is right before the regulator IC in almost all Arduino boards. For the UNO and Mega, this is like powering the board through the DC jack. For all Arduino boards, Vin should be higher than 5V to compensate for the drop out at the regulator. You can also use the Vin pin as a power source if you’re powering the Arduino through the DC barrel jack.
Thru the ICSP pins
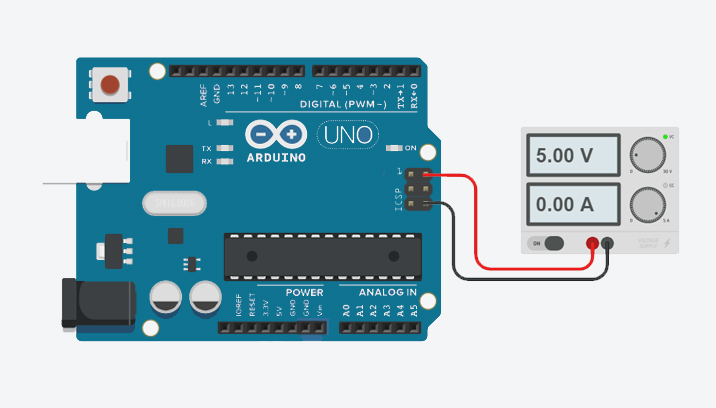
The ICSP pins are primarily for changing the Arduino’s bootloader. There’s actually a 5V and GND pin among these pins! I usually use them when I run out of the regular 5V or GND pins. Limits when powering through these pins are the same as powering through the 5V pin.
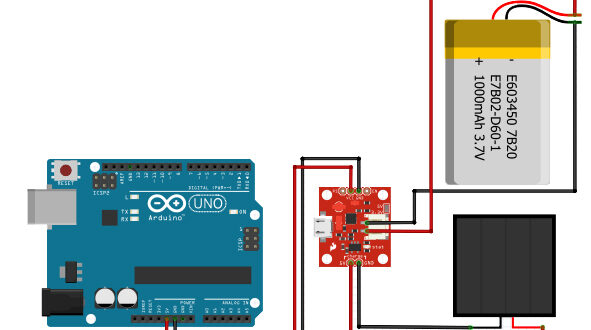
Solar Power!
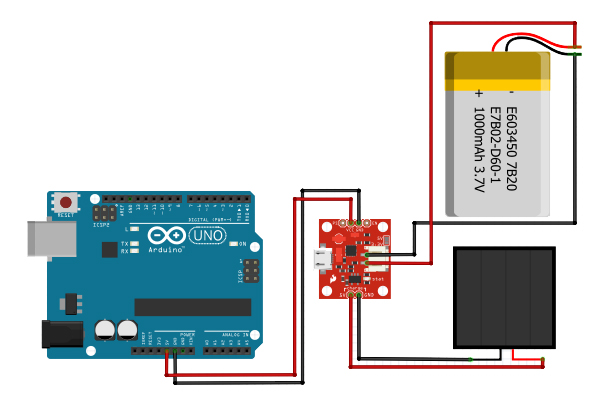
This is a unique way to power your Arduino. However, there’s no grid-tied option like the household solar panel types. You’ll need a 18650 battery and a charger IC/module like SparkFun’s PowerCell to keep your Arduino running even if the sky is dim or at night.
So these are the ways I've tried powering the Arduino. There are other possible ways like using wind, foot steps, or even potatoes. Are there ways not mentioned here that could power the Arduino? Drop them in the comments below!


