How to Send HTTP Post and Get Requests Using Arduino ENC28J60 Ethernet Shield

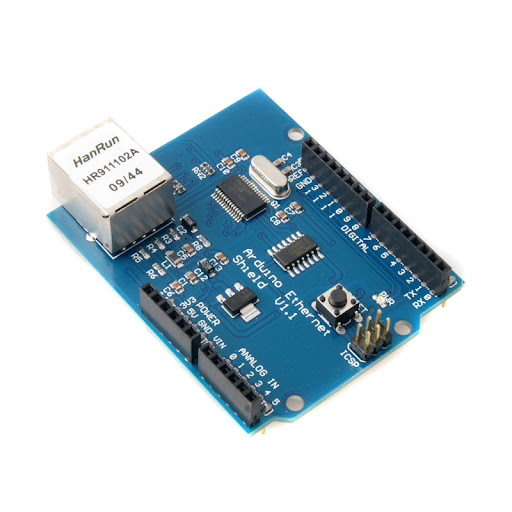
In this IoT age, there are several ways of sending and getting data to/from a microcontroller to a remote server. This article will be part of a series about such ways through the Arduino ENC28J60 shield or module. Here I will be showing the classic way of communicating via the Internet: HTTP requests.
Introduction
An HTTP request is how most web browsers request a web page from a server. For example, when you visit this website, your browser will send this request:
GET / HTTP/1.1
Host: teachmemicro.com
The server handling this website hears the request and then returns a response and all the code for viewing the website on the browser (HTML, CSS, JS, etc.).
A microcontroller with Internet capabilities can also do such requests. In this tutorial, I will feature the Arduino ENC28J60 shield or module. However, the codes here might also be usable for other shields like W5100, etc.
Sending a GET Request
A GET request gets data from a remote server. When done using a web browser, GET requests can be cached, bookmarked, or saved in the browser’s history. As such, GET requests are less secure compared to POST requests.
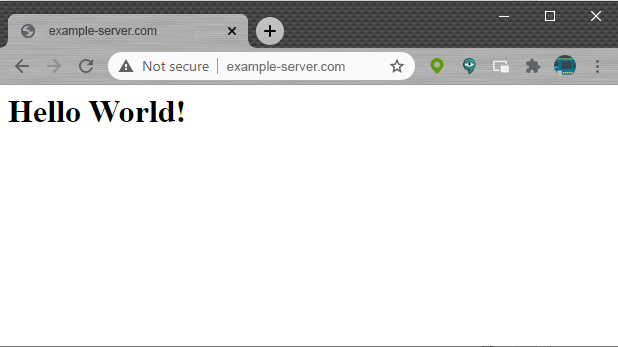
Let's say we have a fake website, example-server.com. This website's homepage displays a simple Hello World!

The code below uses GET to acquire the homepage above.
#include <UIPEthernet.h>

EthernetClient client;
uint8_t mac[6] = {0x00,0x01,0x02,0x03,0x04,0x05};

void setup() {
  Serial.begin(9600);
  char server[] = "www.example-server.com";
  if(Ethernet.begin(mac) == 0){
    Serial.println("Failed to configure Ethernet using DHCP");
    while(1); //do nothing if ethernet failed to start
  }
  if (client.connect(server,80)){
      Serial.println("Connected to server");
      client.println("GET / HTTP/1.1");
      client.println("Host: example-server.com");
      client.println();
  }else{
      Serial.println("Connection to server failed");
  }
}

void loop() {
  while(client.connected()){
    if(client.available()){
      char c = client.read();
      Serial.print(c);
    }
  }
}
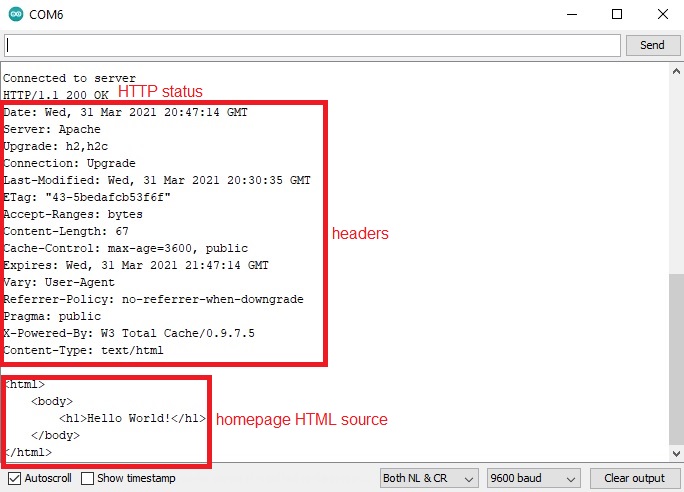
If you run this code on an Arduino, the serial monitor will show this:

This is an example of a response from a server. At the bottom is the HTML source of the page. Above it is HTTP headers and the status code.
Let’s just run through the code. The first lines contain this:
#include <UIPEthernet.h>

EthernetClient client;
uint8_t mac[6] = {0x00,0x01,0x02,0x03,0x04,0x05};
Here the UIPEthernet library is included as the built-in Ethernet library doesn’t support the EN28J60 shield/module.
We then initialize the EthernetClient object and then create a MAC address. The MAC address could be anything as long as it isn’t the same as any other devices on your LAN. Some ethernet shields have their MAC address printed on the board so you may use that.
Here’s the setup() function:
void setup() {
  Serial.begin(9600);

  char server[] = "www.example-server.com";
  if(Ethernet.begin(mac) == 0){
    Serial.println("Failed to configure Ethernet using DHCP");
    while(1); //do nothing if ethernet failed to start
  }

  if (client.connect(server,80)){
      Serial.println("Connected to server");
      client.println("GET / HTTP/1.1");
      client.println("Host: example-server.com");
      client.println();
  }else{
      Serial.println("Connection to server failed");
  }
}
I created a server char array to which the server name is assigned to. Then, we check if the ethernet device is able to initiate a connection through DHCP. If this initialization is unsuccessful, there’s no point in continuing so the program ends with an infinite loop.
If the DHCP initialization is successful, we connect to the server using
client.connect(server,80)
This function returns true if successful and false if not. The second parameter in the function is the port number. Port 80 is the port for HTTP requests while 443 is for HTTPS. We will be using more port numbers as we go along with this series.
If we are able to connect to the server, we now send the request:
client.println("GET / HTTP/1.1");
client.println("Host: example-server.com");
client.println();
Note the extra client.println() is necessary.
The simplest GET request follows this format:
GET <page> HTTP/1.1
Host: <website URL>
In the Arduino sketch, we are requesting for the home page so there’s only a “/”. If we want to request another page, like contact.php for example, then this is the request:
GET /contact.php HTTP/1.1
Host: <website URL>
Browsers typically send more headers than what I used here.
The loop() function waits for any response from the server and prints it to the serial monitor.
void loop() {
  while(client.connected()){
    if(client.available()){
      char c = client.read();
      Serial.print(c);
    }
  }
}
The GET request, again, is for receiving data from the server. If we want to send data, we use POST request.
Sending a POST Request
Unlike the GET request, a POST request will not be cached, bookmarked, or remain in the browser’s history. This makes POST requests more secure than GET requests. Moreover, you can use POST requests to send data to the server.
Here’s an Arduino sketch for sending a POST request:
#include <UIPEthernet.h>

EthernetClient client;
uint8_t mac[6] = {0x00,0x01,0x02,0x03,0x04,0x05};

void setup() {
  Serial.begin(9600);

  char server[] = "www.example-server.com";

  String data = "sensor1=";
  data += analogRead(A0);
  data += "sensor2=";
  data += analogRead(A1);

  if(Ethernet.begin(mac) == 0){
    Serial.println("Failed to configure Ethernet using DHCP");
    while(1);
  }

  if (client.connect(server,80)){
      Serial.println("Connected to server");
      client.println("POST / HTTP/1.1");
      client.println("Host: example-server.com");
      client.println("Content-Type: application/x-www-form-urlencoded");
      client.print("Content-Length: ");
      client.println(data.length());
      client.println();
      client.println(data);
      client.println();
  }else{
      Serial.println("Connection to server failed");
  }
}

void loop() {
  while(client.connected()){
    if(client.available()){
      char c = client.read();
      Serial.print(c);
    }
  }
}
The first difference in this sketch from the first one is we need to define the data we will be sending:
String data = "sensor1=";
data += analogRead(A0);
data += "&sensor2=";
data += analogRead(A1);
Here, I created a string and embedded the readings from analog ports A0 and A1. This is assuming I have some sensor connected in these ports. The data string would look like this:
sensor1=100&sensor2=200
The second difference is this part:
if(client.connect(server,80)){
      Serial.println("Connected to server");
      client.println("POST / HTTP/1.1");
      client.println("Host: example-server.com");
      client.println("Content-Type: application/x-www-form-urlencoded");
      client.print("Content-Length: ");
      client.println(data.length());
      client.println();
      client.println(data);
      client.println();
}
Besides changing GET to POST, notice that I added these:
client.println("Content-Type: application/x-www-form-urlencoded");
client.print("Content-Length: ");
client.println(data.length());
client.println();
client.println(data);
client.println();
The first line tells the server what type of data we are sending. The next lines tell the length of the data to be sent (which is the data string). Then the last part of the request is the data string itself.
The format for a simple POST request is like this:
POST <page> HTTP/1.1
Host: <website URL>
Content-Type: <content-type>
Content-Length: <length of data>

<data>
When you upload the sketch, expect the same reply as the previous sketch.
Typically, POST requests will not provide the HTML code of the page unless the page you are requesting is explicitly sending the HTML code.
So what happens to the data we just sent? If the page to where it was sent is using PHP, two variables will now have been created: $_POST[‘sensor1’] and $_POST[‘sensor2’]. Now it is up to the web developer what he will do with the contents of these variables.
Example With PHP Code
For example, we have a page that captures our POST data and stores it inside a text file. When a browser user visits the same page, the data is displayed. That sensor.php page will have a code like this:
<html>
    <body>
    <?php
            $filename = "post-data.txt";
            if ($_SERVER['REQUEST_METHOD'] === 'POST') {
                $s1 = 'Sensor 1: '.$_POST['sensor1']."\r\n";
                $s2 = 'Sensor 2: '.$_POST['sensor2']."\r\n";
                $handle = fopen($filename, "w") or die("Unable to open file!");
                fwrite($handle, $s1);
                fwrite($handle, $s2);
                fclose($handle);
            }else if($_SERVER['REQUEST_METHOD'] === 'GET'){
                $handle = fopen($filename, "r");
                $contents = fread($handle, filesize($filename));
                echo $contents;
                fclose($handle);
            }else{;}
     ?>
    </body>
</html>
Here, we separate the POST requesters from the GET requesters. The latter sends data while the former reads the data. If a POST request is sent, this part of the code runs:
if ($_SERVER['REQUEST_METHOD'] === 'POST') {
   $s1 = 'Sensor1: '.$_POST['sensor1']."\r\n";
   $s2 = 'Sensor2: '.$_POST['sensor2']."\r\n";
   $handle = fopen($filename, "w") or die("Unable to open file!");
   fwrite($handle, $s1);
   fwrite($handle, $s2);
   fclose($handle); }
Data sent via POST are stored in $_POST[name] variables. Here the POST data have names sensor1 and sensor2 which are defined in the Arduino sketch. Both values are put into a string and then written to a text file.
If a user uses a browser to visit the same page, he initiates a GET request. Hence, this part of the PHP code executes:
else if($_SERVER['REQUEST_METHOD'] === 'GET'){
   $handle = fopen($filename, "r");
   $contents = fread($handle, filesize($filename));
   echo $contents;
   fclose($handle); }
The full Arduino sketch is below:
#include <UIPEthernet.h>

EthernetClient client;
uint8_t mac[6] = {0x00,0x01,0x02,0x03,0x04,0x05};

void setup() {
  Serial.begin(9600);

  char server[] = "www.example-server.com";

  String data = "sensor1=";
  data += analogRead(A0);
  data += "sensor2=";
  data += analogRead(A1);
  if(Ethernet.begin(mac) == 0){
    Serial.println("Failed to configure Ethernet using DHCP");
    while(1);
  }

  if (client.connect(server,80)){
      Serial.println("Connected to server");
      client.println("POST /sensor.php HTTP/1.1");
      client.println("Host: example-server.com");
      client.println("Content-Type: application/x-www-form-urlencoded");
      client.print("Content-Length: ");
      client.println(data.length());
      client.println();
      client.println(data);
      client.println();
  }else{
      Serial.println("Connection to server failed");
  }
}

void loop() {
  while(client.connected()){
    if(client.available()){
      char c = client.read();
      Serial.print(c);
    }
  }
}
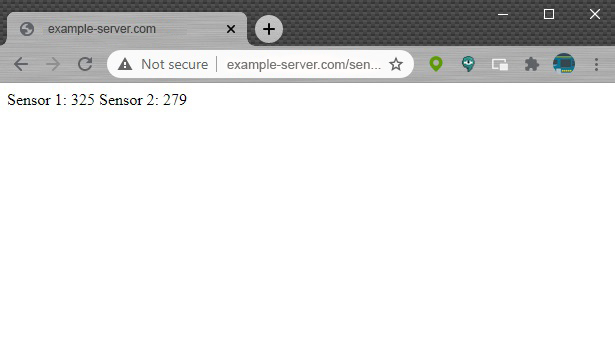
Now when I upload the sketch, and the data is successfully sent to the remote server, the sensor.php page will display the sensor values on a web browser.

That’s it! For the next part of this series, I will show you another way of sending and receiving data from a remote server still using the ENC28J60 ethernet shield.
This tutorial is originally written by Roland Pelayo for circuitxcode.com


