
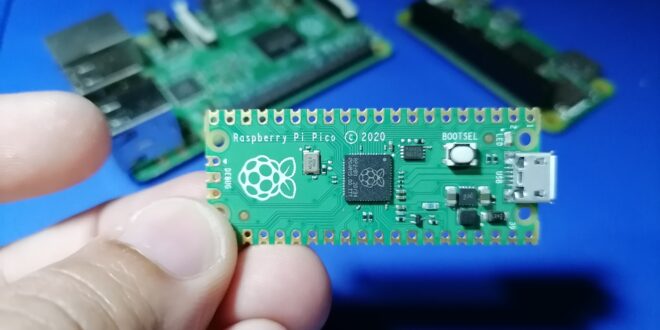
In my previous post, I showed how challenging it was to build code for the Raspberry Pi Pico in C/C++. Fortunately, the microcontroller is now fully supported by the Arduino IDE! This post shows you how to program the Raspberry Pi Pico as if it’s an Arduino.
1. Download Pico Setup Tools for Windows
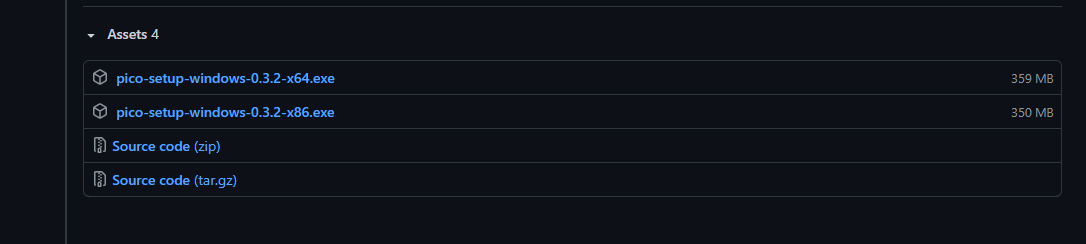
Navigate to https://github.com/ndabas/pico-setup-windows/releases and look for the pico-setup-windows executable that matches your computer.
Once downloaded, run the program, clicking Next after Next, and wait for it to finish.

After the setup, you may want to check “Clone and build Pico repos” and uncheck “Show ReadMe” and then click Finish.
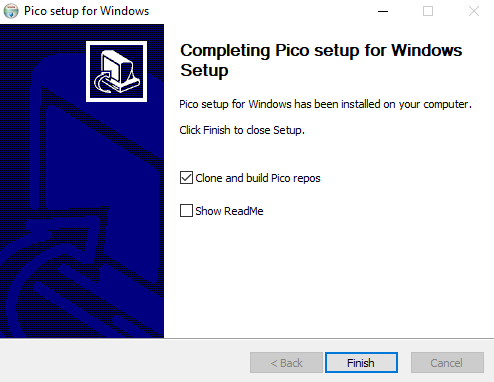
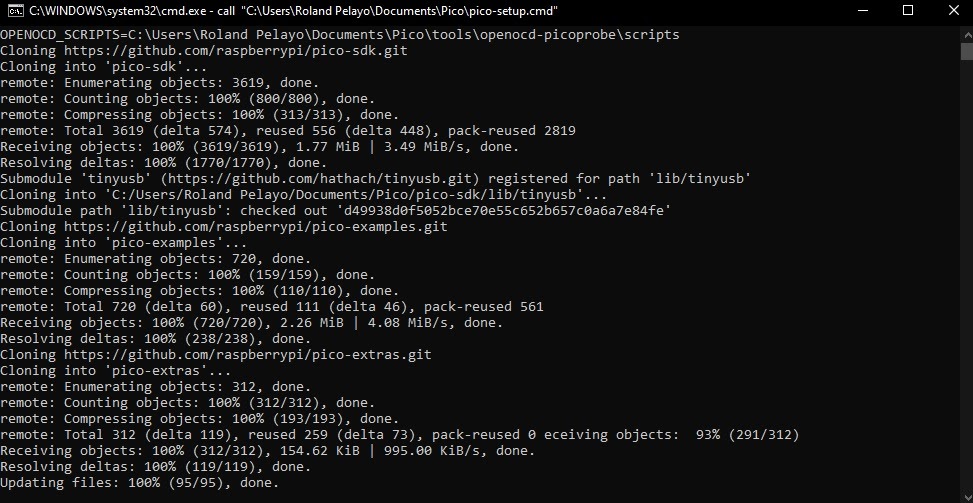
Checking Clone and build Pico repos will download the Raspberry Pi SDK, including example projects, and will be on your Documents folder. This is not required to code using Arduino but reading through the files will help you understand the device more.
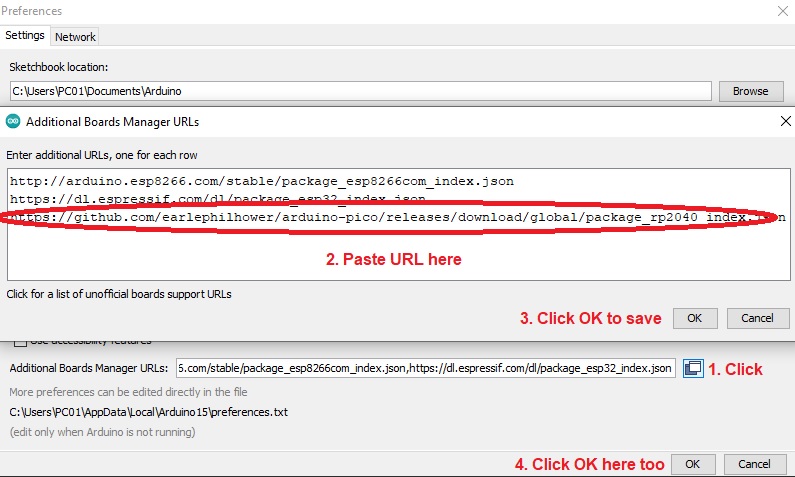
2. Add board reference to Arduino
Open Arduino IDE, go to File > Preferences. In the Additional Boards Manager URLs field, add the following:
https://github.com/earlephilhower/arduino-pico/releases/download/global/package_rp2040_index.json
Next, go to Tools > Boards > Boards Manager. In the search field, type in “pico”. If you see the one as the screenshot below, install it:
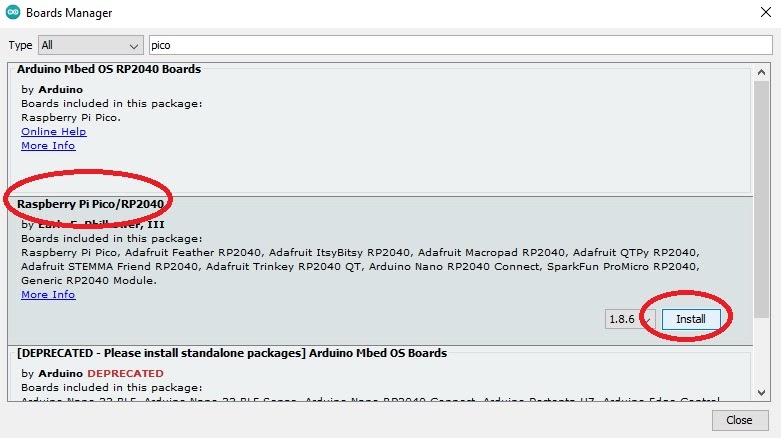
After installation, the Raspberry Pi Pico is now selectable in Tools > Board.
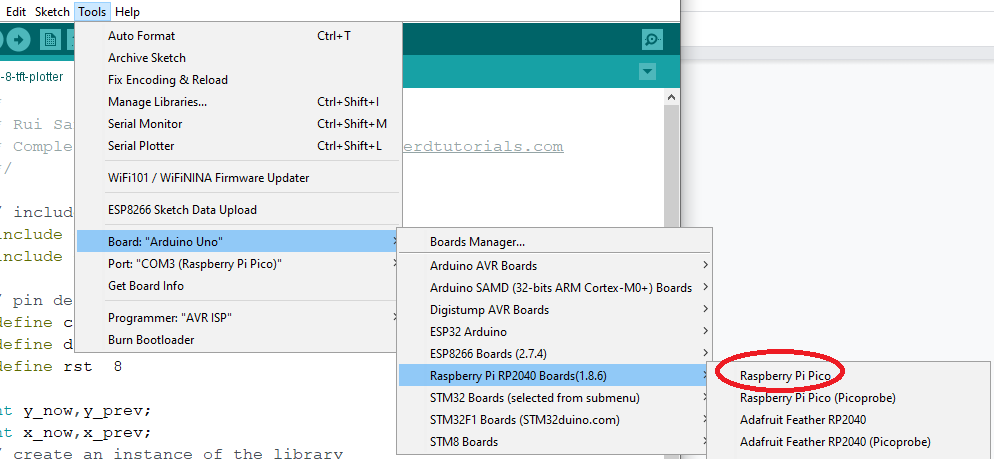
3. Connect Raspberry Pi Pico to PC
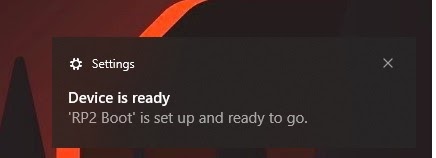
Now, hold the BOOTSEL button on the board and then plug it into your computer’s USB port. Here comes the weird part: you’ll notice that the Pico’s COM port is not found (on device manager and Arduino IDE) but a hard drive will appear on your computer.
Nevertheless, this tells you that the Raspberry Pi Pico is able to connect to your computer. Upload an example sketch, like the Blink example (File > Examples > 01. Basics > Blink). You’ll notice that the IDE auto-detects the Raspberry Pi Pico:
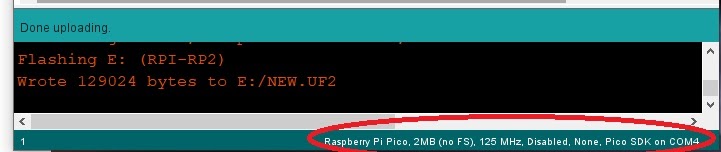
Only after uploading the first sketch will you be able to select the COM port for the Pico in Tools > Port. BTW, the Blink sketch you just uploaded should flash the onboard LED on the Pico.
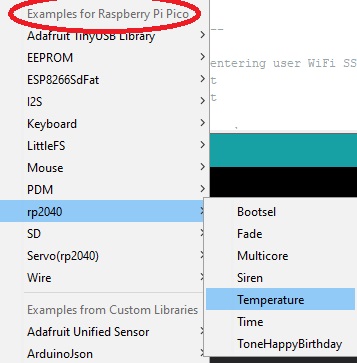
Now we can use the Raspberry Pi Pico like an Arduino board! The IDE will filter sketches that are incompatible with the Pico. Go to File > Examples to look at the usable sketches, with a few that are Pico-exclusive:
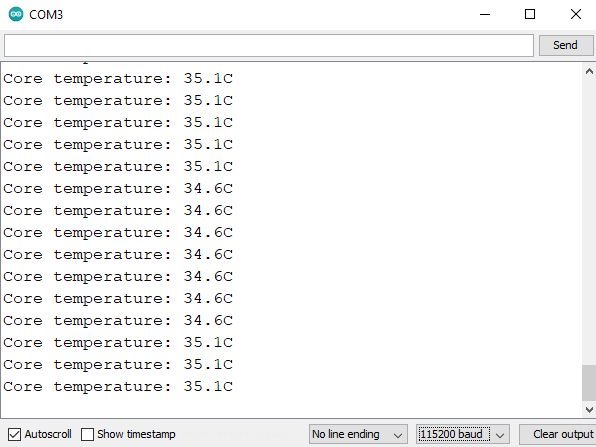
This example sketch uses the Raspberry Pi Pico’s internal temperature sensor to display the temperature in Arduino’s serial monitor:
void setup() {
  Serial.begin(115200);
  delay(5000);

}

void loop() {
  Serial.printf("Core temperature: %2.1fC\n", analogReadTemp());
  delay(1000);
}
Come back for more projects using the Raspberry Pi Pico with Arduino!


