Arduino Simulation in Proteus ISIS

Labcenter Electronics’ Proteus has become an indispensable tool for engineers as it offers not only schematic and PCB design but also real-time simulation. However, Arduino simulation is not supported by this application by default. This tutorial will show you how to simulate an Arduino with Proteus ISIS.
Step 1: Add Arduino Library for Proteus
All devices that can be simulated in Proteus ISIS have an .IDX and a .LIB file. Normally, one or more devices are part of a library. The .IDX file is an index or list of all devices under the library while the .LIB file contains information about the devices in the same library.
To add support for Arduino simulation, we just need to add an .IDX and .LIB file for Arduino. You can download the files in my repository. Note that these files are a work in progress and only contain a UNO model. In the future, however, I am looking to support all Arduino boards.
Place the files inside the folder: C:\ProgramData\Labcenter Electronics\Proteus 8 Professional\LIBRARY for Proteus version 8 or at C:\Program Files (x86)\Labcenter Electronics\Proteus 7 Professional\LIBRARY for Proteus version 7.
Step 2: Open Arduino Model to Verify
After placing the said files, open Proteus ISIS and search for the model using the keyword “arduino”:

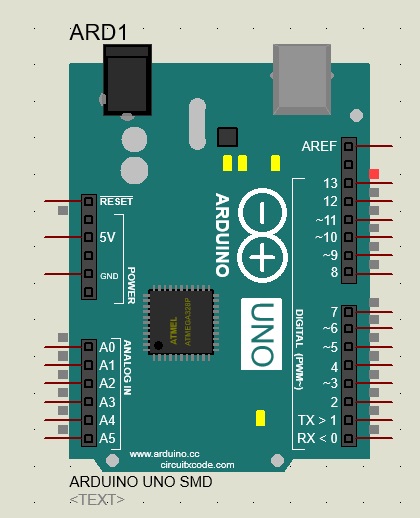
Place the model in the workspace and you can now simulate Arduino programming in Proteus ISIS! Here's what the Arduino UNO model looks like:

Step 3: Load an Example Sketch
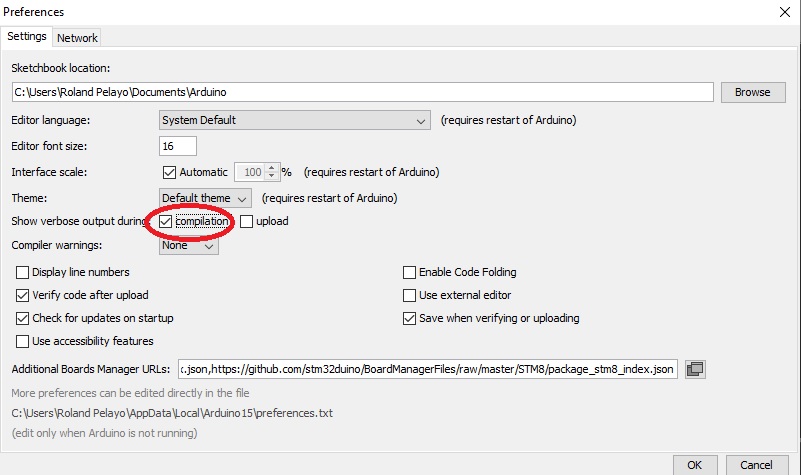
As with other microcontroller models in Proteus, the Arduino model requires a HEX file for simulation. However, the Arduino IDE won’t show the HEX file location by default. To show the location, go to File > Preferences and tick on the compilation checkbox beside Show verbose output during

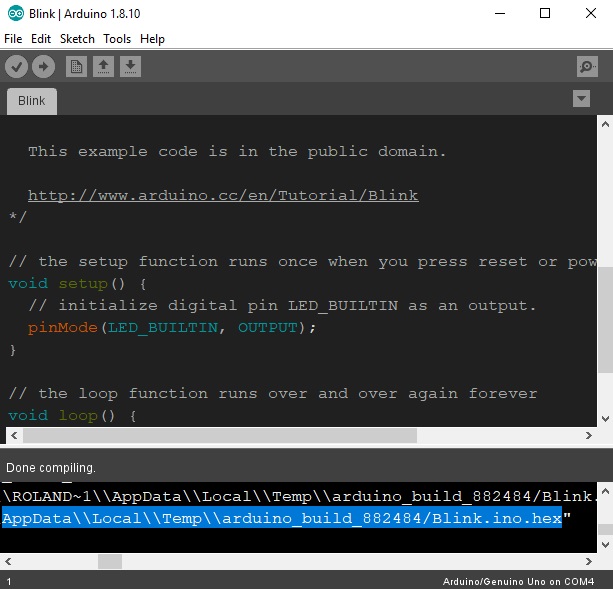
This will show a lot more information during compilation, including the HEX file location of the sketch you are compiling! Here I am compiling the Blink example sketch which simply changes the state of pin 13.

Copy (CTRL+C) the location, double click on the Arduino Proteus model, and then paste to the Program field:

Step 4: Simulate
Finally, run the simulation and see the results!


