Arduino GPRS Tutorial

Connecting your Arduino project to the Internet is easy though WiFi and modules like the ESP8266 or a WiFi shield. Another option is to ditch wireless and use an Ethernet shield. But what if there’s no WiFi or network cable available? The solution would be to connect to the Internet via cellular data.
There are two ways to connect to the Internet via cellular data: GPRS (slower) or 3G (faster). For 3G, you’ll need the SIM5320A breakout board. This Arduino GPRS tutorial covers connecting to the Internet through the slower cellular data connection.
Introduction
GPRS is short for General Packet Radio Service and provides data rates of 56 to 114 kbit/second. It supports TCP/IP and thus can connect to the Internet albeit slower than WiFi or 3G (it is an older technology after all). Nonetheless, most networks still support it and is useful for IoT applications where large data throughput is not necessary.
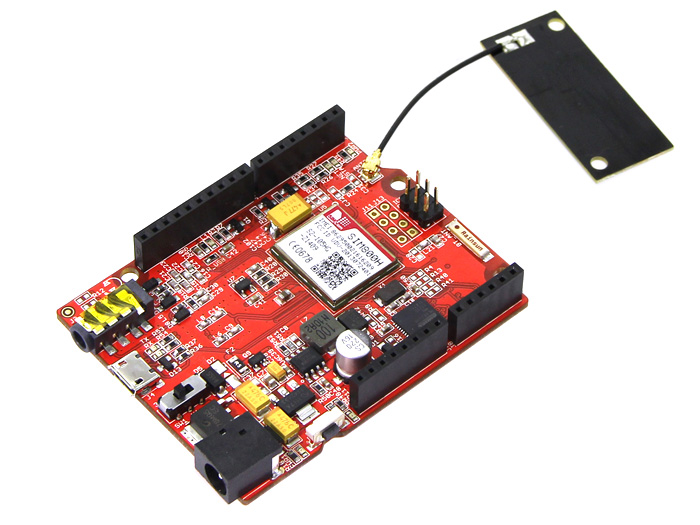
I’ll be using the SIM800H in this Arduino GPRS tutorial particularly this SIM800H GPRS Shield. You can also use a SIM900-based shield
if it is available to you. The primary difference between the SIM900 shields to the SIM800 shields is the latter has Bluetooth (3.0) and FM capabilities.
For texting and calling using the SIM800, I suggest you go to my SIM800 tutorial article.
AT Commands for GPRS
There are a set of AT Commands to be sent to the SIM800 in sequence to establish an Internet connection. Of course, your SIM card must be installed and have enough balance to connect to the Internet. You must also know the APN, username and password for your provider. I found this list for all the APN settings for different cellular networks across the globe.
[the_ad id="3059"]
Here is the sequence of AT commands for establishing a GPRS connection.
1. AT - this checks if your SIM800 modem is responsive. This should return “OK”.
2. AT+CPIN? – this checks if your SIM has a pin code. If you don’t need a PIN, this returns “READY”. If a PIN is required, this returns “SIM PIN”, “SIM PIN2”, “SIM PUK” or “SIM PUK2”. To enter the PIN, use AT+CPIN = “”. Example AT+CPIN = 1234. To set up a new PIN, use AT+CPIN=”<PIN>”,”<NEW PIN>”.
3. AT+CGATT? – this checks if the modem is attached to GPRS to a network. If the reply is AT+CGATT = 1 then it is attached. If AT+CGATT = 0, it is not attached. Do AT+CGATT = 1 to attach if unattached.
4. AT+CIPMUX = 0 – this sets the modem in single connection mode. This should return “OK”.
5. AT+CSTT = “<apn>”,”<username>”,”<password>” - this sets the APN settings for your network provider. For example, my settings would be AT+CSTT = “internet.globe.com.ph”, “”,””.
6. AT+CIICR – this starts the GPRS connection.
7. AT+CIFSR – this gives the IP address of the modem.
8. AT+CIPSTART = “TCP”,”<website>”,”<port>” – this establishes the connection to the server of the chose website. For example: AT+CIPSTART = “TCP”,”www.teachmemicro.com”,”80”. This should return “CONNECT OK”.
9. AT+CIPSEND – start sending server request with this. It would return “>” which is the sign that you should start sending the request. An example server request that gets the homepage of our website is GET / HTTP/1.0
10. You should end the request with CTRL+Z or ASCII 26. This signals the modem that the request is finished.
11. AT+CIPSHUT – this shuts down the GPRS connection. This returns “SHUT OK”.
You can test the commands above by wiring your SIM800 module to a USB-to-serial converter or use an Arduino as the USB-to-serial device.
Arduino GPRS Library
To make things easier, I’ve created a simple library that embeds the above AT commands to simple functions. Here are the functions of the library:
init(apn, uname, pword) //initialize GPRS connection
connTCP(ip, port) // connect to TCP
sendTCP(data) // sends the data via TCP
closeTCP() // shutsdown connection
Example Code
Here’s an example Arduino code for getting the homepage of this website via GPRS through SIM800H. For the code to work, your connection must be as follows:
- SIM800 TX -> D8
- SIM800 RX ->D7
- SIM800 POWER PIN -> D9
- SIM800 POWER STATUS -> D12
You must also provide your providers apn, username and password on lines 13, 14 and 15 below.
/*
Sketch: GPRS Connection Test

by R. Pelayo
Copyright (c) January 2018 Teach Me Micro

*/
#include <gprs800.h>
#include <SoftwareSerial.h>

char http_cmd[] = "GET / HTTP/1.0\r\n\r\n";       //server request
char website[] = "www.teachmemicro.com";          //website domain name or ip address
char apn[] = "internet.globe.com.ph";             //APN of your cellular network provider
char uname[] = "";								  //APN username
char pword[] = "";                                //APN password
int port = 80;                                    //connection port, usually 80 for HTTP

char buffer[512];

GPRS800 gprs;

void setup() {
  Serial.begin(9600);
  while(!Serial);
  Serial.println("GPRS HTTP Connection Example");
  Serial.print("Connecting via ");
  Serial.prinln(apn);

  while(!gprs.init(apn, uname, pword)) {
      delay(2000);
  }
  Serial.print("IP Address is ");
  Serial.println(gprs.getIPAddress());

  Serial.print("Initialization successful. Connecting to ");
  Serial.println(website);

  if(gprs.connectTCP(website, port)) {
      Serial.print("Connected to ");
      Serial.println(website);
  }else{
      Serial.println("Connection error");
      while(1);
  }

  Serial.println("Fetching server response");
  if(gprs.sendTCP(http_cmd))
  {
    gprs.showResponse();
  }
  gprs.closeTCP();

}

void loop() {

}
[the_ad id="3059"]
Upload the code to your Arduino GPRS circuit and open serial monitor. You should see the HTML of the home page of this website if successful. Feel free to fetch any other website by editing line 12 of the sketch above!
You can download the library on my repository.
Now you can connect to the Internet through a cellular network! In my next tutorial, I will use 3G instead of GPRS.


