
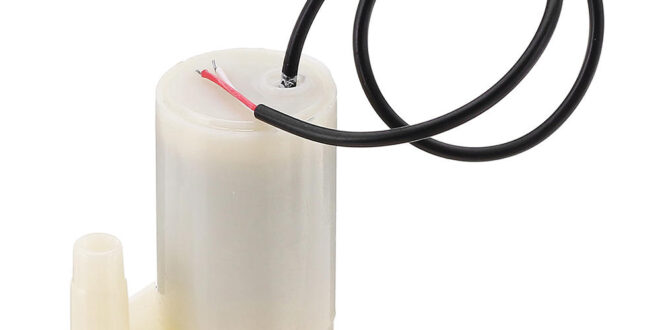
I recently bought a mini Arduino water pump that runs on 3 to 6 V. Since it consumes very little current (130 mA @ 3V according to its specs), it seems perfect to be used for small projects featuring the ESP8266. In this tutorial, I will share how I managed to create a WiFi-controlled mini water pump.
Mini Water Pump Specification
Here's some information about the pump:
- Operating Current : 130 ~ 220mA
- Flow Rate : 80 ~ 120 L/H
- Maximum Lift : 40 ~ 110 mm
- Continuous Working Life: 500 hours
- Driving Mode: DC, Magnetic Driving
- Material: Engineering Plastic
- Outlet Outside Diameter: 7.5 mm
- Outlet Inside Diameter : 5 mm
It is a submersible pump and should be used that way. It tends to heat too much that there's a risk of overheating if you turn it on unsubmerged.
Water Pump and WeMos D1 Mini Connection
The first thing I noticed is that it requires a wider tube pipe compared to the ones used by aquarium air pumps so I had to purchase one separately. The operating current also makes it impossible to connect the wires directly to one of the GPIO pins of the ESP8266 (which maxes out at 12 mA). So naturally, I had to design a way to turn on/off the pump with enough power for it.

Here I have a 2N7000 MOSFET switch triggered by a signal coming from the WeMos D1. With this, the power through the pump is from the external power supply and not from the WeMos D1.
Next, I created a WiFi server application so that I may able to control the pump through my smartphone. Basically, the WeMos D1 Mini broadcasts an access point and then I connect to that access point. I then visit an IP address using a web browser and there an interface is shown for controlling the water pump.
As of now, the only thing I can do is turn on or turn off the water pump. Inside this Arduino water pump is a motor so I may try to control it by using PWM. That would be an update in the days to come.
Full Sketch
Here's the full sketch for the WiFi server:
#include <ESP8266WiFi.h>
#include <WiFiClient.h>
#include <ESP8266WebServer.h>

const char* ssid = "Pump Controller";
const char* password = "12345678";

ESP8266WebServer server(80);

const int pump = 8;
static const String page PROGMEM = "<h1>Water Pump Controller</h1><p><a href=\"PumpOn\"><button>ON</button></a> <a href=\"PumpOff\"><button>OFF</button></a></p>";

void setup(void) {

  pinMode(pump, OUTPUT);
  digitalWrite(pump, 0);
  Serial.begin(115200);

  WiFi.softAP(ssid, password);
  Serial.println("");

  Serial.println(ssid);
  Serial.print("WiFi Server started at IP address: ");
  Serial.println(WiFi.softAPIP());


  server.on("/", [](){
    server.send(200, "text/html", page);
  });

  server.on("/PumpOn", [](){
    server.send(200, "text/html", page);
    digitalWrite(pump, HIGH);
    delay(1000);
  });

  server.on("/PumpOff", [](){
    server.send(200, "text/html", page);
    digitalWrite(pump, LOW);
    delay(1000);
  });

  server.begin();
  Serial.println("HTTP server started");
}

void loop(void) {
  server.handleClient();
}
The interface is just simple HTML but I'm planning more things for it in the future.

If you're interested in this project, updates will be made on its repository.


