
In the previous tutorial, we set up a soil moisture sensor and have its data readable via WiFi. However, that data is only accessible if the NodeMCU ESP8266 and the client (smartphone, PC, etc.) is in the same network. In this tutorial, we will use a service that allows us to read the data from the sensor from any device connected to the Internet.
The service I’m talking about is ThingSpeak by MathWorks. Most engineering students and professors might be familiar with MathWorks which is the same company behind MATLAB. ThingSpeak has already been featured in one of my projects. However, in that project, I used cellular data to connect to the Internet. This tutorial will use the WiFi connection through the ESP8266 NodeMCU.
Video Tutorial
Setting Up a ThingSpeak Account
ThingSpeak requires a MathWorks account for login. So before anything else, go to mathworks.com/mwaccount/register and provide the required information:

Make sure you can access the email you provided as it's required to verify your email:
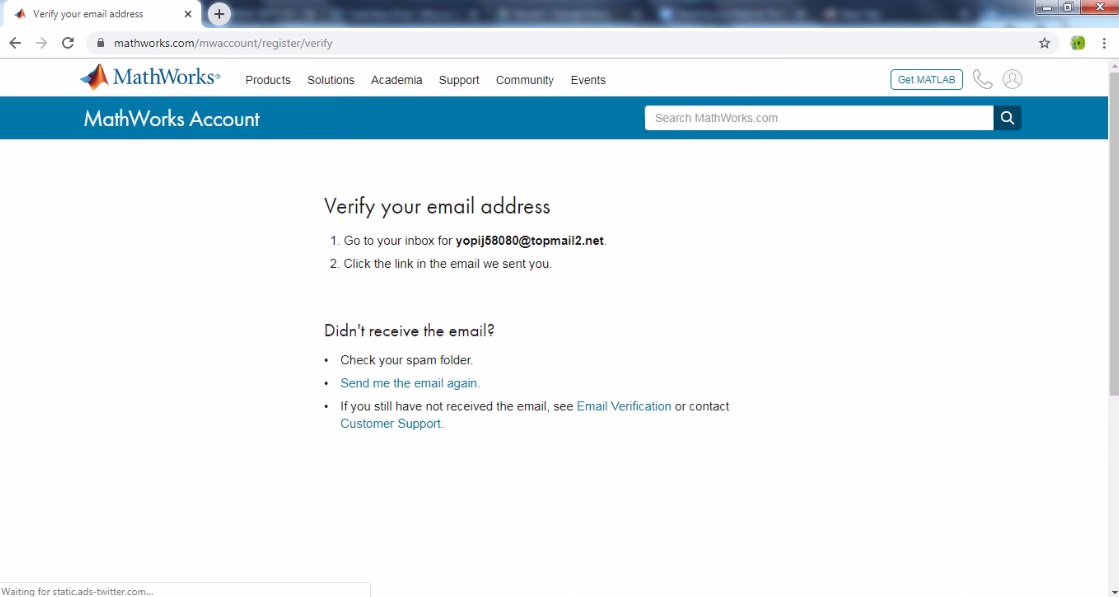
Open your email and click on the “verify” button. You will then be redirected to this page which asks for additional information:

If you or your university owns a licensed MATLAB software, you can enter the activation key or license number on the form shown:

If you don't have any MATLAB license, just skip this part. I haven't explored the benefits of adding a MATLAB license here but maybe your account gets upgraded.
After this, your MathWorks profile is now ready!
Creating a ThingSpeak Channel
Now that you have a MathWorks account, go to thingspeak.com/login:

Enter your MathWorks email and password to sign in. A pop-up window will appear. Select one of the options; the other field is optional.

You should now be in the "channels" page. ThingSpeak requires you to create a channel with up to 8 fields. Free users are limited to 4 channels and 255 characters per field.
Clicking the "New Channel" button directs you to this page:

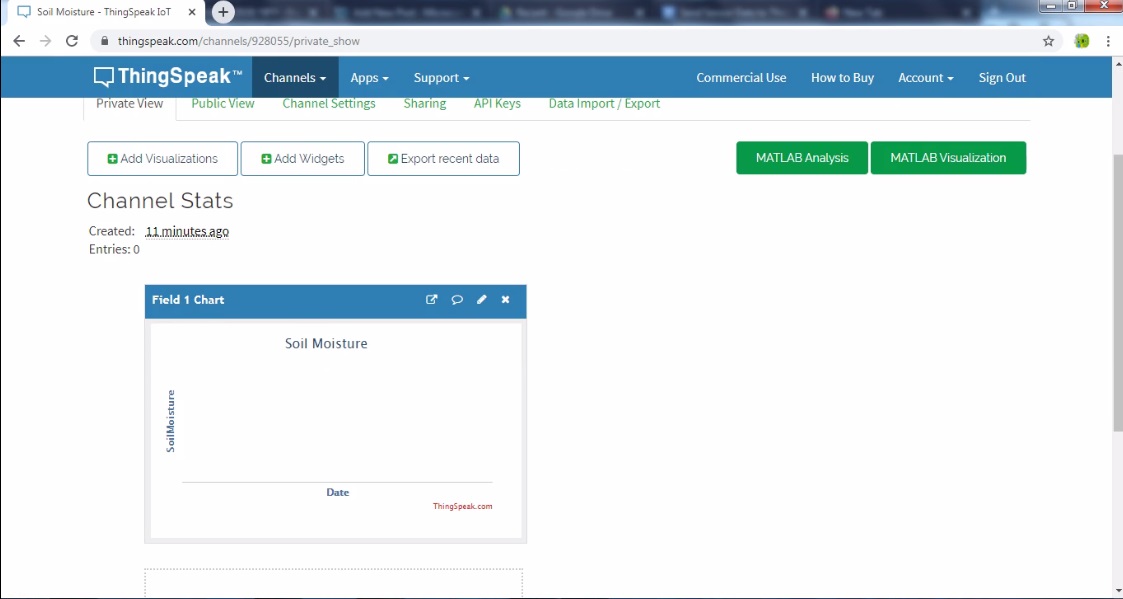
Here, I named my channel Soil Moisture, gave a brief description and named 1 field. After creating the channel, you’ll be on a page where you’ll see an empty time plot of your created field.
Updating the field requires simple HTTP GET requests. For free accounts, the field updates every 15 seconds.
Click the API Keys tab:
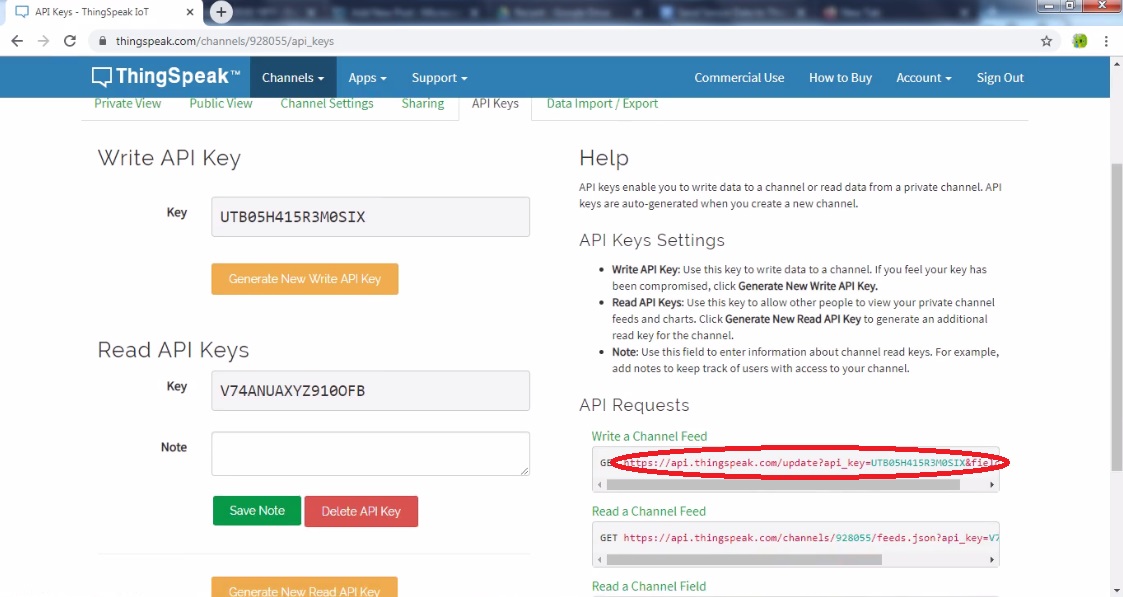
Here we can see the possible API requests. For example, to update the field SoilMoisture, I copy the URL https://api.thingspeak.com/update?api_key=UTB05H415R3M0SIX&field1=0
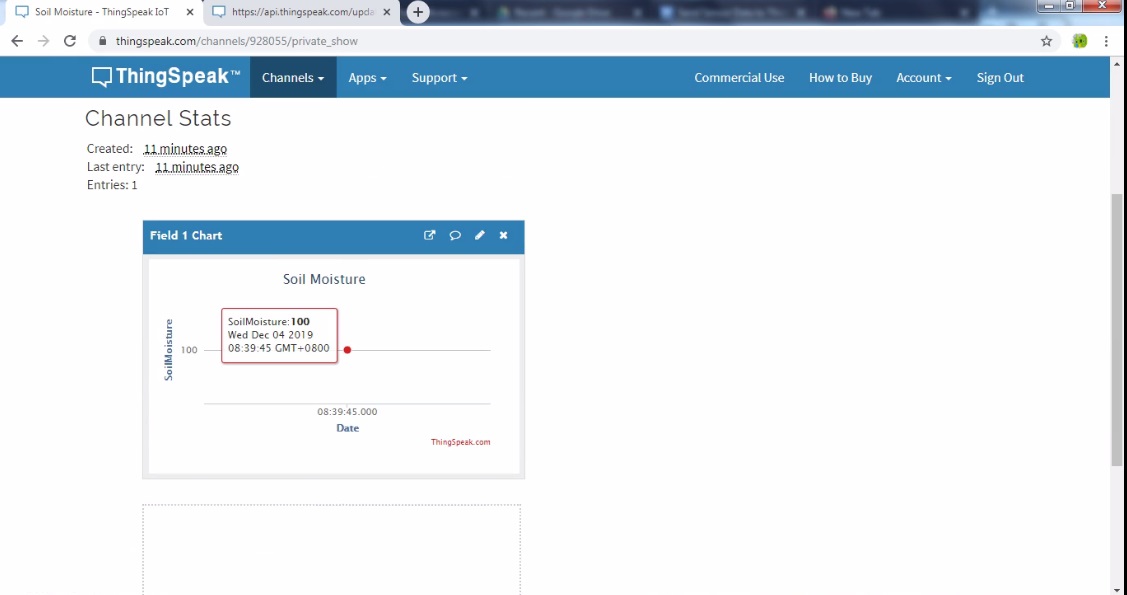
The last part of this URL is the updates to the SoilMoisture field. We can test this by copy-pasting the URL above to a browser and just change the last number to any number. Here, I changed the number to 100 and pressed enter:

The time plot on the “private view” tab now updates:
Uploading Sketch to NodeMCU
Now that we know how to send data to ThingSpeak through HTTP GET request, it’s time to create a sketch for the ESP8266 NodeMCU board.
Modify the sketch below at lines 5 & 6 to your own WiFi SSID and password. Also, modify line 9 to your own ThingSpeak API key.
#include <ESP8266WiFi.h>
#include <WiFiClient.h>
#include <ESP8266WebServer.h>

const char* ssid     = "your-ssid";
const char* password = "your-password";

const char* host = "api.thingspeak.com";
const char* APIKey = "UTB05H415R3M0SIX";

void setup()
{
    Serial.begin(115200);
    delay(10);

    // We start by connecting to a WiFi network

    Serial.println();
    Serial.println();
    Serial.print("Connecting to ");
    Serial.println(ssid);

    WiFi.begin(ssid, password);

    while (WiFi.status() != WL_CONNECTED) {
        delay(500);
        Serial.print(".");
    }

    Serial.println("");
    Serial.println("WiFi connected");
    Serial.println("IP address: ");
    Serial.println(WiFi.localIP());
}

int value = 0;

void loop()
{
    delay(5000);
    value = analogRead(A0);

    Serial.print("connecting to ");
    Serial.println(host);

    // Use WiFiClient class to create TCP connections
    WiFiClient client;
    const int httpPort = 80;
    if (!client.connect(host, httpPort)) {
        Serial.println("connection failed");
        return;
    }

    // We now create a URI for the request
    String url = "/update";
    url += "?api_key=";
    url += APIKey;
    url += "&field1=";
    url += value;

    Serial.print("Requesting URL: ");
    Serial.println(url);

    // This will send the request to the server
    client.print(String("GET ") + url + " HTTP/1.1\r\n" +
                 "Host: " + host + "\r\n" +
                 "Connection: close\r\n\r\n");
    unsigned long timeout = millis();
    while (client.available() == 0) {
        if (millis() - timeout > 5000) {
            Serial.println(">>> Client Timeout !");
            client.stop();
            return;
        }
    }

    // Read all the lines of the reply from server and print them to Serial
    while(client.available()) {
        String line = client.readStringUntil('\r');
        Serial.print(line);
    }

    Serial.println();
    Serial.println("closing connection");
}
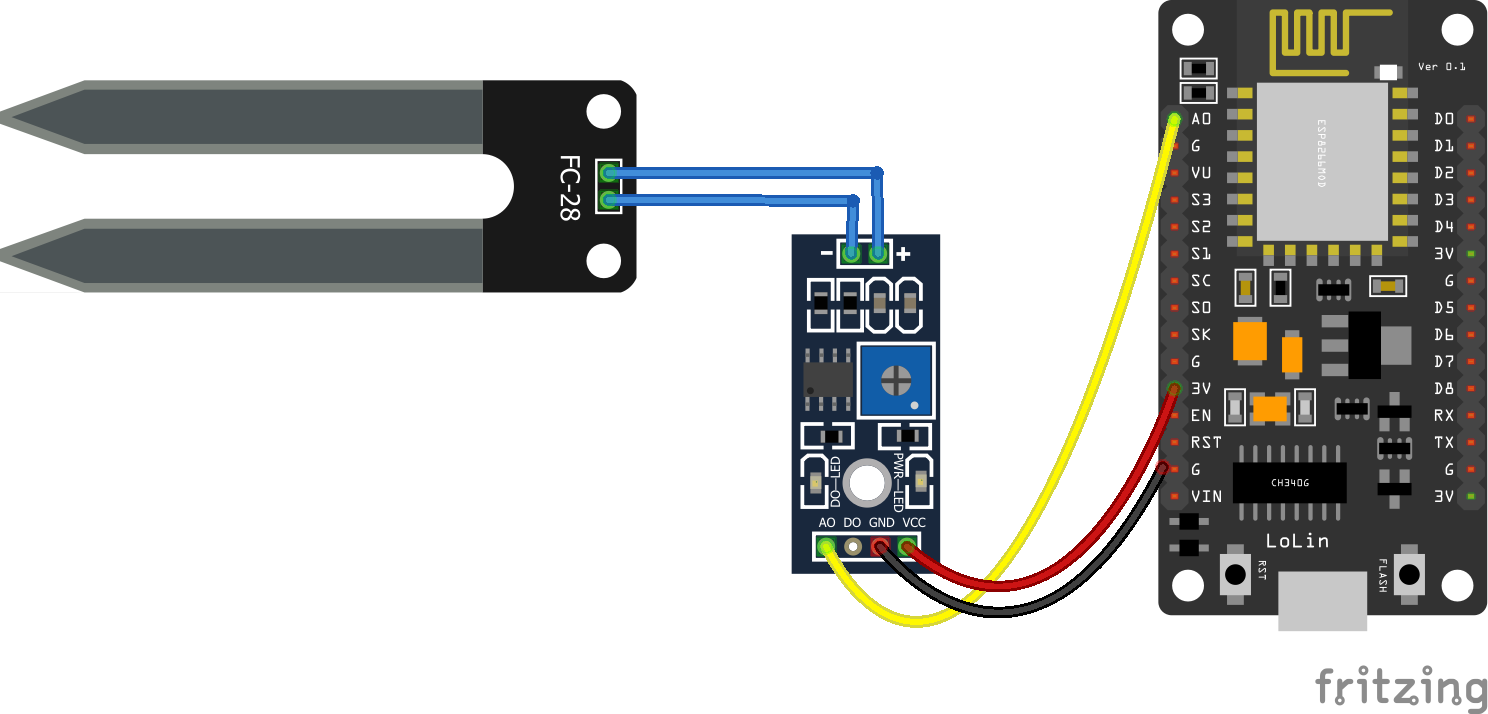
This sketch sends reading from the sensor with about 5 seconds interval. The sensor, from the previous tutorial, connects to the A0 pin of the NodeMCU.
The graph on the ThingSpeak private view now updates regularly (see video for output).
For the next part of this tutorial, we will embed the data from ThingSpeak to a website.


