
I’ve already covered the basics of how a PIR motion sensor work on my previous tutorial. DFRobot was kind enough to send me a free sample of their PIR motion sensor. So naturally, I got to play with and write about it today.
Two of a Kind
It turns out, DFRobot offers two kinds of PIR sensors. One is named “PIR Motion Sensor” and looks like this:

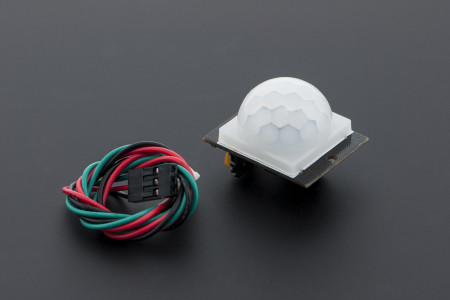
While the other one is named “Digital Infrared Motion Sensor” and looks like this:
DFRobot sent me the latter module.

PIR vs. Digital Motion
So what’s the difference between these two? First would be the size of the dome and consequently, the angle of coverage. The official wiki for both these devices list 100 degrees for the “PIR Motion Sensor” while 110 degrees for the “Digital Motion Sensor”.
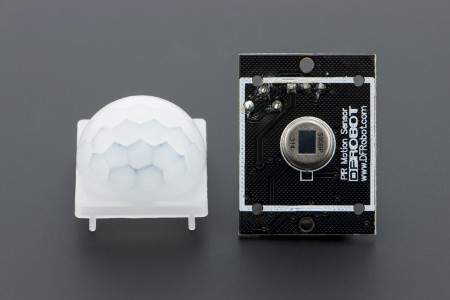
As per my previous tutorial, the dome is a Fresnel lens that concentrates all infrared signals to the center, where the IR receiver is located:
The wider the lens, the larger the area of coverage should be. Now considering the significant difference between the size of the first lens to the second lens, I doubt the 10 degree difference in detection angle.
The second difference between modules is power consumption. The smaller “PIR sensor” consumes 15 uA while the “Digital Infrared Sensor” consumes 50 uA. This is no surprise since the latter has a larger sensor compared to the former. Btw, both can operate at 3 to 5 V.
The third and last difference between modules is function. The PIR sensor simply detects presence and non-presence: the output pin goes high when a warm body is detected within the coverage area. Meanwhile, the Digital Motion sensor includes a jumper for choosing between repeatable and unrepeatable trigger which I covered in my last tutorial. The latter module also contains a potentiometer for adjusting the trigger latency.
Using the Motion Sensor with Arduino
Anyhow, using the Digital Infrared Sensor is quite easy. Here is one way to connect the module to your Arduino UNO:
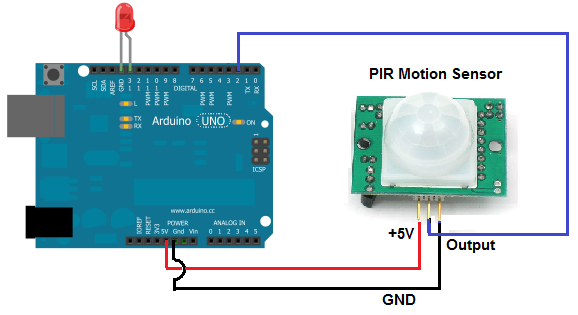
int pirPin = 2; // Input for PIR sensor
int pirVal; // Place to store read PIR Value

void setup() {
   Serial.begin(9600);
   pinMode(pirPin, INPUT);
}

void loop() {
  pirVal = digitalRead(pirPin);
  if(pirVal){
    Serial.println(“Motion detected!”);
    delay(3000);                                //wait for three seconds
  }
}
I hope I’ve helped you today in how to use DFRobot’s Digital Motion Sensor. Please subscribe to this blog to get automatic updates everytime I write a new post. Happy building!


