
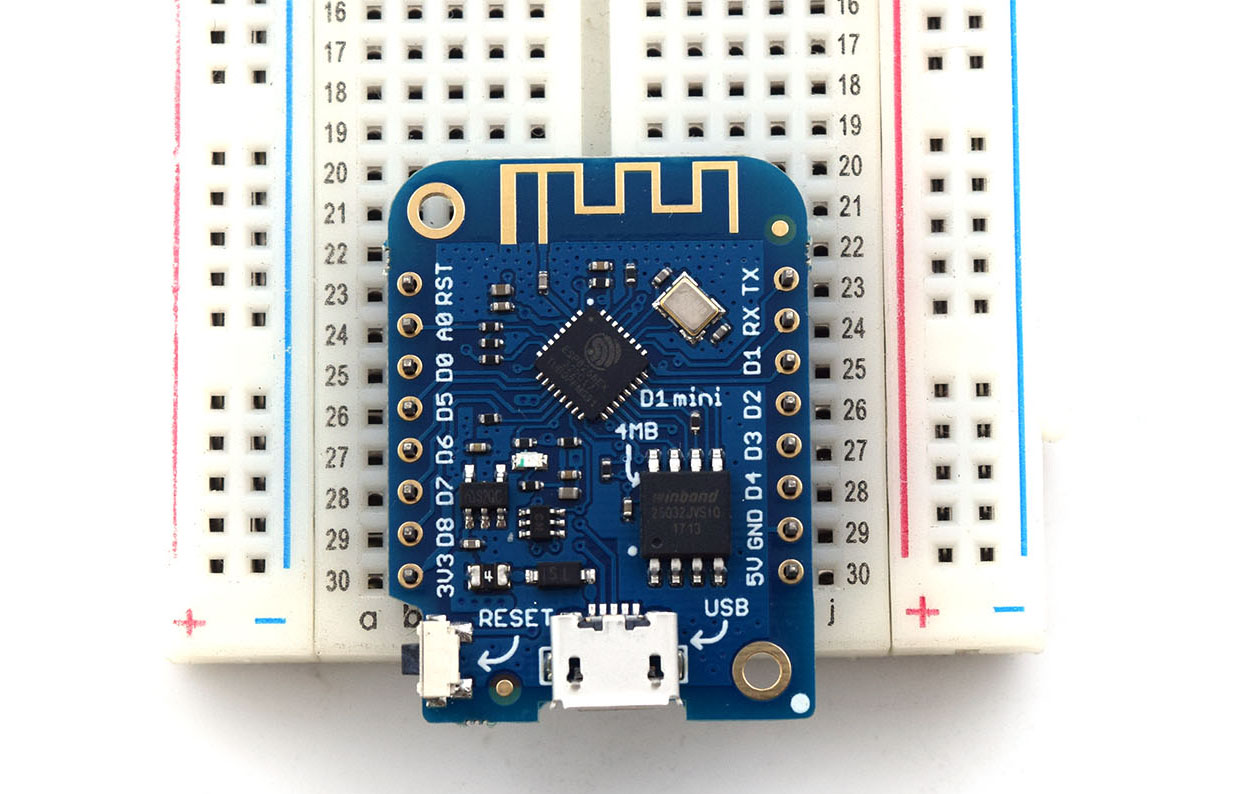
The WeMos D1 Mini is part of the WeMos D1 family of development boards that feature the popular ESP8266 WiFi chip. If you have just purchased this board, then you’re on the right page. This WeMos D1 Mini tutorial will show how to start programming with this device.
WeMos D1 Mini Pinout
As far as pinout goes, the WeMos D1 Mini is very much like the NodeMCU, albeit smaller.
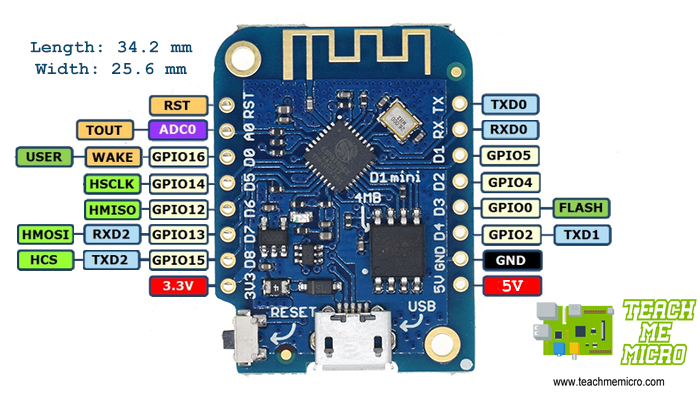
It has sixteen pins as shown and follows the same naming scheme as the NodeMCU. However, unlike the NodeMCU, it has one pin that can produce 5V. Moreover, each of the I/O pins run at 3.3V so if you want to use it with 5V devices, you need a level shifter.
Setting Up the Arduino IDE for the WeMos D1 Mini
To program this board, we must make the Arduino IDE recognize it. Download the latest Arduino IDE and install it on your computer. Once installed, fire up the IDE and go to File > Preferences.
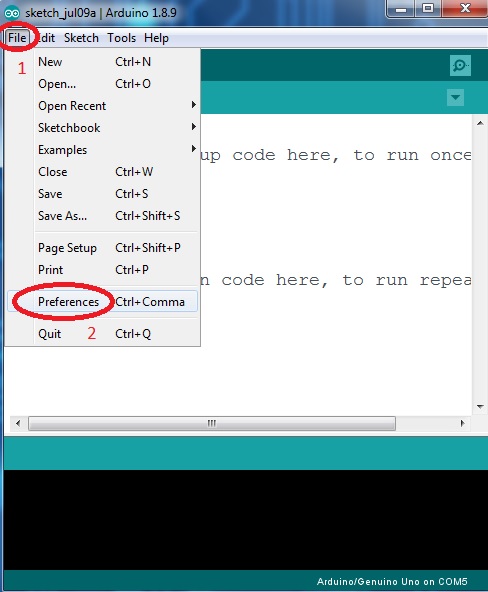
This will bring up the Preferences window. On the Additional Boards Manager URLs field, paste this:
https://arduino.esp8266.com/stable/package_esp8266com_index.json
Press OK to close the window.

The json file will give the IDE information about the WeMos D1 Mini and other ESP8266-based boards.
Next, go to Tools > Board > Boards Manager.. to open up the Board Manager window.
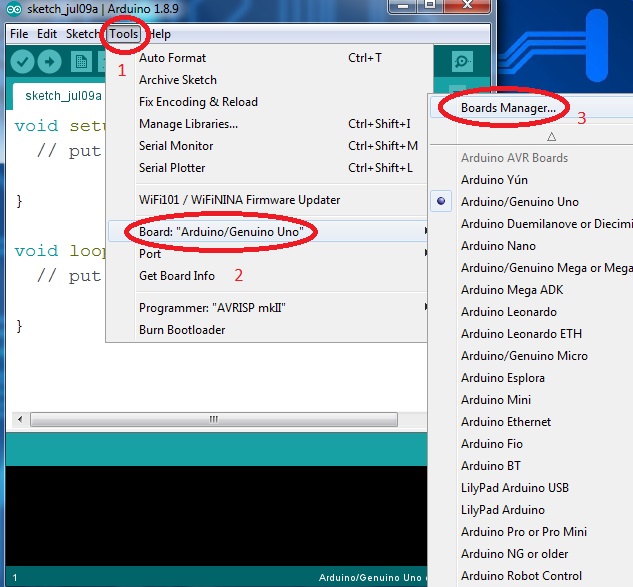
On the search field, type ESP8266 and one result should appear. Click the install button on the lower right.
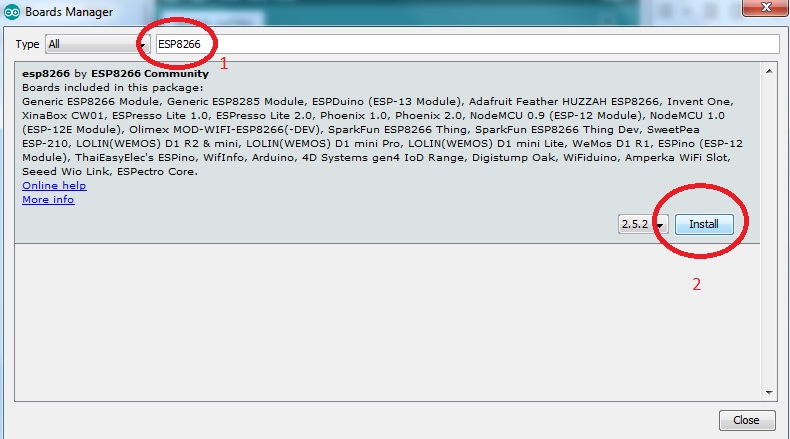
Wait for the download to finish. After that, you can now use the Arduino IDE to program the WeMos D1 Mini.
Connecting the WeMos D1 Mini
With a microUSB cable, connect the WeMos D1 Mini to your computer then select the correct board on Tools > Board:
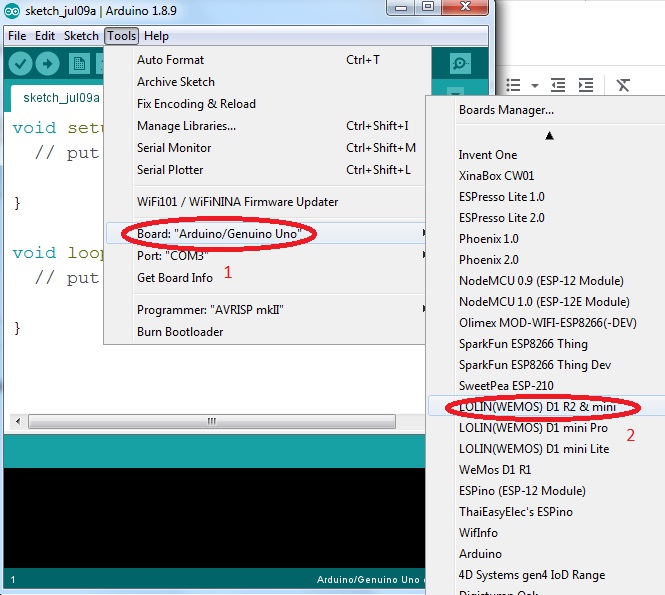 Also, make sure you select the correct COM Port:

We may not have the same COM port designation. If there’s nothing else connected to your computer, then only one COM port should appear if you connect the board to a USB port.
If your computer fails to detect your board, you might need to install the CH340 driver.
An Example Sketch
We will use a program that flashes the on-board LED to test if the board works,. This is the same blink program included in the IDE so you might as well go to File > Examples > 01. Basics > Blink.
void setup() {
  // initialize digital pin LED_BUILTIN as an output.
  pinMode(LED_BUILTIN, OUTPUT);
}

// the loop function runs over and over again forever
void loop() {
  digitalWrite(LED_BUILTIN, HIGH);   // turn the LED on (HIGH is the voltage level)
  delay(1000);                       // wait for a second
  digitalWrite(LED_BUILTIN, LOW);    // turn the LED off by making the voltage LOW
  delay(1000);                       // wait for a second
}
Upload the sketch then watch the blue LED blink!
Since this board is very similar to the NodeMCU, you can try out the sketches in my other tutorials featuring the NodeMCU. I have also a tutorial on creating a WiFi server with the WeMos D1 Mini.
What projects will you create using this WiFi board? If you find this WeMos D1 Mini tutorial helpful, kindly drop a comment below!


good job thank you very much
Finally a clear description for a noob like me. Thank you very much.
Very clear and price guide. Thank you.
* precise guide