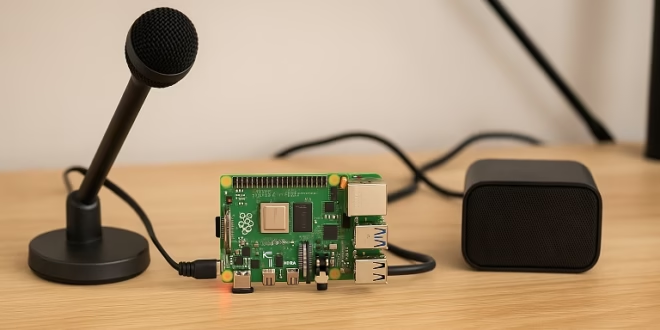
In this tutorial, I’m going to walk you through how I built my own voice assistant—similar to Alexa or Google Home—using only a Raspberry Pi 5, a USB microphone, a speaker, and an LLM with text-to-speech (TTS) and speech-to-text (STT) support.
By the end of this guide, you’ll have a Raspberry-Pi-powered device that:
- Listens for your voice
- Converts your speech into text
- Sends that text to an LLM
- Converts the LLM’s response into natural speech
- Speaks it aloud
It feels surprisingly close to a commercial smart assistant—just without the Amazon ecosystem behind it.
Why I Chose Raspberry Pi 5 for My Voice Assistant
The Raspberry Pi 5 is powerful enough to handle:
- Live audio recording
- Streaming data to an LLM
- Playing back voice responses
- Handling wake-word models like Porcupine
Its quad-core CPU and USB 3.0 bandwidth make it perfect for a responsive, low-latency voice assistant.
What You Need
Hardware
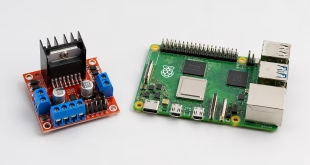
- Raspberry Pi 5 (4GB or 8GB recommended)
- USB microphone (Blue Snowball, Fifine, or any generic USB mic)
- Speakers or a USB sound card with speakers
- Raspberry Pi OS (Bookworm), fully updated
- Internet connection (Wi-Fi or Ethernet)
Software & APIs
- Python 3.11+ (pre-installed on Pi OS)
- OpenAI Realtime API (or any LLM with STT + TTS endpoints)
- Picovoice Porcupine (optional wake-word detection)
- Python libraries: sounddevice, pyaudio, websockets, requests
Step 1 — Updating My Raspberry Pi 5
I always begin by updating the Pi:
Then install required audio tools:
Step 2 — Setting Up My USB Microphone
I plugged in my mic and checked if the Pi detected it:
To test recording:
If I heard my voice, the microphone and speaker were good to go.
Step 3 — Installing Python Libraries
I installed everything I needed for recording audio, playing audio, and talking to the LLM:
If I planned to add a wake word:
Step 4 — Setting Up the LLM (OpenAI Realtime)
To get real-time conversational audio, I used the OpenAI Realtime WebSocket endpoint.
This gives me:
- Streaming speech-to-text
- Streaming conversation
- Streaming text-to-speech
All in one pipeline.
I simply created an API key in my OpenAI account and stored it:
Step 5 — Creating My Simple Push-to-Talk Voice Assistant (MVP)
Before getting fancy with wake words, I built a press-Enter-to-talk version.
This script:
- Records my voice
- Sends audio to Whisper STT
- Sends text to an LLM
- Converts reply text to speech
- Plays the audio
Create the file:
Paste this:
Run it:
I now had a functional voice AI that:
- Listens when I press Enter
- Understands what I say
- Responds using natural speech
Step 6 — Adding Wake-Word Detection (Optional Upgrade)
To get that Alexa-like "always listening" experience, I added Porcupine.
Install the engine:
I then created a second script,
wake_assistant.py- Continuously listens for the wake word (e.g., “Jarvis”)
- When triggered, runs the same record → STT → LLM → TTS pipeline
(Want me to include the full wake-word script? I can add it.)
Step 7 — (Optional) Using OpenAI Realtime for Streaming Audio
For true Alexa behavior—interrupting, barge-in, low latency—I can give you the Realtime WebSocket version too. It allows:
- Speaking to the Pi without waiting for a stop signal
- The LLM to start responding while I'm still talking
- Beautifully fluid conversation
Just tell me if you want the full Realtime streaming version.
Step 8 — Autostarting My Voice Assistant on Boot
I made my AI device boot straight into “always listening” mode using systemd:
Service file:
Enable it:
Now my Pi automatically behaves like a smart speaker.
Final Thoughts
Building my own Alexa-style voice assistant on the Raspberry Pi 5 turned out to be:
- Easier than expected
- Surprisingly powerful
- Fully customizable
- Not locked into any ecosystem
I can choose any wake word, any personality, any LLM, and I fully own the device.
If you want to extend this project, here are ideas:
- Add home automation (MQTT, Home Assistant)
- Display responses on a small touchscreen
- Allow multi-room audio
- Build a custom housing with 3D printing
- Add LED rings like Alexa Echo
")
")
")