
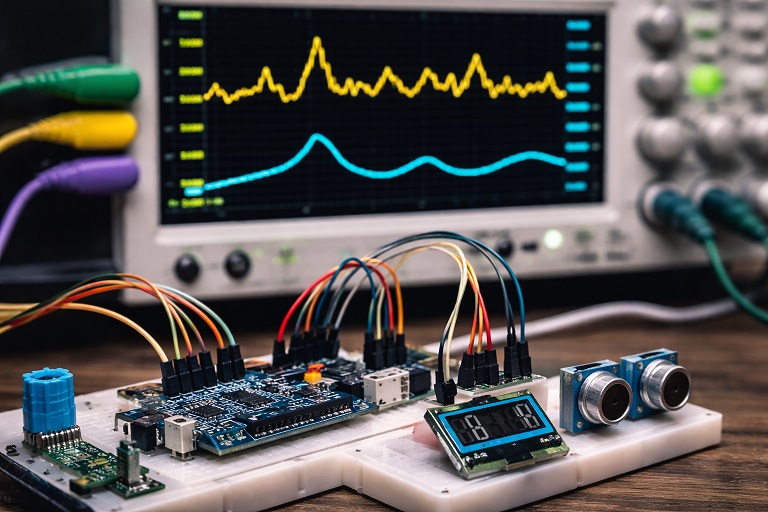
When I first started working with sensors, I expected clean, stable readings. Instead, what I got were values jumping all over the place. A temperature sensor would fluctuate ±2°C, an ADC reading would jitter constantly, and analog signals were almost unusable without processing.
That’s when I realized: raw sensor data is almost always noisy.
In this article, I’ll walk you through how I handle sensor noise—from the simplest filtering methods to more advanced techniques—and then I’ll give you a reusable filtering library you can drop into your projects.
Why Sensor Readings Are Noisy
Before filtering, it’s important to understand why noise exists:
- Electrical noise (power supply, EMI)
- ADC quantization errors
- Sensor imperfections
- Environmental interference
For example, even a simple potentiometer read using:
int value = analogRead(A0);
…will fluctuate slightly even if you don’t touch it.
1. The Simplest Filter: Delay-Based Stabilization
The most basic approach I used early on was just adding a delay:
int read_sensor()
{
   delay(10);
   return analogRead(A0);
}
This kind of works, but it doesn’t actually filter noise—it just slows things down. I don’t recommend relying on this except for quick tests.
2. Moving Average Filter
This is the first real filter I use in almost every project.
Idea:
Take multiple samples and average them.
Example:
#define NUM_SAMPLES 10

int moving_average_read()
{
   long sum = 0;

   for (int i = 0; i < NUM_SAMPLES; i++)
   {
      sum += analogRead(A0);
   }

   return sum / NUM_SAMPLES;
}
What it does:
- Smooths out random noise
- Reduces spikes
Tradeoff:
- Slower response (lag increases with more samples)
3. Running Average
Instead of recalculating everything, I use a running average.
#define NUM_SAMPLES 10

int samples[NUM_SAMPLES];
int index = 0;
long total = 0;

int running_average_read()
{
   total -= samples[index];
   samples[index] = analogRead(A0);
   total += samples[index];

   index = (index + 1) % NUM_SAMPLES;

   return total / NUM_SAMPLES;
}
Why I prefer this:
- Much faster
- Works continuously
- Great for real-time systems
4. Exponential Moving Average (EMA)
This is one of my favorite filters because it’s simple and powerful.
Formula:

Example:
float alpha = 0.1;

float filtered_value = 0;

float ema_filter(float new_value)
{
   filtered_value = alpha * new_value + (1 - alpha) * filtered_value;
   return filtered_value;
}
Tuning:
- alpha = 0.1 → very smooth, slow response
- alpha = 0.5 → faster response, less smoothing
When I use this:
- Analog sensors (light, temperature, force)
- Real-time systems where memory is limited
5. Median Filter
If your sensor occasionally gives crazy spikes, average filters won’t help much.
That’s where median filtering shines.
Example:
#define NUM_SAMPLES 5

int median_filter()
{
   int values[NUM_SAMPLES];

   for (int i = 0; i < NUM_SAMPLES; i++)
   {
     values[i] = analogRead(A0);
   }

   // simple sort
   for (int i = 0; i < NUM_SAMPLES - 1; i++)
   {
      for (int j = i + 1; j < NUM_SAMPLES; j++)
      {
         if (values[j] < values[i])
         {
           int temp = values[i];
           values[i] = values[j];
           values[j] = temp;
         }
      }
   }

   return values[NUM_SAMPLES / 2];
}
Why this works:
- Ignores outliers completely
- Perfect for noisy environments
6. Combining Filters
In real projects, I rarely use just one filter.
A common combo I use:
Median filter → remove spikes
EMA → smooth the result
This gives:
- Clean signal
- Fast response
- Good stability
7. Kalman Filter
When I first heard about Kalman filters, I thought they were only for aerospace or robotics. But once I simplified it, I realized:
A Kalman filter is just a smart way of combining prediction and measurement.
How It Works (Intuition First)
Unlike the previous filters, Kalman doesn’t just smooth data.
It does two things every cycle:
1. Predict
It estimates what the next value should be based on previous data.
2. Update
It corrects that prediction using the actual sensor reading.
Key Idea
Instead of blindly trusting the sensor:
If the sensor is noisy → trust prediction more
If the sensor is stable → trust measurement more
The filter automatically balances both
Simplified Model
We track two things:
- Estimated value
- Estimated uncertainty
Each update adjusts both.
Simple 1D Kalman Filter Code
This version is perfect for embedded systems (no matrices).
typedef struct
{
   float estimate;
   float error_estimate;
   float error_measure;
   float q; // process noise
} kalman_t;

void kalman_init(kalman_t *k, float mea_e, float est_e, float q)
{
   k->error_measure = mea_e;
   k->error_estimate = est_e;
   k->q = q;
   k->estimate = 0;
}

float kalman_update(kalman_t *k, float measurement)
{
   // Kalman gain
   float kalman_gain = k->error_estimate /
   (k->error_estimate + k->error_measure);

   // Update estimate
   k->estimate = k->estimate +
   kalman_gain * (measurement - k->estimate);

   // Update error estimate
   k->error_estimate = (1 - kalman_gain) * k->error_estimate +
   fabs(k->estimate - measurement) * k->q;

   return k->estimate;
}
What’s Happening Internally
Let’s break it down simply:
Kalman Gain

- High K → trust measurement more
- Low K → trust prediction more
Update Step

This is basically:
- Take old estimate
- Move it toward the new measurement
- Amount depends on K
Example
Sensor readings:
10, 11, 50, 12, 11
Kalman output:
10 → 10.5 → 11 → 11.5 → 11.3
Notice:
- The spike (50) is heavily reduced
- Response is faster than moving average
When I Use Kalman Filter
I use it when:
- Sensor is noisy but needs fast response
- Combining sensors (e.g., IMU)
- Precision matters (robotics, control systems)
When NOT to Use It
Avoid Kalman if:
- Simple EMA already works
- You don’t want to tune parameters
- System is very resource-constrained
Practical Example: Temperature Sensor
Let’s say I’m reading a temperature sensor:
Raw: 25.1, 25.3, 24.9, 26.5, 25.0
That 26.5 is likely noise.
After median filter: 25.1, 25.3, 25.0, 25.0, 25.0
After EMA: 25.0 → 25.05 → 25.08 → stable
Now the data is usable.
A Reusable Filtering Library
Here’s a simple library I use across projects.
//filter.h

#ifndef FILTER_H
#define FILTER_H

typedef struct
{
   float alpha;
   float value;
} ema_filter_t;

void ema_init(ema_filter_t *f, float alpha);
float ema_update(ema_filter_t *f, float input);

#endif

//filter.c
#include "filter.h"

void ema_init(ema_filter_t *f, float alpha)
{
   f->alpha = alpha;
   f->value = 0;
}

float ema_update(ema_filter_t *f, float input)
{
   f->value = f->alpha * input + (1 - f->alpha) * f->value;
   return f->value;
}
Example Usage
#include "filter.h"

ema_filter_t temp_filter;

void setup()
{
   Serial.begin(9600);
   ema_init(&temp_filter, 0.1);
}

void loop()
{
   float raw = analogRead(A0);
   float filtered = ema_update(&temp_filter, raw);

   Serial.print("Raw: ");
   Serial.print(raw);
   Serial.print(" Filtered: ");
   Serial.println(filtered);

   delay(100);
}
Choosing the Right Filter
Here’s how I usually decide:
| Situation | Filter |
|---|---|
| Random noise | Moving Average/EMA |
| Fast system | EMA |
| Spikes/outliers | Median |
| High precision | Combine filters |
Final Thoughts
If there’s one thing I’ve learned, it’s this:
Filtering is not optional—it’s part of reading a sensor.
The difference between a “working” project and a “reliable” one often comes down to how well you handle noise.
")


