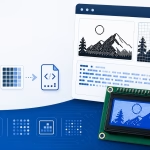
Color TFT displays usually cannot draw PNG, JPG, or other desktop image formats directly from a C or C++ program. Before an image can be displayed, its pixels often need to be converted into the color format expected by the display controller or graphics library.
This online RGB565 image converter turns an uploaded image into a 16-bit C or C++ array. It converts every pixel into an RGB565 value that can be used with Arduino, ESP32, STM32, RP2040, and other embedded systems driving color TFT displays.
You can resize the image, preview the converted colors, edit pixels, select the required byte order, check the resulting memory usage, and copy the generated uint16_t array into your project.
Example: const uint8_t icon[] = { 0x18, 0x3C, 0x7E };
What Is RGB565?
RGB565 is a 16-bit color format commonly used by embedded displays. It stores the red, green, and blue components of one pixel inside a single 16-bit value.
The 16 bits are divided as follows:
- 5 bits for red
- 6 bits for green
- 5 bits for blue
The bit arrangement is:
RRRRRGGG GGGBBBBBGreen receives six bits because the human eye is generally more sensitive to changes in green than to similar changes in red or blue.
RGB565 can represent:

This is fewer than the millions of colors available in a normal 24-bit PNG or JPG image, but RGB565 requires only two bytes per pixel and is well suited to microcontrollers and display interfaces.
What Does the RGB565 Converter Generate?
The converter produces one 16-bit hexadecimal value for every pixel in the image.
A small output array may look like this:
#include <stdint.h>

#define IMAGE_WIDTH  4
#define IMAGE_HEIGHT 2

const uint16_t image_data[] = {
    0xF800, 0x07E0, 0x001F, 0xFFFF,
    0x0000, 0xFFE0, 0xF81F, 0x07FF
};
In this example:
- 0xF800 is red
- 0x07E0 is green
- 0x001F is blue
- 0xFFFF is white
- 0x0000 is black
- 0xFFE0 is yellow
- 0xF81F is magenta
- 0x07FF is cyan
The generated values use four hexadecimal digits so leading zeros are preserved.
How to Convert an Image to RGB565
1. Enter the Image Dimensions
Set the width and height required by your display project. The image can use the complete display resolution or occupy only part of the screen.
For example, a 240 × 320 TFT display might use:
- A 240 × 320 full-screen background
- A 120 × 60 logo
- A 48 × 48 application icon
- A 24 × 24 status symbol
- A narrow button or menu graphic
Large RGB565 images require considerably more storage than monochrome bitmaps. Use the smallest practical dimensions for icons and interface elements.
2. Upload the Source Image
Upload a PNG, JPG, logo, icon, photograph, or other supported image. The converter resizes the source to the selected output dimensions and converts each pixel to RGB565.
Use a source image with an aspect ratio close to the target dimensions. Stretching a square image into a wide rectangle, for example, will distort the result.
3. Review the Color Preview
Inspect the converted image before generating the array. RGB565 uses fewer color levels than the original image, so gradients may show visible steps or color banding.
Small differences between similar colors may also disappear during conversion. This is a normal result of reducing 24-bit color to 16-bit color.
4. Edit Individual Pixels
Use the pixel editor to correct colors, clean up icon edges, or remove artifacts introduced during resizing.
Manual editing is especially useful for:
- Small application icons
- Pixel-art graphics
- Button symbols
- Status indicators
- Low-resolution logos
5. Select the Required Byte Order
Some display libraries accept a 16-bit RGB565 array directly, while others expect the two bytes of every pixel in a particular order.
Check whether your target expects:
- A 16-bit host-order value
- High byte first
- Low byte first
- Byte-swapped RGB565 data
The colors may appear incorrect if the byte order does not match the display driver.
6. Generate the RGB565 Array
Click Generate after confirming the image dimensions, colors, and byte order. Copy the generated array into your C or C++ project.
How RGB888 Is Converted to RGB565
Most uploaded images use 8 bits for each color channel:
- Red: 0 to 255
- Green: 0 to 255
- Blue: 0 to 255
RGB565 reduces red and blue to five bits and green to six bits.
The conversion can be performed using:
uint16_t rgb565 =
    ((red   & 0xF8) << 8) |
    ((green & 0xFC) << 3) |
    (blue >> 3);
This discards the least significant bits that cannot fit into the 16-bit output.
The individual components can also be viewed as:


The final value is:

Common RGB565 Color Values
| Color | RGB888 | RGB565 |
|---|---|---|
| Black | #000000 | 0x0000 |
| White | #FFFFFF | 0xFFFF |
| Red | #FF0000 | 0xF800 |
| Green | #00FF00 | 0x07E0 |
| Blue | #0000FF | 0x001F |
| Yellow | #FFFF00 | 0xFFE0 |
| Magenta | #FF00FF | 0xF81F |
| Cyan | #00FFFF | 0x07FF |
RGB565 Memory Usage
Every RGB565 pixel requires two bytes. The uncompressed image size is therefore:

A 16 × 16 icon requires:

A 32 × 32 icon requires:

A 128 × 128 image requires:

A 240 × 240 image requires:

A 320 × 240 full-screen image requires:

Large images may consume a substantial portion of the program flash on a small microcontroller. They may also exceed the available SRAM if copied into a runtime buffer.
RGB565 Versus Monochrome Bitmap Storage
A monochrome bitmap uses approximately one bit per pixel, while RGB565 uses 16 bits per pixel.
For a 128 × 64 image:
- Monochrome: 1,024 bytes
- RGB565: 16,384 bytes
The RGB565 version requires 16 times more storage because each pixel contains a complete 16-bit color value.
This difference is important when deciding whether to embed an image in firmware or load it from external storage.
Using the Array with TFT_eSPI
TFT_eSPI can draw RGB565 image arrays using functions such as pushImage().
A basic example is:
#include <TFT_eSPI.h>

TFT_eSPI tft = TFT_eSPI();

#define IMAGE_WIDTH  32
#define IMAGE_HEIGHT 32

const uint16_t image_data[] = {
    /* Generated RGB565 values */
};

void setup() {
    tft.init();
    tft.setRotation(1);
    tft.fillScreen(TFT_BLACK);

    tft.pushImage(
        20,
        20,
        IMAGE_WIDTH,
        IMAGE_HEIGHT,
        image_data
    );
}

void loop() {
}
The first two values passed to pushImage() are the X and Y coordinates. The following values are the image width, height, and array name.
Depending on the target processor, display configuration, and how the array is stored, byte swapping may be necessary.
Using Byte Swapping with TFT_eSPI
A common symptom of incorrect byte order is an image that has recognizable shapes but completely wrong colors.
TFT_eSPI provides a byte-swap setting that may be required when the source array and display transfer order differ:
tft.setSwapBytes(true);A typical drawing sequence is:
tft.setSwapBytes(true);

tft.pushImage(
    0,
    0,
    IMAGE_WIDTH,
    IMAGE_HEIGHT,
    image_data
);
Whether this should be enabled depends on how the RGB565 values were generated and how the selected platform transfers 16-bit pixel data.
If red, green, and blue appear correct, do not swap the bytes. If the colors are badly distorted, test the opposite byte-order setting.
Using the Array with Adafruit GFX TFT Libraries
Adafruit display libraries often provide drawRGBBitmap() for drawing RGB565 arrays.
A typical example is:
#include <Adafruit_GFX.h>
#include <Adafruit_ST7735.h>

#define TFT_CS   10
#define TFT_DC    9
#define TFT_RST   8

Adafruit_ST7735 tft =
    Adafruit_ST7735(TFT_CS, TFT_DC, TFT_RST);

#define IMAGE_WIDTH  32
#define IMAGE_HEIGHT 32

const uint16_t image_data[] PROGMEM = {
    /* Generated RGB565 values */
};

void setup() {
    tft.initR(INITR_BLACKTAB);
    tft.fillScreen(ST77XX_BLACK);

    tft.drawRGBBitmap(
        20,
        20,
        image_data,
        IMAGE_WIDTH,
        IMAGE_HEIGHT
    );
}

void loop() {
}
The exact initialization depends on the display controller and module. The bitmap array itself contains the RGB565 pixel values.
Using the Array with an STM32 Display Driver
In a generic embedded C project, the array can be passed to a display function that writes a rectangular pixel block:
#include <stdint.h>

void LCD_DrawRGB565Image(
    uint16_t x,
    uint16_t y,
    uint16_t width,
    uint16_t height,
    const uint16_t *pixels
);

LCD_DrawRGB565Image(
    0,
    0,
    IMAGE_WIDTH,
    IMAGE_HEIGHT,
    image_data
);
The implementation normally:
- Sets the display address window
- Starts a memory-write command
- Sends each RGB565 pixel
- Handles the byte order required by the bus
When using SPI, the high byte is commonly transmitted before the low byte, although the exact driver behavior should be confirmed.
Sending RGB565 Pixels over SPI
Suppose one pixel has the value:
0xF800This is pure red. Its two bytes are:
High byte: 0xF8
Low byte:  0x00
A display driver that expects high-byte-first transmission may use:
uint16_t color = image_data[index];

SPI_WriteByte((uint8_t)(color >> 8));
SPI_WriteByte((uint8_t)(color & 0xFF));
If the bytes are sent in the opposite order, the resulting color will be incorrect.
Big-Endian and Little-Endian RGB565 Output
Endianness describes how a multi-byte value is arranged in memory or transferred over an interface.
For the RGB565 value:
0xF800The bytes are:
0xF8 0x00High-byte-first output stores or sends:
0xF8, 0x00Low-byte-first output stores or sends:
0x00, 0xF8A uint16_t array expresses each pixel as a logical 16-bit value. Its physical byte order in memory depends on the processor architecture.
A raw uint8_t byte array, on the other hand, fixes the byte sequence explicitly.
Select the output style that matches the drawing function or display driver rather than choosing an order based only on the microcontroller’s CPU endianness.
Handling Transparent PNG Pixels
RGB565 does not contain an alpha channel. Every generated pixel must have a visible 16-bit color value.
When converting a PNG containing transparency, transparent pixels must therefore be handled in one of these ways:
- Replace them with a selected background color
- Replace them with a designated transparent-key color
- Create a separate one-bit transparency mask
- Skip them in custom drawing code
If using a transparent-key color, select a color that does not otherwise appear in the image.
For example, a drawing routine might treat magenta as transparent:
#define TRANSPARENT_COLOR 0xF81FThe code can then skip pixels matching that value:
uint16_t color = image_data[index];

if (color != TRANSPARENT_COLOR) {
    display_draw_pixel(x, y, color);
}
This method sacrifices one usable color and can accidentally remove real pixels if the source image also contains the selected key color.
Drawing an RGB565 Image with a Transparency Mask
A separate one-bit mask provides more reliable transparency. The RGB565 array stores the colors, while the mask identifies which pixels should be drawn.
const uint16_t icon_pixels[] = {
    /* RGB565 color data */
};

const uint8_t icon_mask[] = {
    /* One-bit transparency data */
};
The drawing routine reads both arrays:
for (uint16_t y = 0; y < ICON_HEIGHT; y++) {
    for (uint16_t x = 0; x < ICON_WIDTH; x++) {
        if (mask_get_pixel(icon_mask, ICON_WIDTH, x, y)) {
            const uint32_t index =
                ((uint32_t)y * ICON_WIDTH) + x;

            display_draw_pixel(
                x,
                y,
                icon_pixels[index]
            );
        }
    }
}
This uses additional storage but preserves all RGB565 color values.
Placing RGB565 Data in Flash Memory
Large color arrays should normally remain in flash memory rather than being copied into SRAM.
For Arduino projects, a declaration may use:
const uint16_t image_data[] PROGMEM = {
    /* Generated RGB565 values */
};
On AVR-based boards, manually reading a 16-bit flash value may require:
uint16_t color =
    pgm_read_word(&image_data[index]);
Many graphics libraries already handle program-memory access internally. Check the library documentation before reading the array manually.
On ARM, ESP32, and RP2040 platforms, constant arrays are commonly mapped into flash in a way that permits normal reads, although the exact behavior depends on the framework and linker configuration.
Using a Header and Source File
For large images, placing the array in a separate source file keeps the application code manageable.
The header can contain:
/* image_data.h */

#ifndef IMAGE_DATA_H
#define IMAGE_DATA_H

#include <stdint.h>

#define IMAGE_WIDTH  64
#define IMAGE_HEIGHT 64

extern const uint16_t image_data[];

#endif
The source file contains the actual data:
/* image_data.c */

#include "image_data.h"

const uint16_t image_data[] = {
    /* Generated RGB565 values */
};
This avoids defining the same large array in every source file that includes the header.
When to Use External Storage
Embedding images in firmware works well for icons, logos, buttons, and a small number of interface graphics. It becomes less practical when the project contains many large images.
Consider using external storage when:
- The images consume a large portion of program flash
- The graphics need to be changed without recompiling firmware
- The application uses photographs or full-screen backgrounds
- Several animation frames are required
- The device already contains a microSD card or external flash chip
Possible storage options include:
- MicroSD cards
- SPI flash memory
- QSPI flash
- LittleFS or SPIFFS on supported boards
- External EEPROM for very small assets
The application can store raw RGB565 files to avoid decoding PNG or JPG data at runtime.
Creating Raw RGB565 Files
A raw RGB565 file contains only sequential pixel data. It has no header describing the width, height, format, or byte order.
The application must already know:
- The image width
- The image height
- The byte order
- The row order
- The exact color format
Raw files are simple and fast to display, but they are not self-describing. Store the required metadata in the program or in a separate asset table.
Common RGB565 Problems
Red appears blue and blue appears red
The display or library may expect BGR565 instead of RGB565, or a color-order setting may be incorrect. Check the controller configuration and library setup.
The image shape is correct but the colors are wrong
This is often a byte-order problem. Enable or disable byte swapping, or generate the image using the opposite byte order.
The image is completely scrambled
The width, height, or pixel count passed to the drawing function may not match the generated array. Confirm that the array contains exactly:

pixel values.
The image is shifted one row at a time
The display function may expect additional row padding, or the supplied width may be incorrect. Standard RGB565 arrays normally contain exactly one 16-bit value for every pixel with no row padding.
The colors look dull or banded
RGB565 contains fewer shades than the original 24-bit image. Some loss of color detail and visible banding are expected, especially in smooth gradients.
Transparent parts become black
RGB565 has no alpha channel. Transparent source pixels must be replaced with a background color, a transparent-key color, or handled using a separate mask.
The program no longer fits in flash
The image may be too large. Reduce its dimensions, use fewer embedded images, store the asset externally, or apply compression with a suitable runtime decoder.
The board crashes after copying the image into a buffer
The image may exceed available SRAM. Draw directly from flash when possible, transfer the image in smaller blocks, or use external memory.
The compiler says the array is too large
Some small microcontrollers and compilers have restrictions on object size, address range, or flash access. Split the image, choose a smaller resolution, or move the asset to external storage.
Frequently Asked Questions
Can I convert a PNG to RGB565?
Yes. Upload the PNG, choose the required dimensions, inspect the converted colors, select the appropriate byte order, and generate the array.
Can I convert a JPG to RGB565?
Yes. The converter decodes the image in the browser and generates raw RGB565 pixel values. The resulting array does not contain JPG compression.
Does RGB565 support transparency?
No. RGB565 stores only red, green, and blue. Use a background color, transparent-key color, or separate transparency mask when alpha information is required.
Why are there six bits for green?
RGB565 assigns an additional bit to green because human vision is more sensitive to green detail. This generally produces better perceived color quality within 16 bits.
Can I use the generated array with an ESP32?
Yes. ESP32 graphics libraries such as TFT_eSPI and Adafruit GFX-based display drivers commonly accept RGB565 image data. Check whether byte swapping is required.
Can I use the output with STM32?
Yes. The generated uint16_t values can be sent using an STM32 display driver, DMA transfer, SPI interface, parallel bus, or framebuffer routine that expects RGB565 pixels.
Can I use the array with an ST7789 display?
Yes, provided the selected ST7789 library accepts RGB565 image data. Confirm the expected byte order and color-order configuration.
Can I use the array with an ILI9341 display?
Yes. Many ILI9341 libraries use RGB565 for pixel and image data. The required drawing function depends on the selected library.
Why does a full-screen RGB565 image use so much memory?
Every pixel requires two bytes. A 320 × 240 image therefore requires 153,600 bytes before any additional metadata or alignment.
Should I store the image as uint16_t or uint8_t?
Use uint16_t when the graphics library accepts logical RGB565 pixel values. Use uint8_t when the driver expects an explicit high-byte-first or low-byte-first stream.
Can I animate several RGB565 arrays?
Yes, but full-screen frames consume large amounts of flash and bus bandwidth. Small sprites, partial-screen frames, external storage, or compressed animation formats are often more practical.
Is RGB565 the same as RGB555?
No. RGB555 uses five bits for each color and normally leaves one bit unused or assigns it another purpose. RGB565 gives green six bits and uses all 16 bits for color.
Conclusion
An RGB565 image converter allows you to prepare color graphics for microcontrollers and TFT displays without manually calculating every 16-bit pixel value. The generated array can be used for logos, icons, interface elements, backgrounds, and other embedded display assets.
Before adding the output to your project, confirm the image dimensions, color order, byte order, library requirements, and memory usage. A correctly generated RGB565 array should preserve the image layout while providing a compact two-byte representation of every pixel.