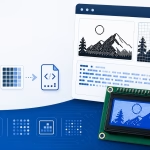
Microcontrollers normally cannot display a PNG, JPG, or other desktop image format directly. Before an image can be drawn on an LCD, OLED, LED matrix, or similar embedded display, its pixels often need to be converted into numerical data stored inside a C array.
This online image to C array converter turns an uploaded image into a portable C-compatible array. You can set the required dimensions, preview the converted bitmap, edit individual pixels, and copy the generated hexadecimal data into your embedded project.
The generic C output does not depend on Arduino-specific features such as PROGMEM. This makes it suitable for projects built with STM32, ESP32, PIC, AVR, RP2040, and other microcontrollers programmed in C or C++.
Example: const uint8_t icon[] = { 0x18, 0x3C, 0x7E };
What Is an Image to C Array Converter?
An image is normally stored as a collection of pixels. Each pixel contains information describing its brightness or color. Desktop image formats also contain headers, compression data, color profiles, and other information that a basic microcontroller display driver may not understand.
An image to C array converter removes that file-format structure and represents the useful pixel information as numbers. The resulting data can be declared directly inside a C source file or header file.
For example, a small monochrome bitmap may produce an array similar to this:
#include <stdint.h>

#define IMAGE_WIDTH  8
#define IMAGE_HEIGHT 8

const uint8_t image_data[] = {
    0x18, 0x3C, 0x7E, 0xDB,
    0xFF, 0x24, 0x5A, 0xA5
};
Each hexadecimal value represents one byte. A byte can store the state of eight monochrome pixels, although the exact pixel order depends on the selected orientation and bit-order settings.
How to Convert an Image to a C Array
1. Enter the Bitmap Dimensions
Set the width and height required by your project. These values describe the generated bitmap rather than necessarily describing the full physical display.
For example, a 128 × 64 OLED can display a full-screen 128 × 64 bitmap, but it can also display a smaller 16 × 16 icon or 32 × 20 logo.
2. Upload or Draw the Image
Upload an existing image or draw directly on the pixel grid. Simple logos, icons, symbols, and high-contrast graphics normally produce better results on monochrome displays.
After uploading the image, inspect how it looks at the selected resolution. Fine details in a large source image may disappear when it is reduced to a small bitmap.
3. Edit Individual Pixels
Use the editable grid to correct the converted result. You can add missing pixels, remove unwanted details, or clean up edges before generating the final C array.
This is especially useful when converting small icons, where changing only one or two pixels can make the image considerably easier to recognize.
4. Check the Output Format
The output summary shows the bitmap dimensions, byte orientation, bit order, and estimated storage size. Make sure these settings match the way your display driver expects to read bitmap data.
The generic C preset generates portable hexadecimal values using an 8-bit array. You can still adjust the available packing settings when your display controller requires a different order.
5. Generate and Copy the Array
Click Generate after the bitmap looks correct. Copy the resulting declaration into a C source file or header file in your project.
Keep the generated width and height values with the array. Your drawing routine needs these dimensions to locate each row and determine how many pixels should be displayed.
Understanding the Generated C Array
A typical generated bitmap contains three important parts:
- The image width
- The image height
- The array containing the packed pixel data
A generated declaration may look like this:
#include <stdint.h>

#define LOGO_WIDTH  16
#define LOGO_HEIGHT 8

const uint8_t logo_data[] = {
    0x0F, 0xF0,
    0x18, 0x18,
    0x30, 0x0C,
    0x67, 0xE6,
    0x67, 0xE6,
    0x30, 0x0C,
    0x18, 0x18,
    0x0F, 0xF0
};
In this example, the bitmap is 16 pixels wide. Because one byte contains eight bits, each row requires two bytes.
The interpretation of each bit depends on the selected bit order. In an MSB-first byte, the leftmost pixel is normally stored in bit 7. In an LSB-first byte, the leftmost pixel is normally stored in bit 0.
How Bitmap Pixels Are Packed into Bytes
For a horizontally packed monochrome bitmap, the converter groups every eight pixels into one byte. A dark or active pixel is normally represented by a 1, while an inactive pixel is represented by a 0. Some display drivers use the opposite convention, so an invert option may be required.
Consider this row of eight pixels:
0 1 1 0 1 0 0 1When interpreted from the most significant bit to the least significant bit, the binary value is:
01101001The equivalent hexadecimal value is:
0x69Reversing the bit order changes how the display driver interprets the same byte. Incorrect bit order can cause an image to appear mirrored within every eight-pixel group or otherwise scrambled.
Bitmap Widths That Are Not Multiples of Eight
A bitmap row does not need to be exactly 8, 16, 24, or 32 pixels wide. However, a partially filled final byte is still needed when the width is not divisible by eight.
The number of bytes required by each monochrome row is:

The total bitmap size is:

For example, a 13 × 7 bitmap uses two bytes per row:

The unused bits in the final byte of each row act as padding. Your drawing code should use the actual image width so those padding bits are not drawn as extra pixels.
Reading the Bitmap Array in C
The way you send the generated data to a display depends on its controller and driver library. The following example shows how a program can read one pixel from a horizontally packed, MSB-first bitmap:
#include <stddef.h>
#include <stdint.h>

uint8_t bitmap_get_pixel(
    const uint8_t *bitmap,
    uint16_t width,
    uint16_t x,
    uint16_t y
) {
    const size_t bytes_per_row = (width + 7u) / 8u;
    const size_t byte_index =
        ((size_t)y * bytes_per_row) + (x / 8u);

    const uint8_t bit_position = 7u - (x % 8u);

    return (bitmap[byte_index] >> bit_position) & 0x01u;
}
You can call this function while looping through the bitmap:
for (uint16_t y = 0; y < IMAGE_HEIGHT; y++) {
    for (uint16_t x = 0; x < IMAGE_WIDTH; x++) {
        if (bitmap_get_pixel(image_data, IMAGE_WIDTH, x, y)) {
            display_draw_pixel(x, y, 1);
        }
    }
}
The display_draw_pixel() function in this example is only a placeholder. Replace it with the pixel-drawing function provided by your LCD or graphics driver.
If you select LSB-first or vertical packing, the byte-reading logic must be changed accordingly. Always use the output summary as a reference for the selected layout.
How Much Memory Does an Image Use?
Bitmap arrays are normally stored in flash memory, although some applications copy them to RAM before drawing. Memory usage becomes important when working with small microcontrollers.
A full 128 × 64 monochrome image requires:

That is approximately 1 KB for one image. Several full-screen bitmaps can quickly consume a significant part of the program memory on a small MCU.
Smaller icons use much less storage. A 16 × 16 monochrome icon requires only:

The converter displays the calculated byte count before you copy the array, making it easier to decide whether an image is practical for the selected device.
C Source File or Header File?
Small projects sometimes place the entire generated array in a header file. However, placing a non-static array definition in a header included by several source files can produce duplicate-definition linker errors.
For larger projects, place the array definition in one C source file:
/* image_data.c */

#include <stdint.h>
#include "image_data.h"

const uint8_t image_data[] = {
    /* Generated bytes */
};
Then place only the declarations in the header:
/* image_data.h */

#ifndef IMAGE_DATA_H
#define IMAGE_DATA_H

#include <stdint.h>

#define IMAGE_WIDTH  16
#define IMAGE_HEIGHT 16

extern const uint8_t image_data[];

#endif
Any source file that needs the bitmap can include the header without creating another copy of the array.
Common Image-to-C-Array Problems
The image appears mirrored in groups of eight pixels
The selected bit order probably does not match the display driver. Switch between MSB-first and LSB-first output, or use the reverse-bits control.
The image is inverted
Your display driver may treat 0 as an active pixel and 1 as an inactive pixel. Use the invert option or invert the value when drawing each pixel.
Every row is shifted
This commonly happens when the drawing code assumes that the width is divisible by eight. Calculate the row size using the rounded-up number of bytes rather than using integer division alone.
The image looks stretched or distorted
The uploaded image may have a different aspect ratio from the target bitmap. Use dimensions that preserve the source image’s proportions, or edit the result manually after scaling.
The compiler reports that uint8_t is undefined
Include the standard integer header before declaring the array:
#include <stdint.h>The linker reports multiple definitions of the array
The full array may have been defined in a header included by several C files. Move the definition to one source file and use an extern declaration in the header.
Frequently Asked Questions
Can I convert a PNG or JPG image to a C array?
Yes. Upload the image, select the required bitmap dimensions, review the pixel-grid preview, and generate the array. Transparent pixels are converted according to the converter’s background and image-processing behavior.
Can I use the generated C array with an STM32 or PIC?
Yes. The generic output uses standard fixed-width C data types rather than Arduino-only declarations. You still need drawing code compatible with your specific display controller.
Does the C array include the original PNG or JPG compression?
No. The converter creates raw pixel or bitmap data. This is easier for a microcontroller to read, but it can require more storage than a compressed image file.
Why does the converted array differ between display libraries?
Display libraries do not all use the same byte orientation or bit order. Some store pixels horizontally, others organize them vertically, and some expect the first pixel in the most significant or least significant bit.
Should I use uint8_t or unsigned char?
Both commonly represent an 8-bit unsigned value on embedded C compilers. Using uint8_t makes the intended width explicit and is generally preferable when the compiler provides stdint.h.
Can this converter generate color arrays?
The generic C preset is intended mainly for byte-oriented bitmap data. For a color TFT project, use the RGB565 output target, which stores one 16-bit color value for each pixel.
Conclusion
Converting an image to a C array allows an embedded application to store graphics directly with the program and draw them without decoding a desktop image format. Use the converter to resize the image, correct individual pixels, select the required byte layout, and generate a portable array for your display driver.
Before adding the data to a project, confirm the bit order, byte orientation, dimensions, and memory requirement. These settings determine whether the image appears correctly on the target LCD, OLED, or other embedded display.