
Sensors allow microcontroller projects to measure and react to the real world. With the right sensor, an Arduino, ESP32, Raspberry Pi, or PIC microcontroller can detect temperature, distance, light, motion, pressure, current, water flow, sound, gas levels, weight, and many other physical conditions.
This page collects the sensor tutorials published on Teach Me Microcontrollers. Each guide is written for practical use, with wiring diagrams, sample code, explanations, and project ideas you can build on. Whether you are a beginner learning how to connect your first sensor or an engineer looking for a quick reference, these tutorials will help you understand both the hardware connection and the program behind it.
Browse All Sensor Tutorials
Use the tutorials below to learn how different sensors work and how to connect them to microcontroller boards.

ESP32 Time-of-Flight Sensor Tutorial (VL53L0X / VL53L1X Distance Measurement)
When I first moved from ultrasonic sensors to Time-of-Flight (ToF) sensors, the difference was night and day. Measurements became faster, more stable, and far…
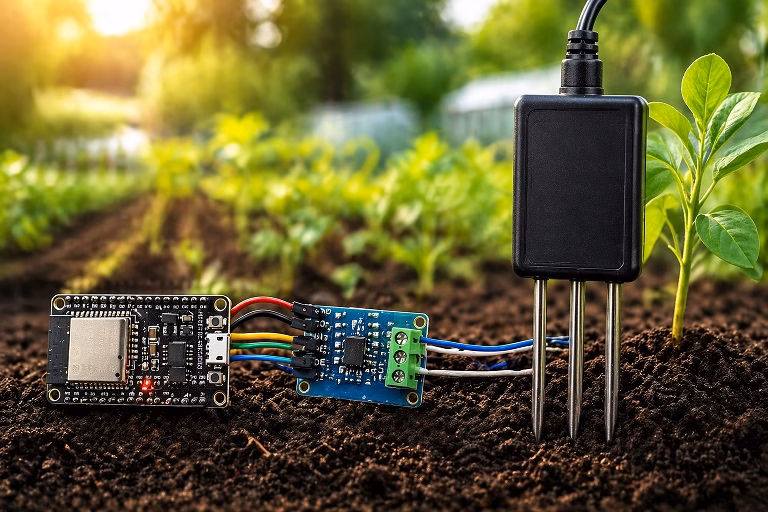
How to Use an NPK Soil Sensor with ESP32
If you are building a smart agriculture project, one of the most useful things you can measure is the nutrient condition of the soil.…

Interfacing MLX90614 Non-Contact Infrared Temperature Sensor with ESP32
Introduction Ever wanted to measure temperature without actually touching anything? Meet the MLX90614, a cool little infrared sensor that lets you do just that!…

Interfacing BH1750 Light Intensity Sensor with ESP32
The BH1750 is a digital light intensity sensor capable of measuring light in lux (lumens per square meter). Its high resolution and ease of…

Building an ESP32 Heart Rate Sensor with MAX30102
This tutorial guides you through building a heart rate sensor project using an ESP32 and a MAX30102 breakout board. The heart rate data is…
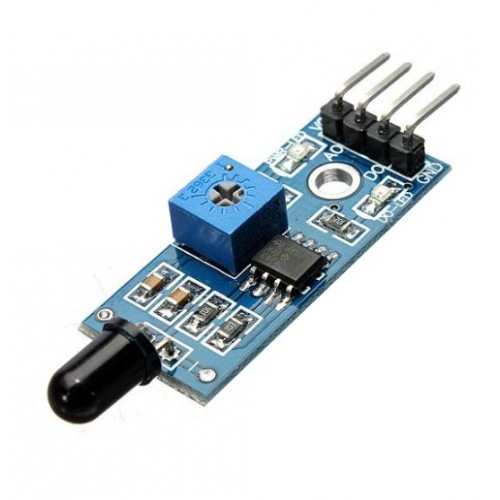
Building a Web-Based Fire Alarm Using ESP32, Flame and Smoke Sensors, and Arduino Cloud
In this tutorial, we will build a web-based fire alarm system using an ESP32 microcontroller, a flame sensor, a smoke sensor, and Arduino Cloud.…
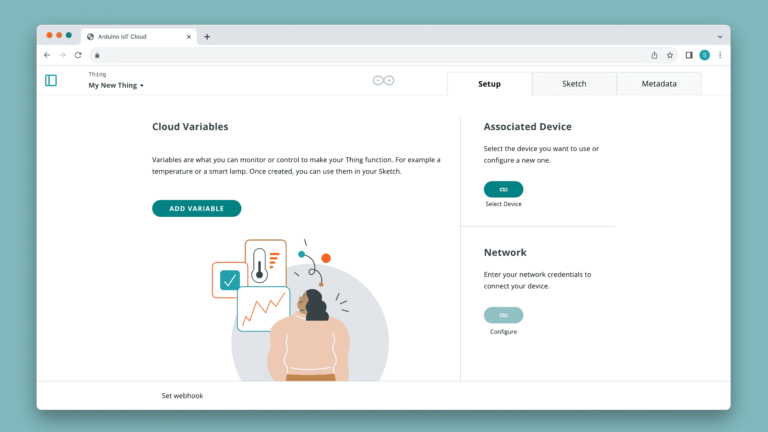
ESP8266 IoT Gas Leak Sensor with Arduino Cloud
In this project, we’ll use the ESP8266 to connect an MQ-135 gas sensor to the Arduino IoT Cloud. This setup will enable you to…
Arduino Interfacing with MLX90614 (GY-906) Sensor
The MLX90614 is a really cool infrared thermometer sensor that can measure temperature without even touching an object. It works by detecting infrared radiation…

Interfacing HC-SR04 Ultrasonic Sensor with Raspberry Pi Pico
Introduction Beginner tutorials on the web often use the HC-SR04 ultrasonic sensor. Why? Because it’s easy to use and requires a few short lines…

ESP32 Pressure Sensor
In this tutorial, we will feature the MPS20N0040D and how to use it with the ESP32 microcontroller. It's challenging to directly interface this pressure…
Arduino Pressure Sensor Tutorial | MPS20N0040D
This site has built up several tutorials on how to measure almost anything. Now, we add to that list an Arduino pressure sensor featuring…
MAX30102: An Improved Heart Rate Sensor for Arduino
Have you read the MAX30100 tutorial and are still having trouble making that chip work? Maybe it’s time to use another Arduino heart rate…
Start Learning Sensor Modules
Most sensor modules are designed to make electronic measurements easier. Instead of building the full signal-conditioning circuit yourself, the module usually includes the sensor element, resistors, amplifiers, filters, voltage dividers, or interface circuits needed to connect it to a microcontroller.
Some sensors provide a simple digital output. These are useful when you only need to know if a condition is true or false, such as whether motion is detected, water is present, or a magnetic field is nearby.
Other sensors provide an analog output. These are useful when you need to measure a changing value, such as light level, voltage, pressure, flex, sound level, or current.
Many modern sensors use digital communication protocols such as I2C, SPI, UART, or 1-Wire. These sensors can send calibrated data directly to the microcontroller, which makes them useful for more advanced projects.
Arduino Sensor Tutorials
Arduino is often the easiest starting point for sensor projects. Many sensor modules work directly with Arduino Uno, Nano, and Mega boards, especially if they operate at 5 V or include voltage-compatible outputs.
In these tutorials, you will learn how to wire common sensors to Arduino boards, read their output, display the result, and use the sensor value to control LEDs, buzzers, motors, relays, LCDs, and other output devices.
ESP32 Sensor Tutorials
The ESP32 is a good choice for sensor projects that need Wi-Fi, Bluetooth, web servers, dashboards, data logging, or IoT features. However, ESP32 boards use 3.3 V logic, so sensor voltage compatibility is important.
For ESP32 sensor projects, always check whether the sensor output is safe for 3.3 V GPIO pins. Some 5 V sensor modules may need a voltage divider, level shifter, or a different wiring approach before connecting them to an ESP32 board.
Raspberry Pi Sensor Projects
Raspberry Pi boards are useful when a sensor project needs Linux, Python, networking, image processing, databases, or a web interface. Since Raspberry Pi GPIO pins are also 3.3 V only, you should avoid connecting 5 V sensor outputs directly to the GPIO header.
Raspberry Pi sensor tutorials usually focus on practical applications such as monitoring, automation, logging, and interactive projects.
Common Sensor Types
Teach Me Microcontrollers covers different types of sensors used in electronics and embedded systems projects, including:
- Temperature and humidity sensors
- Distance and proximity sensors
- Light and color sensors
- Motion and vibration sensors
- Water level and water flow sensors
- Current and voltage sensors
- Gas and air-quality sensors
- Load cell and force sensors
- Sound and microphone modules
- Magnetic and Hall-effect sensors
- Soil moisture and environmental sensors
Choosing the Right Sensor
Before choosing a sensor, check the supply voltage, output type, communication interface, accuracy, measurement range, and whether the sensor needs calibration. Also check whether your microcontroller has the required pins, such as analog inputs, I2C pins, SPI pins, UART pins, or interrupt-capable GPIO pins.
For simple beginner projects, digital and analog sensor modules are usually easier to use. For more accurate measurements, sensors with I2C or SPI interfaces are often better because they can provide processed data instead of raw analog values.
Sensor Tutorial FAQs
What is the easiest sensor to use with Arduino?
Simple digital sensors are usually the easiest to use with Arduino because they only require reading a HIGH or LOW signal. Examples include basic motion sensors, magnetic reed switches, tilt sensors, and some water detection modules. Analog sensors are also beginner-friendly if you understand how to use analogRead().
Can I use 5 V sensors with ESP32?
Not always. The ESP32 uses 3.3 V GPIO pins, so a 5 V output signal can damage the board. Some sensor modules can be powered by 5 V but still output 3.3 V-compatible signals, while others need a voltage divider or level shifter. Always check the module output before connecting it to an ESP32 pin.
Are sensor modules accurate?
Sensor modules are useful for learning and prototyping, but accuracy depends on the sensor type, module quality, calibration, power supply, wiring, and environment. For serious measurements, always check the datasheet and calibrate the sensor when needed.