In this tutorial, we will build a web-based fire alarm system using an ESP32 microcontroller, a flame sensor, a smoke sensor, and Arduino Cloud. This project will provide real-time alerts and allow you to monitor fire-related events remotely via a web interface.
Components Needed
- ESP32 Development Board
- Flame Sensor (e.g., YG1006)
- Smoke Sensor (e.g., MQ-2 or MQ-135)
- Buzzer or LED (for local alerts)
- Breadboard and Jumper Wires
- USB Cable
- Arduino Cloud Account
Project Overview
The fire alarm system will:
- Detect flame using a flame sensor.
- Detect smoke using a smoke sensor.
- Trigger a buzzer or LED as a local alert.
- Send real-time data to the Arduino Cloud for remote monitoring.
- Display sensor readings on a web dashboard.
Step 1: Setting Up the Hardware
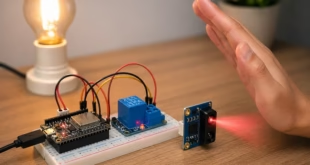
Circuit Diagram

1. Connect the Flame Sensor:
- VCC to 3.3V on the ESP32.
- GND to GND on the ESP32.
- Signal pin to D34 on the ESP32 (or any other GPIO).
2. Connect the Smoke Sensor:
- VCC to 5V on the ESP32.
- GND to GND on the ESP32.
- Analog output pin (AOUT) to A0 (or any analog pin on the ESP32).
3. Connect the Buzzer or LED:
- Positive pin to D27 (or another GPIO).
- Negative pin to GND.
Step 2: Preparing the Arduino Cloud
Create an Arduino Cloud Account
- Visit Arduino Cloud and create an account if you don’t have one.
Set Up a Thing
- Go to the IoT Cloud section.
- Create a new Thing and name it (e.g., "Fire Alarm System").
- Add two variables:
-
- FlameSensor (Type: Float, Permission: Read & Write).
- SmokeSensor (Type: Float, Permission: Read & Write).
Configure the Device
- Select ESP32 as your device and configure it by following the steps in the cloud interface.
- Install the Arduino Create Agent on your computer if prompted.
Step 3: Writing the Code
Install Required Libraries
Open the Arduino IDE and install the following libraries:
- ArduinoIoTCloud for cloud integration.
- WiFi for connecting to the internet.
Code Implementation
Here’s the code for the project:
Step 4: Create a Web Dashboard
1. In the Arduino Cloud, go to the Dashboards section and create a new dashboard.
2. Add widgets:
- A Gauge for FlameSensor.
- A Gauge for SmokeSensor.
- A Switch to control the alert pin remotely (if needed).
3. Link the widgets to the respective variables.
Step 5: Testing the System
1. Upload the code to your ESP32 using the Arduino IDE.
2. Open the Serial Monitor to ensure the ESP32 connects to Wi-Fi and the Arduino Cloud.
3. Introduce a flame or smoke near the sensors and observe:
-
- The buzzer/LED activates locally.
- The sensor readings update in the Arduino Cloud dashboard.
Step 6: Optional Enhancements
- Email or SMS Alerts: Use a third-party service like IFTTT or Twilio to send notifications.
- Mobile App Integration: Access your dashboard via the Arduino IoT Cloud mobile app.
- Battery Backup: Add a rechargeable battery to ensure functionality during power outages.
Conclusion
You have successfully created a web-based fire alarm system using an ESP32, flame and smoke sensors, and Arduino Cloud. This project can be expanded into a comprehensive fire safety system for homes, offices, or industrial setups. Stay safe and keep innovating!