
This tutorial guides you through building a heart rate sensor project using an ESP32 and a MAX30102 breakout board. The heart rate data is dynamically displayed on a web page hosted locally by the ESP32, enabling real-time updates without the need to refresh the page. Devices connected to the same LAN can access the web page.
Components Needed
- ESP32 development board
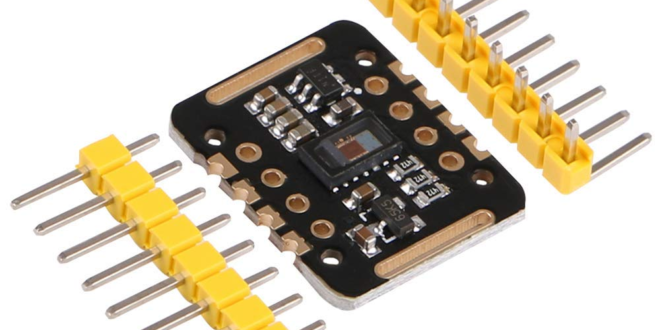
- MAX30102 heart rate and pulse oximeter sensor
- Jumper wires
- Breadboard
Features
- Measures heart rate using the MAX30102 sensor.
- Hosts a web page that dynamically displays heart rate updates using WebSockets.
- Accessible within the same local network.
Circuit Diagram
Connect the components as follows:
| ESP32 Pin | MAX30102 Pin |
| 3.3V | VIN |
| GND | GND |
| GPIO 22 | SCL |
| GPIO 21 | SDA |
Ensure the MAX30102 breakout board is powered by 3.3V.
Code
The code requires the ESPAsyncWebserver and Adafruit's MAX3010x libraries. You can easily search for these libraries in Arduino's library manager.


Upload the following code to your ESP32 using the Arduino IDE. Make sure you provide your WiFi's SSID and password!
#include <Wire.h>
#include <MAX30105.h>
#include <WiFi.h>
#include <ESPAsyncWebServer.h>
#include <AsyncTCP.h>
#include "heartRate.h"

MAX30105 particleSensor;

const char* ssid = "Your_SSID";
const char* password = "Your_PASSWORD";

AsyncWebServer server(80);
AsyncWebSocket ws("/ws");
float heartRate = 0;
long lastBeat = 0;

void notifyClients() {
    String message = String(heartRate, 2);
    ws.textAll(message);
}

void handleWebSocketMessage(void *arg, uint8_t *data, size_t len) {
    // Optional: Handle incoming WebSocket messages
}

void onEvent(AsyncWebSocket *server, AsyncWebSocketClient *client, AwsEventType type, void *arg, uint8_t *data, size_t len) {
    if (type == WS_EVT_CONNECT) {
        Serial.printf("WebSocket client #%u connected from %s\n", client->id(), client->remoteIP().toString().c_str());
    } else if (type == WS_EVT_DISCONNECT) {
        Serial.printf("WebSocket client #%u disconnected\n", client->id());
    } else if (type == WS_EVT_DATA) {
        handleWebSocketMessage(arg, data, len);
    }
}

void setup() {
    Serial.begin(115200);

    // Initialize MAX30102 sensor
    if (!particleSensor.begin(Wire, I2C_SPEED_FAST)) {
        Serial.println("MAX30102 was not found. Please check the wiring/power.");
        while (1);
    }
    particleSensor.setup();
    particleSensor.setPulseAmplitudeRed(0x0A); //Turn Red LED to low to indicate sensor is running
    particleSensor.setPulseAmplitudeGreen(0); //Turn off Green LED

    // Connect to Wi-Fi
    WiFi.begin(ssid, password);
    while (WiFi.status() != WL_CONNECTED) {
        delay(1000);
        Serial.println("Connecting to Wi-Fi...");
    }
    Serial.println("Connected to Wi-Fi");
    Serial.println("IP address: ");
    Serial.println(WiFi.localIP());

    // WebSocket initialization
    ws.onEvent(onEvent);
    server.addHandler(&ws);

    // Serve HTML page
    server.on("/", HTTP_GET, [](AsyncWebServerRequest *request) {
        String html = R"rawliteral(
        <!DOCTYPE html>
        <html>
        <head>
            <title>ESP32 Heart Rate Sensor</title>
            <script>
                var gateway = `ws://${window.location.hostname}/ws`;
                var websocket;

                function initWebSocket() {
                    websocket = new WebSocket(gateway);
                    websocket.onmessage = function(event) {
                        document.getElementById('heartRate').innerText = event.data + ' BPM';
                    };
                }

                window.onload = function() {
                    initWebSocket();
                };
            </script>
        </head>
        <body>
            <h1>ESP32 Heart Rate Sensor</h1>
            <p>Heart Rate: <span id="heartRate">Loading...</span></p> </body> </html> )rawliteral"; request->send(200, "text/html", html);
    });

    // Start server
    server.begin();
}

void loop() {
    long irValue = particleSensor.getIR();

    if (checkForBeat(irValue) == true)
    {
      //We sensed a beat!
      long delta = millis() - lastBeat;
      lastBeat = millis();

      heartRate = 60 / (delta / 1000.0);

      notifyClients();
      Serial.print("Heart Rate: ");
      Serial.print(heartRate);
      Serial.println(" BPM");
    }

    if (irValue < 50000) {
      Serial.println("No finger detected");
    }
}
- Heart Rate Measurement:
- The MAX30102 detects the heart rate based on IR values.
- If no finger is detected, the system waits until one is placed on the sensor.
- WebSocket Communication:
- The ESP32 uses WebSockets to send heart rate data to connected clients in real time.
- Dynamic Web Page:
- The web page fetches updates via WebSocket and displays the heart rate dynamically.
Accessing the Web Page
- Ensure the ESP32 is connected to your Wi-Fi network.
- Open the Serial Monitor to find the ESP32's IP address.
- Enter the IP address in your browser (e.g., http://192.168.1.100).
- The web page will display real-time heart rate data.
The page is a simple design:

Troubleshooting
- Sensor not detected: Check your wiring and ensure the MAX30102 is powered correctly.
- No heart rate displayed: Ensure your finger is placed firmly on the sensor.
- Web page not loading: Verify the ESP32 is connected to Wi-Fi and the IP address is correct.
Enjoy your dynamic and real-time ESP32 heart rate sensor project! If you have questions or encounter issues, let me know.


