
Fingerprint sensors are old technology but it wasn’t readily available to makers until it was cheap. With such a device, you could easily create a keyless secure lock, biometric attendance system, and many more.
Fingerprint Sensor Module
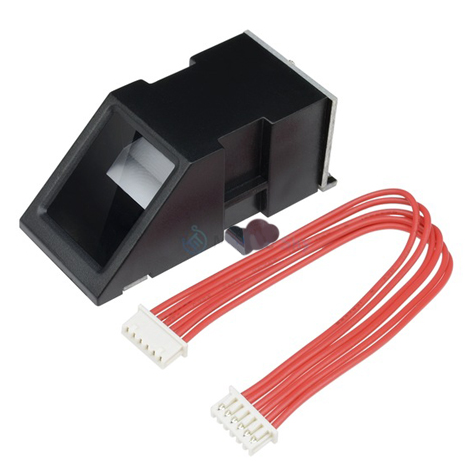
I managed to secure a fingerprint sensor module that communicates via TTL serial. This means it can easily be interfaced with almost any microcontroller.
The sensor has six pinouts as shown. Two of the wires are useless in our project so we can just cut them.
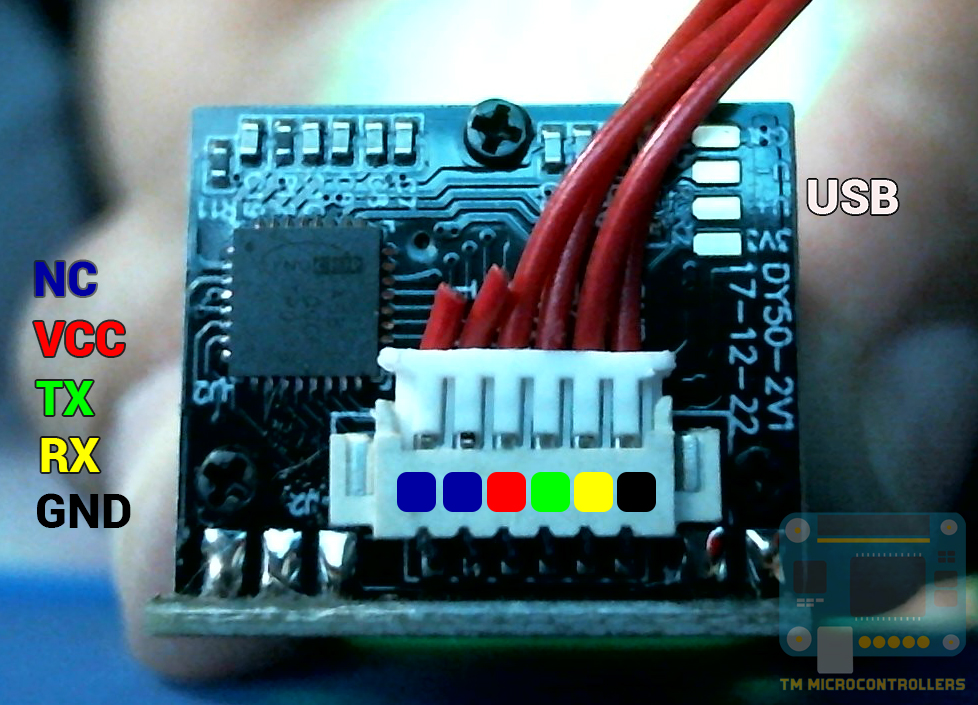
The sensor comes with a 1.27 mm pitch RMC connector at both ends.
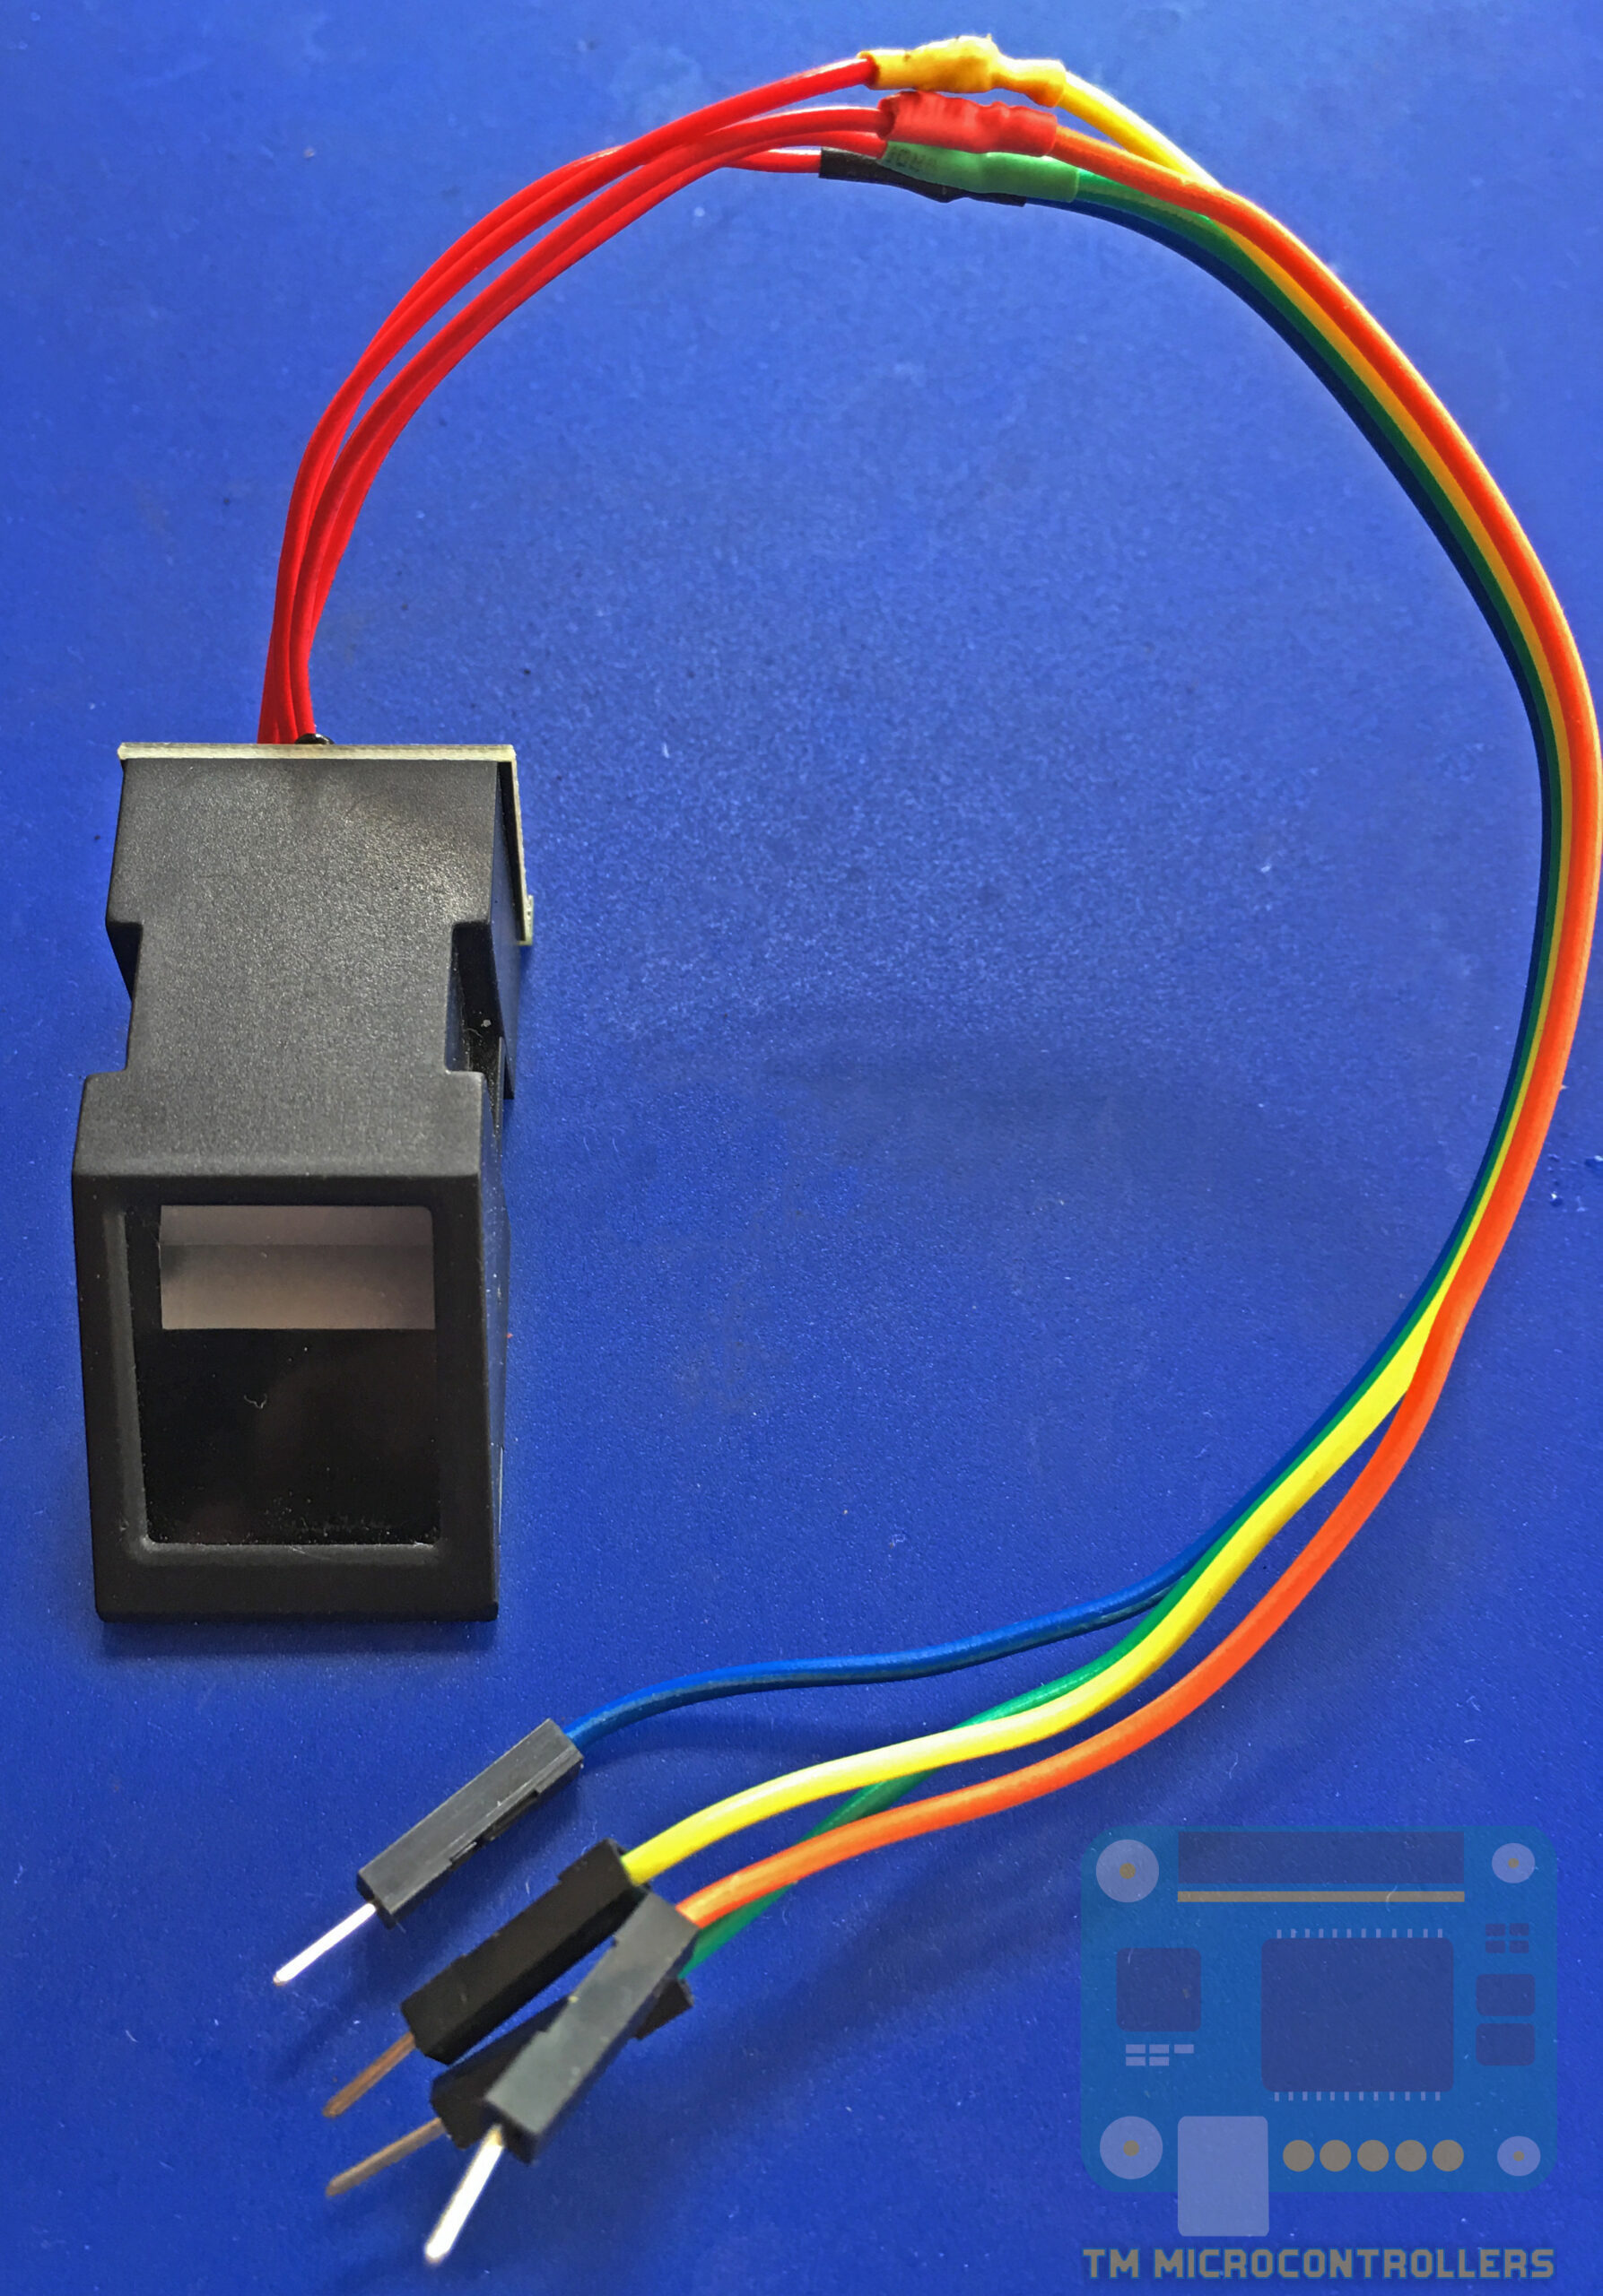
To be able to connect this to a microcontroller or a breadboard, I had to cut the wires, solder jumper wires and had the joint covered with a heat shrink tube.
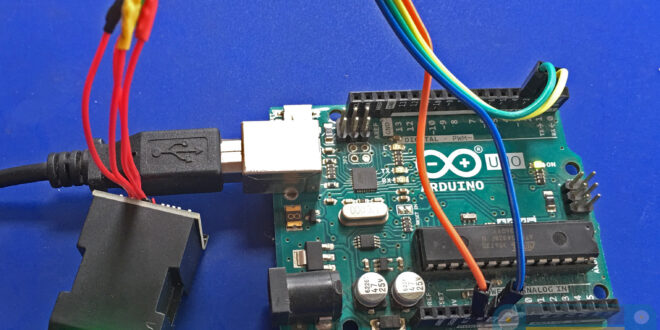
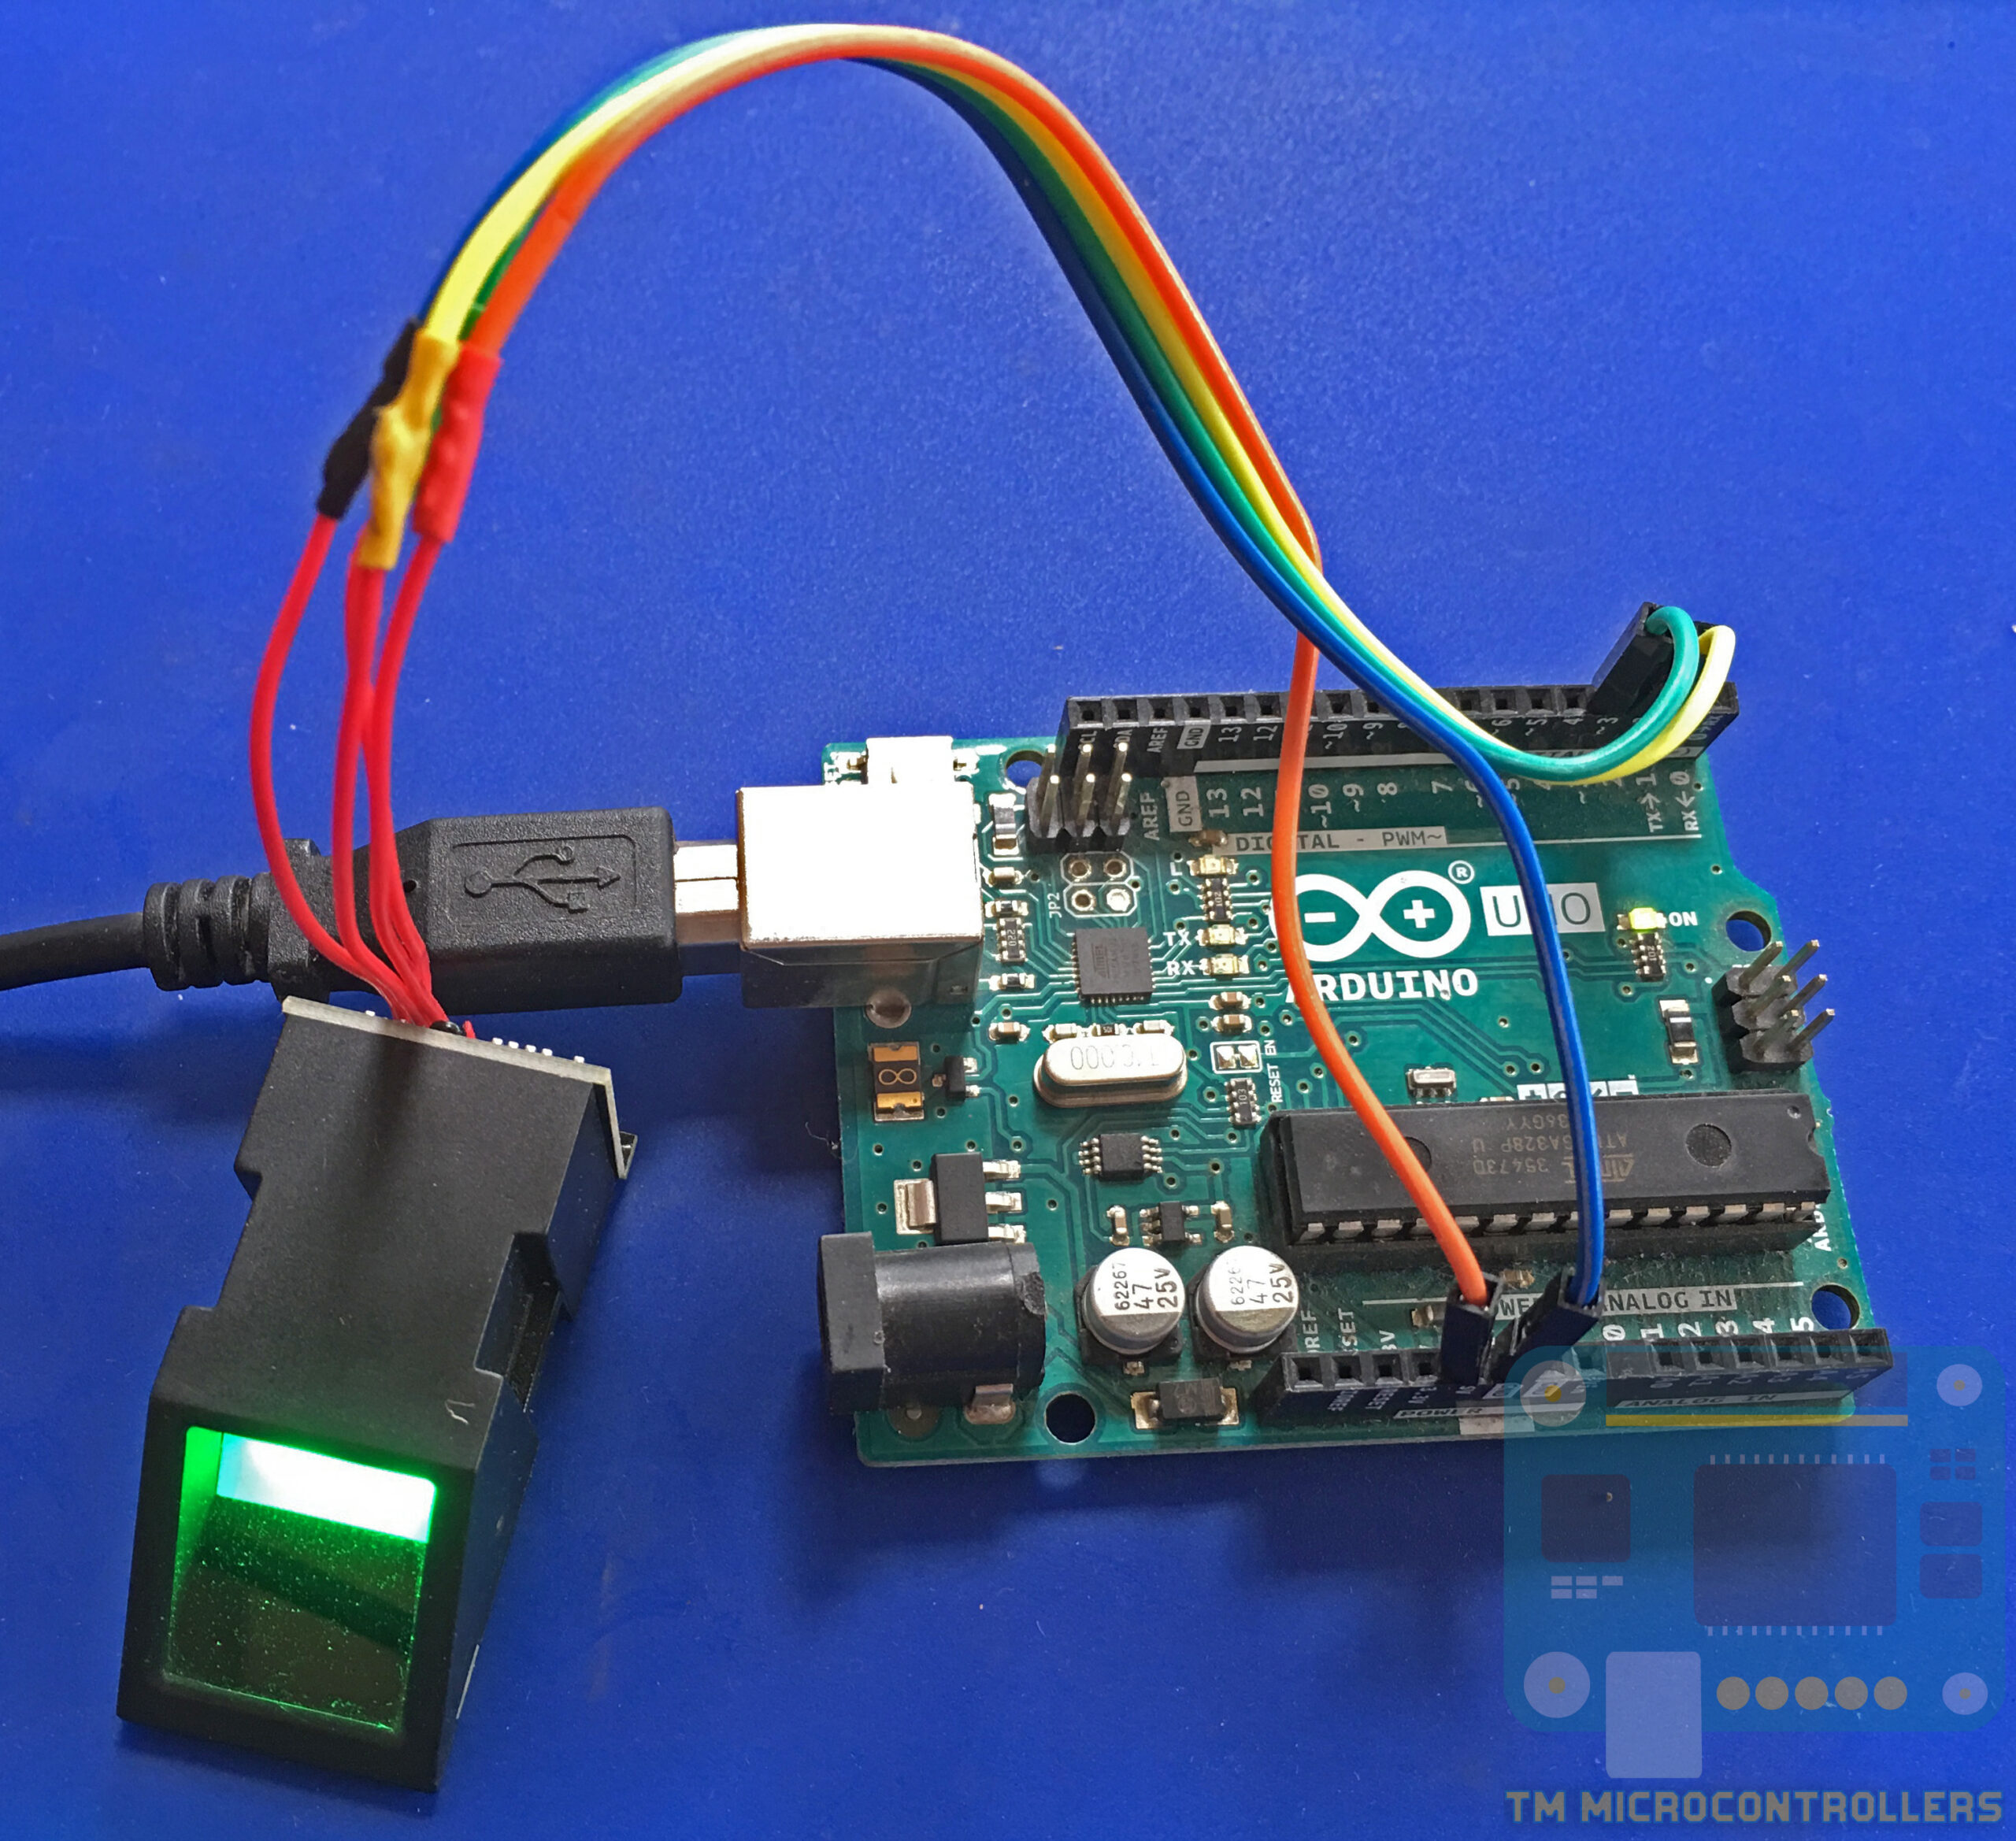
After that, it’s now quite easy to connect the fingerprint sensor to a microcontroller. Here it is attached to my Arduino UNO:
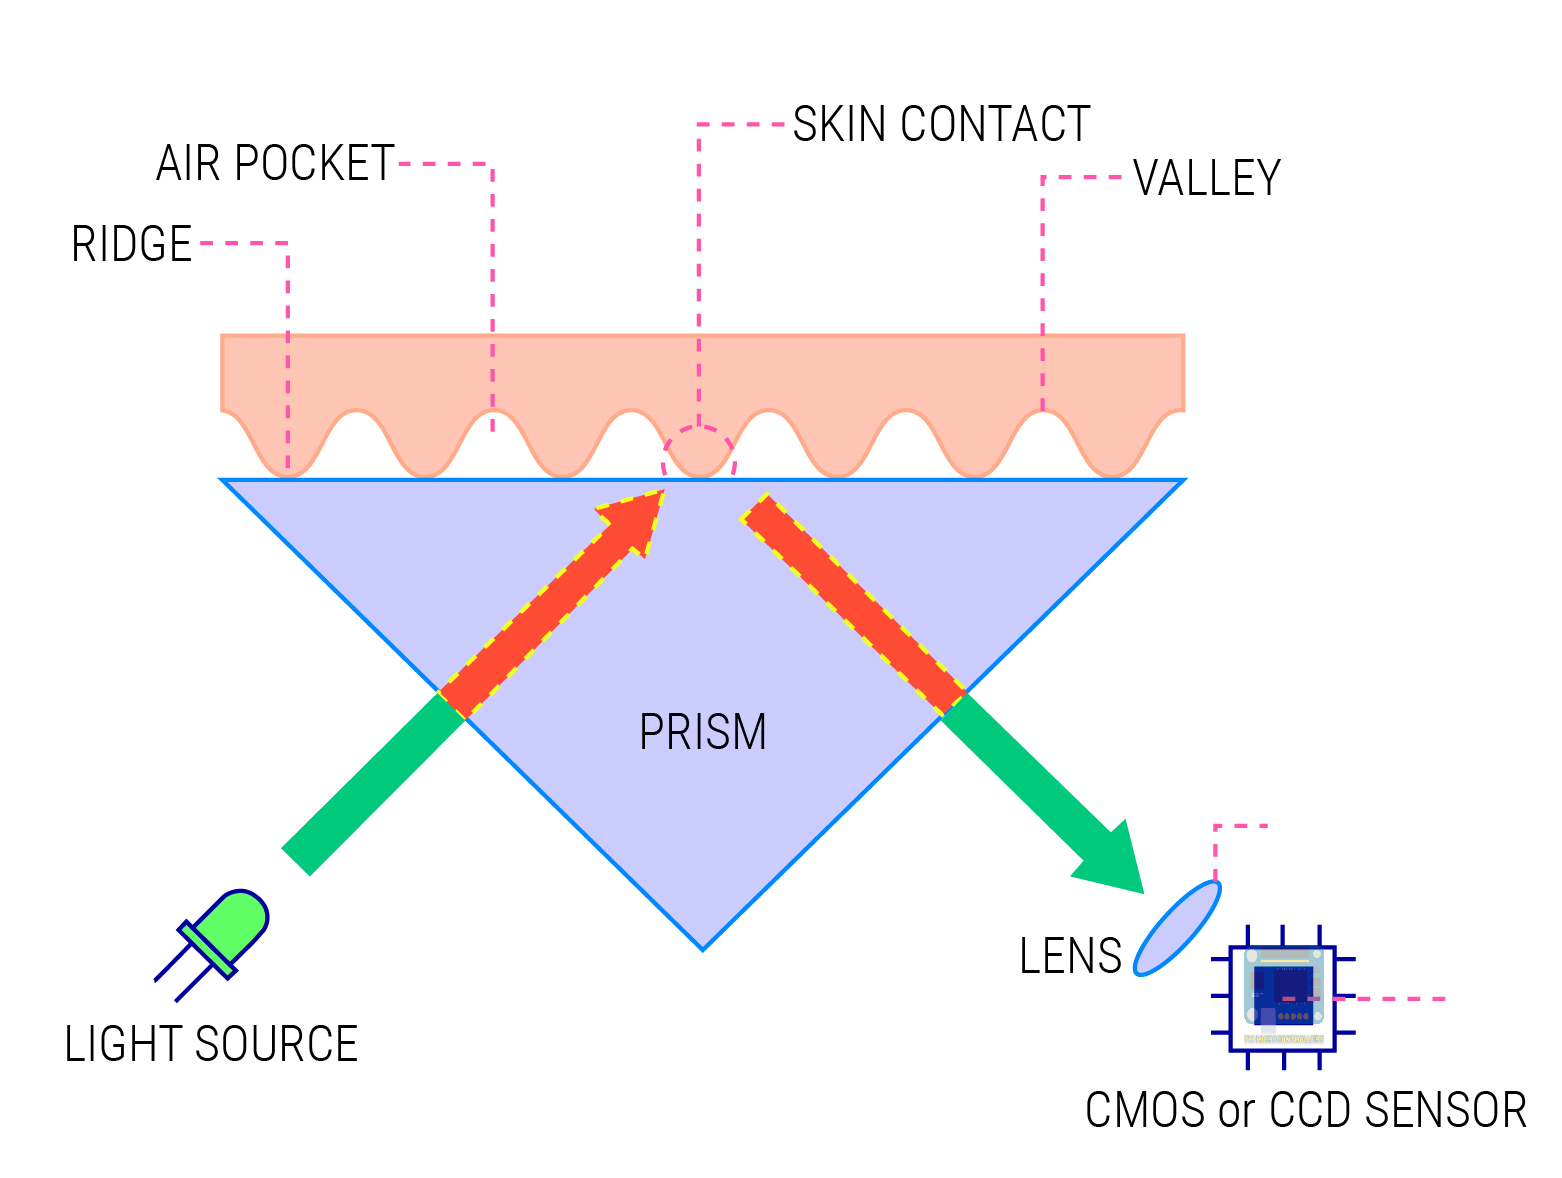
How Fingerprint Sensor Works
Each person’s fingerprint has a unique combination of ridges and valleys. The sensor contains a light source and an image sensor which interprets the ridge as an ‘off’ and the valley as an ‘on’ (or it could be the other way around; the point is ridges and valleys are binary data). This process creates an image of the fingerprint which is then digitally encoded.
The fingerprint sensor has its flash memory where it stores the data. This data, called template, is 512 bytes; the sensor’s memory can store up to 127 templates.
For the sensor to recognize a fingerprint, it must store templates first to compare. Hence, first-time users always need to run first an “enroll” program.
Sensor Library
Thankfully, Adafruit did most of the work for us and created a library, which includes both fingerprint enrollment and detection.
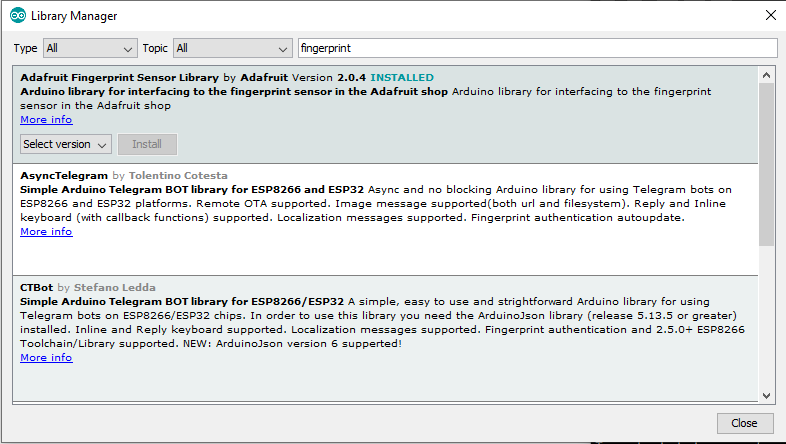
To download the library using the Arduino IDE, go to Sketch > Include Library > Manage Libraries. On the search field, type fingerprint. Adafruit’s library should be the first one to appear.
Once the library is installed, open the enroll sample sketch. At this point, the fingerprint sensor should now already be connected to your Arduino following this connection:
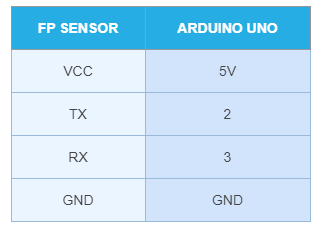
Note that this is the default connection for the library. If you need to use other pins, just change the following line in the code:
SoftwareSerial mySerial(2, 3);
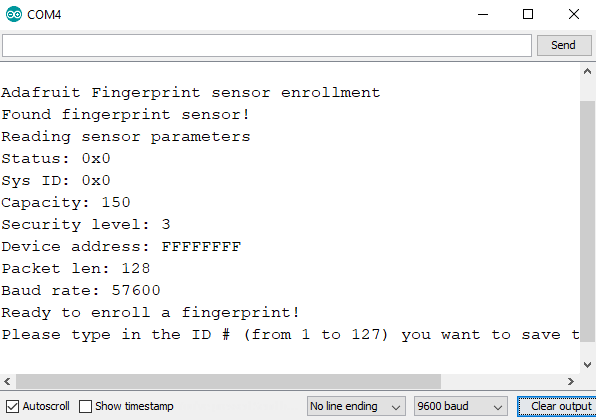
With the enroll sketch successfully uploaded, opening the serial monitor should display the following:
Type in 1 to record your fingerprint with ID equals 1. The microcontroller will then wait for your fingerprint:
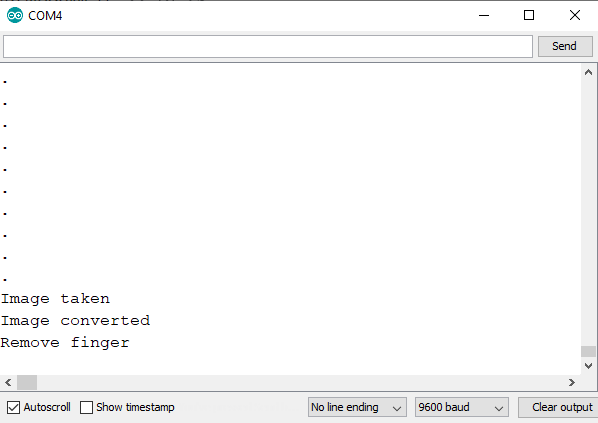
Place your finger in the scanner. If correctly detected, a message like this is shown:
After that, the program will ask you to put the same finger again for verification.
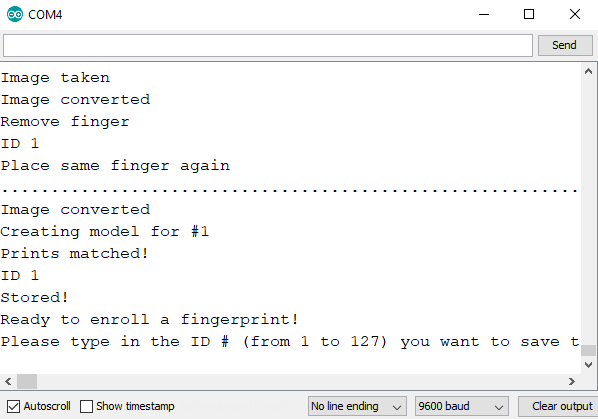
The fingerprint is now stored in memory! You can add more fingerprints or change the data for an ID that has already been taken.
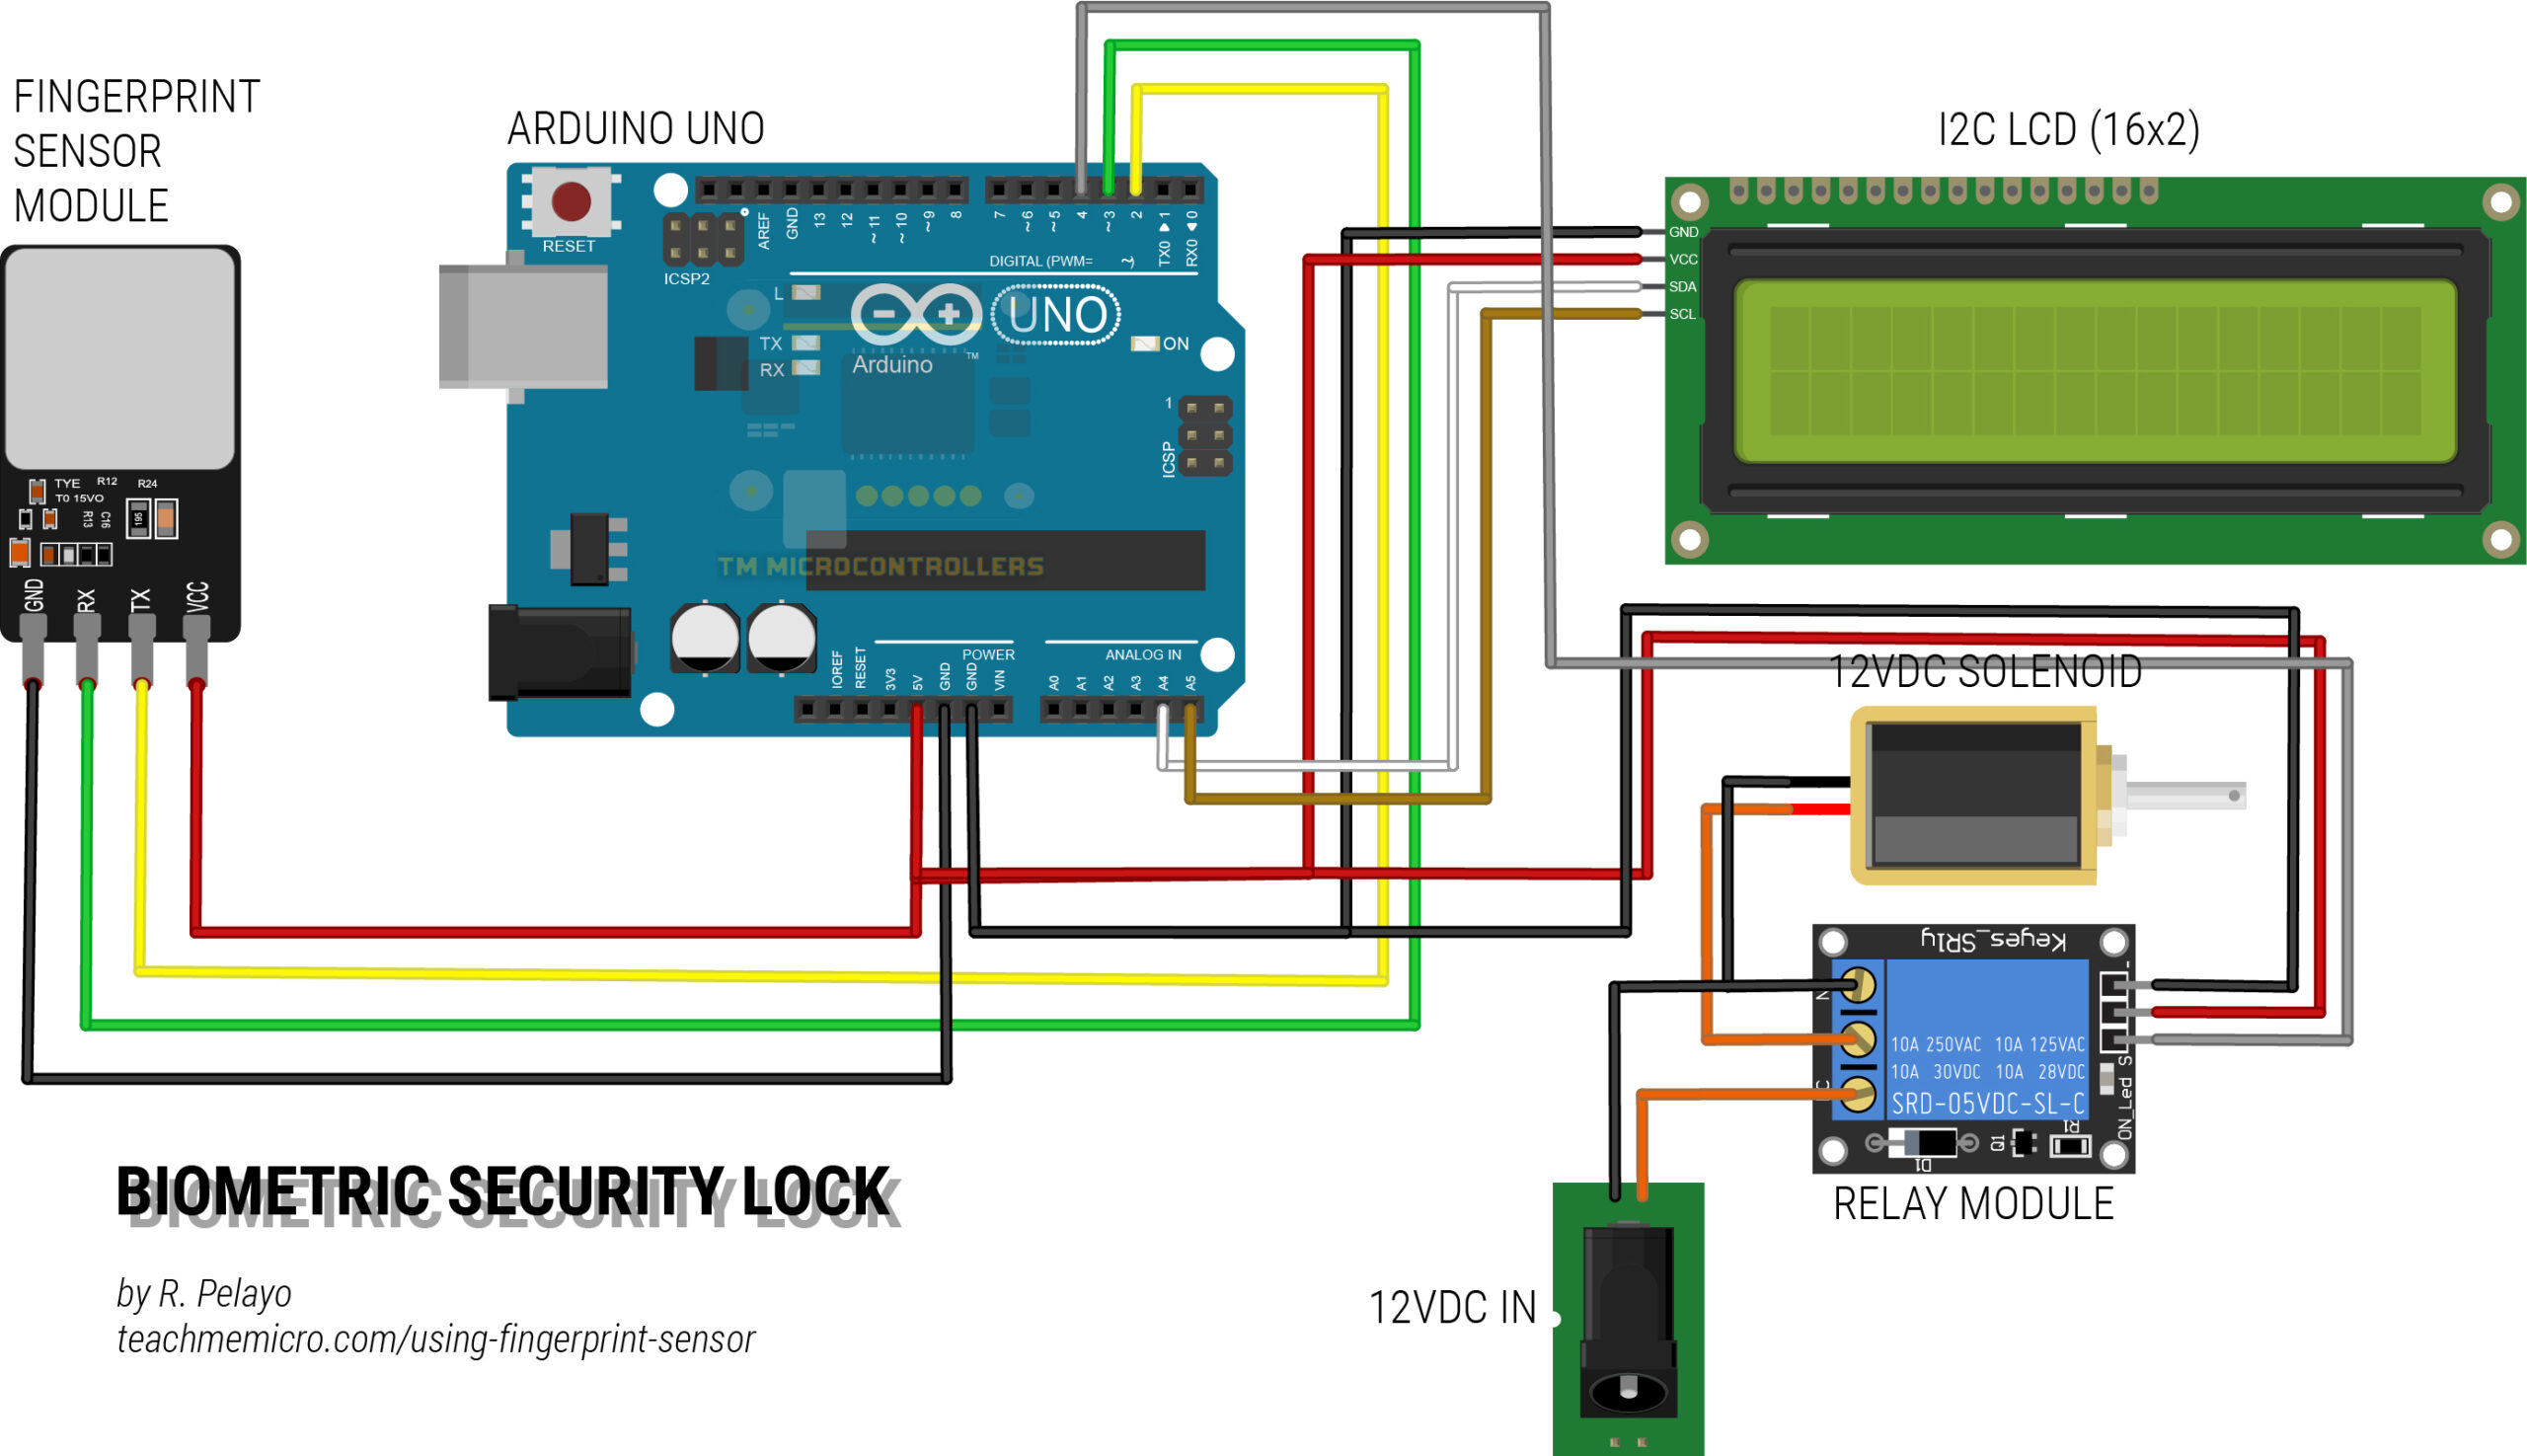
Biometric Lock
At this point, we can now use the fingerprint example sketch in Adafruit’s library to identify our enrolled fingerprint. Better yet, I modified that sketch to trigger a solenoid lock when the correct fingerprint is scanned. I also added an I2C LCD for displaying status messages. Here’s the Fritzing diagram:
Here’s the modified sketch where a correct fingerprint triggers the solenoid:
#include <Adafruit_Fingerprint.h>
#include <Wire.h>
#include <LiquidCrystal_I2C.h>

LiquidCrystal_I2C lcd(0x27, 16, 2);

SoftwareSerial mySerial(2, 3);

Adafruit_Fingerprint finger = Adafruit_Fingerprint(&mySerial);

#define LOCK 4

void setup()
{
  lcd.begin();
  finger.begin(57600);
  pinMode(LOCK, OUTPUT);
  digitalWrite(LOCK, LOW);
  delay(5);
  if (finger.verifyPassword()) {
    lcd.setCursor(0,0);
    lcd.print("FP Device Found ");
    lcd.setCursor(0,1);
    lcd.print("                ");
    delay(2000);
  } else {
    lcd.setCursor(0,0);
    lcd.print("No FP Sensor    ");
    lcd.setCursor(0,1);
    lcd.print("                ");
    delay(2000);
    while (1) { delay(1); }
  }

  finger.getTemplateCount();

  if (finger.templateCount == 0) {
      lcd.setCursor(0,0);
      lcd.print("No FP data found");
      lcd.setCursor(0,1);
      lcd.print("Enroll FP first ");
      delay(2000);
  }
  else {
      lcd.setCursor(0,0);
      lcd.print("Sensor has ");
      lcd.print(finger.templateCount);
      lcd.print(" FP");
      lcd.setCursor(0,1);
      lcd.print("OK to proceed   ");
      delay(2000);
  }

}

void loop()                     // run over and over again
{
  lcd.setCursor(0,0);
  lcd.print("Place finger to     ");
  lcd.setCursor(0,1);
  lcd.print("start scan          ");
  getFingerprintID();
  delay(50);            //don't ned to run this at full speed.
}

uint8_t getFingerprintID() {
  uint8_t p = finger.getImage();
  if(p == FINGERPRINT_NOFINGER){
    return p;
  }
  else if(p != FINGERPRINT_OK){
    lcd.setCursor(0,0);
    lcd.print("Scan Error      ");
    lcd.setCursor(0,1);
    lcd.print("                ");
    return p;
  }

  p = finger.image2Tz();
  if(p != FINGERPRINT_OK){
    lcd.setCursor(0,0);
    lcd.print("Processing Error");
    lcd.setCursor(0,1);
    lcd.print("                ");
    return p;
  }
  p = finger.fingerSearch();
  if (p == FINGERPRINT_OK) {
    lcd.setCursor(0,0);
    lcd.print("Access Granted  ");
    lcd.setCursor(0,1);
    lcd.print("                ");
    digitalWrite(LOCK,HIGH);
    delay(5000);
  } else if (p == FINGERPRINT_PACKETRECIEVEERR) {
    lcd.setCursor(0,0);
    lcd.print("Comm Error      ");
    lcd.setCursor(0,1);
    lcd.print("                ");
    delay(2000);
    return p;
  } else if (p == FINGERPRINT_NOTFOUND) {
    lcd.setCursor(0,0);
    lcd.print("Access Denied   ");
    lcd.setCursor(0,1);
    lcd.print("                ");
    delay(2000);
    return p;
  } else {
    lcd.setCursor(0,0);
    lcd.print("Error in matching");
    lcd.setCursor(0,1);
    lcd.print("                ");
    delay(2000);
    return p;
  }
  digitalWrite(LOCK,LOW);
  return finger.fingerID;
}
Since the fingerprint sensor communicates serially, we need to define a software serial object like this:
SoftwareSerial mySerial(2, 3);
Then, we initialize the fingerprint object:
Adafruit_Fingerprint finger = Adafruit_Fingerprint(&mySerial);
We can easily check if the sensor is connected or not using verifyPassword(). Here, I display messages if the sensor is detected or not:
if (finger.verifyPassword())
{
  lcd.setCursor(0,0);
  lcd.print("FP Device Found ");
  lcd.setCursor(0,1);
  lcd.print(" ");
  delay(2000);
} else
{
  lcd.setCursor(0,0);
  lcd.print("No FP Sensor ");
  lcd.setCursor(0,1);
  lcd.print(" ");
  delay(2000);
  while (1) { delay(1); }
}
Note that before using this sketch, the example “enroll” program must be run first or it will not continue:
finger.getTemplateCount();
if (finger.templateCount == 0)
{
  lcd.setCursor(0,0);
  lcd.print("No FP data found");
  lcd.setCursor(0,1);
  lcd.print("Enroll FP first ");
  delay(2000);
  while(1);
}else {
  lcd.setCursor(0,0);
  lcd.print("Sensor has ");
  lcd.print(finger.templateCount);
  lcd.print(" FP");
  lcd.setCursor(0,1);
  lcd.print("OK to proceed ");
  delay(2000);
}
The bulk of the scanning and identification is inside the getFingerprintID() function which is called inside loop(). This is a three-step process. First, the fingerprint is scanned:
uint8_t p = finger.getImage();
if(p == FINGERPRINT_NOFINGER)
{
  return p;
}

else if(p != FINGERPRINT_OK)
{
  lcd.setCursor(0,0);
  lcd.print("Scan Error ");
  lcd.setCursor(0,1);
  lcd.print(" ");
  return p;
}
Then, the image is converted to data:
p = finger.image2Tz();
if(p != FINGERPRINT_OK)
{
  lcd.setCursor(0,0);
  lcd.print("Processing Error");
  lcd.setCursor(0,1);
  lcd.print(" ");
  return p;
}
Finally, the scanned data is compared to what’s stored in memory. If a match is found, the relay and consequently the solenoid is triggered.
p = finger.fingerSearch();
if (p == FINGERPRINT_OK)
{
  lcd.setCursor(0,0);
  lcd.print("Access Granted ");
  lcd.setCursor(0,1);
  lcd.print(" ");
  digitalWrite(LOCK,HIGH);
  delay(5000);
} else if (p == FINGERPRINT_PACKETRECIEVEERR)
{
  lcd.setCursor(0,0);
  lcd.print("Comm Error ");
  lcd.setCursor(0,1);
  lcd.print(" ");
  delay(2000);
  return p;
} else if (p == FINGERPRINT_NOTFOUND)
{
  lcd.setCursor(0,0);
  lcd.print("Access Denied ");
  lcd.setCursor(0,1);
  lcd.print(" ");
  delay(2000);
  return p;
} else
{
  lcd.setCursor(0,0);
  lcd.print("Error in matching");
  lcd.setCursor(0,1);
  lcd.print(" ");
  delay(2000);
  return p;
}

digitalWrite(LOCK,LOW);
return finger.fingerID;
Here's a demo of the sketch above:
If you have any questions regarding this tutorial, feel free to drop a comment below.


