Using the BH1750 (GY-30) Sensor with Arduino

The BH1750 is a light-intensity sensor that interfaces with a microcontroller through the I2C bus. It can directly provide lux values without further processing, unlike CdS cells or photodiodes.
Overview
Illuminance is a measure of how much an incident light lightens up a given surface. It is given in lumens per square meter or lumens for square foot; the latter is equivalent to a foot-candle while the former is to a lux.
The BH1750 offers lux measurement in two modes: continuous and one-shot. When in continuous mode, the sensor measures light intensity non-stop. When in the latter mode, single measurements are done then the sensor powers down.
The user can specify the sensitivity for both modes. A BH1750 in low resolution detects a minimum of 4 lux in 16 milliseconds. Moreover, a BH1750 in high resolution detects as low as 1 lux in 120 milliseconds. A third sensitivity mode (high resolution 2) enables the sensor to measure as low as 0.5 lux in 120 milliseconds.
The maximum lux value for the low and high-resolution modes is 54612.5 lux. This is about five times of full daylight. In high resolution 2 mode, the maximum lux value reduces to 27306.25 lux.
Wiring the BH1750 to Arduino
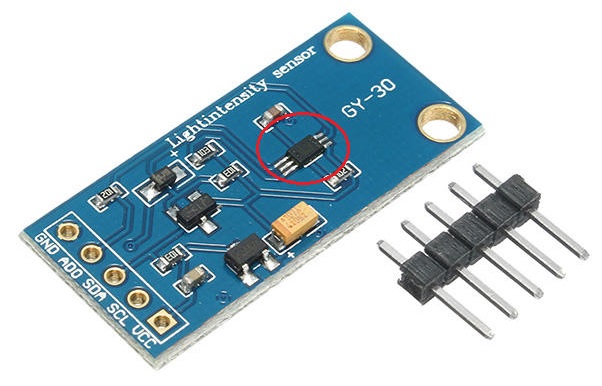
For this article, I am using the GY-30 breakout board:
The breakout board not only contains the sensor (in circle) but also other required components. This makes it ready to interface with a microcontroller like an Arduino.
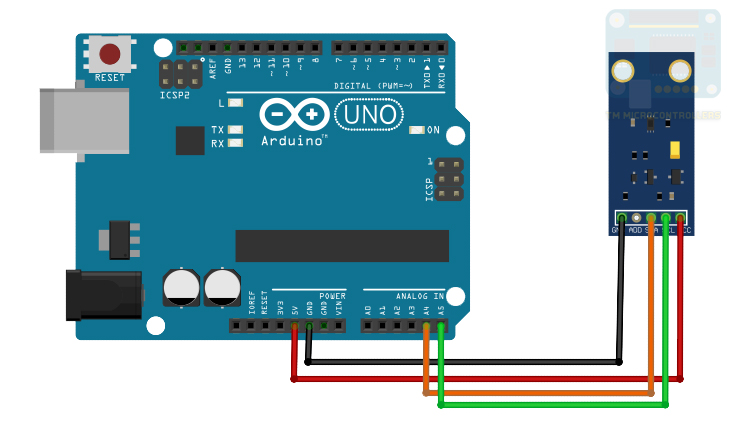
As mentioned, the BH1750 uses the I2C bus, hence, it uses only two pins for data:
The ADD pin helps determine the I2C address of the BH1750. When the voltage to this pin is less than 70% of VCC, the address is 0x23. Otherwise, the I2C address is 0x5C. For our setup above, in which ADD is floating, the address is 0x23.
Programming
There are tons of Arduino libraries for the BH1750, but the one I find easiest to use is by Christopher Laws.
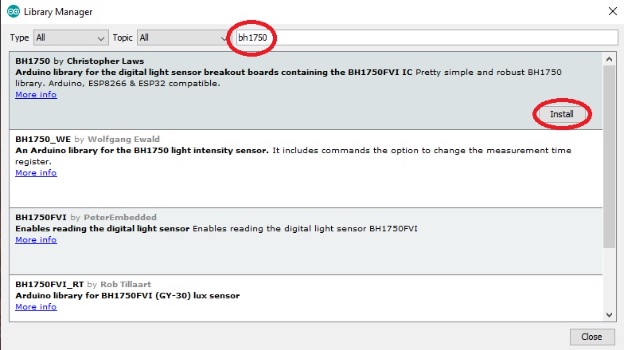
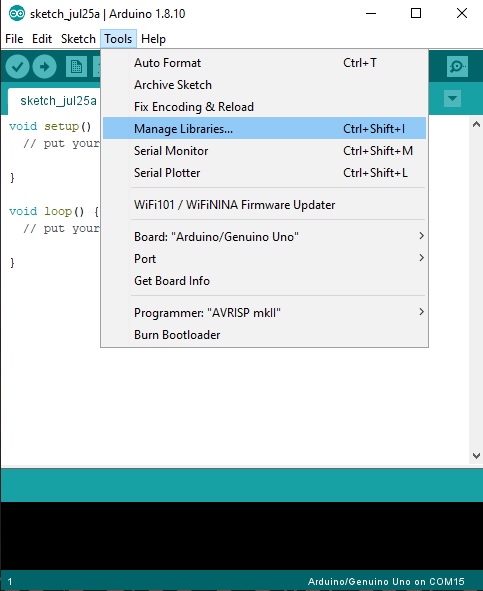
You can download the library from the link above and extract if to your Documents/Arduino/libraries folder or you can use the IDE’s library manager:
Search for BH1750 and Laws’ library is the first result:

The library comes with five examples. The best one to get started on is the BH1750Test.
#include <Wire.h>
#include <BH1750.h>

BH1750 lightMeter;

void setup(){

  Serial.begin(9600);

  Wire.begin();

  lightMeter.configure(BH1750::ONE_TIME_HIGH_RES_MODE);
  lightMeter.begin();

  Serial.println(F("BH1750 Test begin"));

}
Reading the lux values is fairly easy. The first step is to create an object from the BH1750 class which is usable after including the library:
#include <BH1750.h>

BH1750 lightMeter;
Then, invoke begin() function then the readLightLevel() function which returns a float value:
lightMeter.begin();

float lux = lightMeter.readLightLevel()
In the BH1750Test sketch above, the lux levels are printed in the Serial Monitor.
By default, the library uses continuous high-resolution mode. To change this, pass the parameter either to begin() or to another function configure(). The possible parameters are:
BH1750::CONTINUOUS_LOW_RES_MODE
BH1750::CONTINUOUS_HIGH_RES_MODE
BH1750::CONTINUOUS_HIGH_RES_MODE_2
BH1750::ONE_TIME_LOW_RES_MODE
BH1750::ONE_TIME_HIGH_RES_MODE
BH1750::ONE_TIME_HIGH_RES_MODE_2
For example, if you want to use one shot, high-resolution mode, then:
lightMeter.begin(BH1750::ONE_TIME_HIGH_RES_MODE)
Or
lightMeter.configure(BH1750::ONE_TIME_HIGH_RES_MODE)
Normally, the sensor reverts to the default mode after data is sent using one-shot mode. However, the library automatically uses the same mode even if the previous mode is one shot.
Applications
In case you’re wondering where lux meters are used, just look at your phone. The brightness of your phone’s screen adjusts to ambient light. This is possible through a lux sensor like the BH1750.
Buildings follow a set of standards for the correct amount of illumination. Checking this requires a lux meter. Here’s the recommended illumination for rooms in a house:


