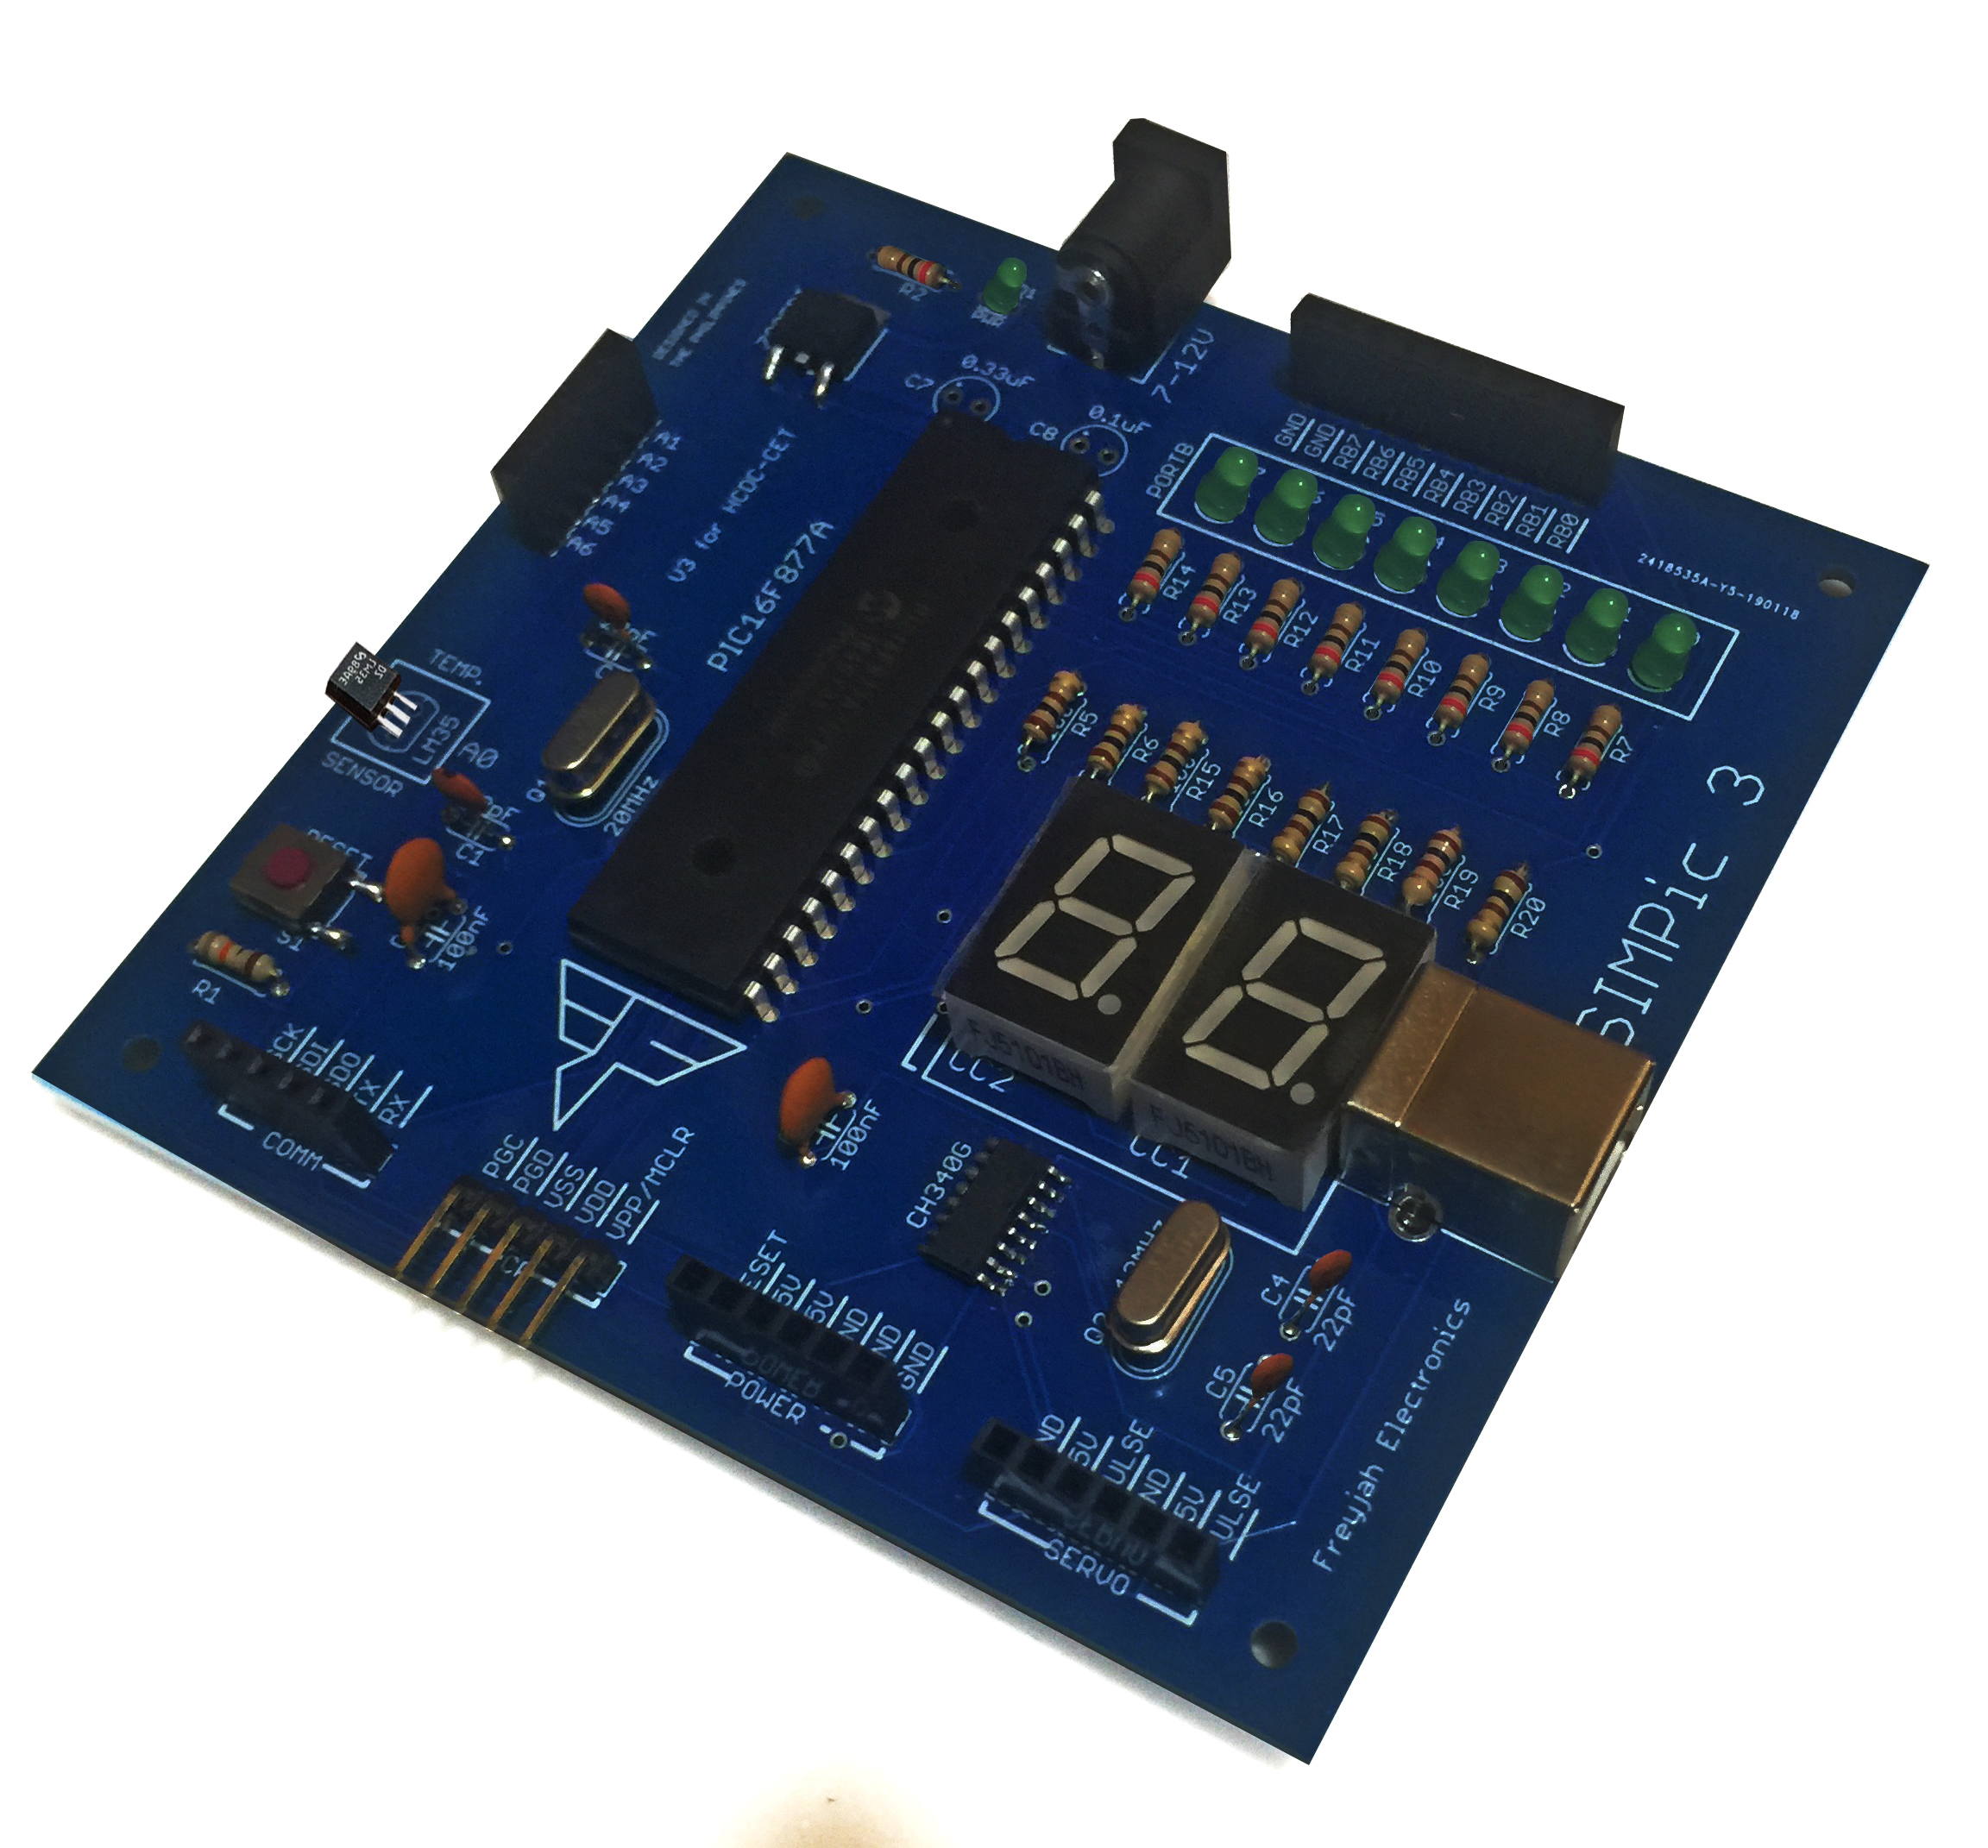
We are done with a few basics on PIC microcontrollers. Now it's time to learn how to load a program to the device itself. There are, in fact, plenty of circuits that can load a HEX file to a PIC microcontroller. Older programmers used the classical RS-232 and parallel ports, while newer programmers communicate through USB. Of course, you will have a hard time looking for computers with RS-232 and parallel ports these days, so USB is now the practical choice.
For PIC microcontrollers, one of the easiest ways to program a device is through Microchip's PICkit programmer/debugger.
PICkit Versions
Microchip has released several generations of the PICkit programmer. The original version of this article stopped at PICkit 4, which was released in 2018. Since then, Microchip has introduced PICkit 5, which is now the current version.
PICkit 1
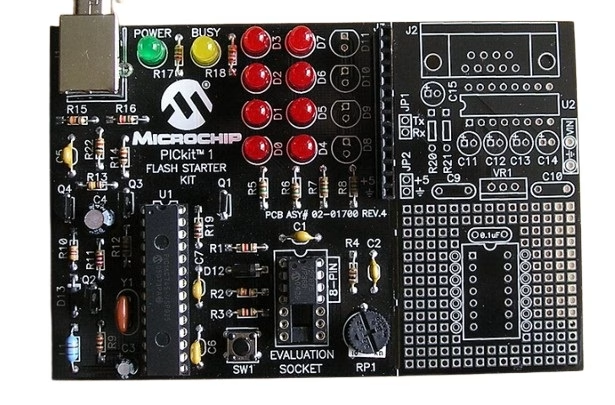
The original PICkit 1 Flash Starter Kit appeared in the early 2000s and was aimed mainly at beginners working with Microchip's small 8-pin and 14-pin Flash PIC microcontrollers. It consisted of a development board connected to a computer through USB. Compared to current programmers, device support was very limited, but the important thing was that it provided an inexpensive USB-based way to start programming PIC devices. Today, PICkit 1 is mainly of historical interest. Microchip no longer recommends it for new development.
PICkit 2
PICkit 2 was a major improvement and became very popular among PIC hobbyists. Unlike the first PICkit, it could program a much wider variety of PIC microcontrollers using ICSP or In-Circuit Serial Programming. One useful feature was its standalone PICkit 2 Programmer software. You could select a HEX file, connect a target PIC and program it without opening an entire MPLAB project. PICkit 2 also included some useful extra tools, including a UART terminal. However, both its software and supported-device list are now considered legacy. Microchip keeps the old PICkit 2 software in its development-tool archive.
PICkit 3

PICkit 3 replaced PICkit 2 and provided closer integration with MPLAB and later MPLAB X IDE. PICkit 3 can both program and debug compatible PIC microcontrollers. Debugging is particularly useful because you can stop your program at a breakpoint, inspect registers and variables, execute instructions step by step, and then continue running the program. You will still find plenty of PICkit 3 programmers and inexpensive clones for sale. They work well with many older PIC devices, including microcontrollers such as the PIC16F84A and PIC16F877A. However, Microchip stopped adding new device support to PICkit 3 on June 1, 2019, so I would not recommend buying one for a new development setup unless you specifically need it for older PICs.
PICkit 4
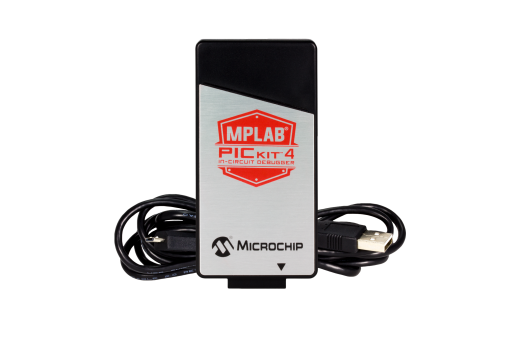
Microchip introduced the MPLAB PICkit 4 on February 27, 2018, as the replacement for PICkit 3. The PICkit 4 increased programming speed considerably, supported a wider target-voltage range and added support for more programming and debugging interfaces. Microchip stated that it could program devices up to five times faster than PICkit 3. PICkit 4 was an excellent programmer and remains perfectly usable if you already own one. However, Microchip now lists it as an archived programmer that is no longer available as its current development tool.
PICkit 5
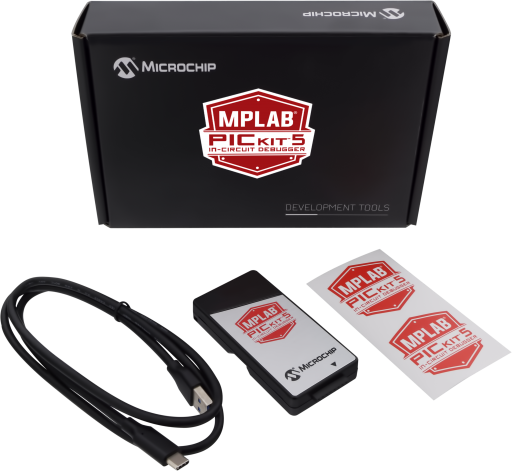
The current version is the MPLAB PICkit 5 In-Circuit Debugger/Programmer, released in May 2023. PICkit 5 supports not only PIC and dsPIC devices but also Microchip's AVR, SAM, and Arm-based devices. It connects to the computer through USB Type-C and works with MPLAB X IDE and MPLAB IPE. Another interesting feature is its Programmer-to-Go capability. PICkit 5 can work with Microchip's mobile Programmer-to-Go application through Bluetooth Low Energy, making it possible to program devices in the field without keeping the programmer connected to a PC.
Here's a quick comparison:
| PICkit | Best Description Today | Recommended for New Projects? |
|---|---|---|
| PICkit 1 | Early USB starter programmer | No |
| PICkit 2 | Popular legacy PIC programmer | No |
| PICkit 3 | Legacy programmer/debugger | No |
| PICkit 4 | Still capable but archived | Only if you already own one |
| PICkit 5 | Current programmer/debugger | Yes |
For a new setup today, PICkit 5 is the obvious choice. If you already have a PICkit 3 or PICkit 4 and your PIC microcontroller is supported, however, there is no reason you can't continue using it.
How PICkit Programs a PIC Microcontroller
PICkit programmers normally use ICSP, which stands for In-Circuit Serial Programming.
The advantage of ICSP is right there in the name: you can program the microcontroller while it is already installed in your circuit. You don't need to remove the PIC and put it into a separate programming socket every time you change your program.
For most traditional PIC microcontrollers, five important connections are involved:
| PICkit Pin | Signal | Purpose |
|---|---|---|
| 1 | MCLR/VPP | Reset and programming-voltage signal |
| 2 | VDD | Target supply-voltage sense/power |
| 3 | VSS | Ground |
| 4 | PGD / ICSPDAT | Programming data |
| 5 | PGC / ICSPCLK | Programming clock |
The exact pins on the PIC microcontroller vary according to the device, so always check its datasheet before connecting your programmer. Microchip recommends a typical pull-up resistor of around 10 kΩ between MCLR and VDD. You should also avoid putting large capacitors or other circuits directly on the PGC and PGD lines because they may interfere with programming signals.
Connecting PICkit to a PIC16F84A
Let's use the PIC16F84A from our previous tutorials as an example. For the 18-pin PDIP version of the PIC16F84A, the ICSP connections are:
| PICkit Signal | PIC16F84A Pin |
|---|---|
| MCLR/VPP | Pin 4 - MCLR |
| VDD | Pin 14 - VDD |
| VSS | Pin 5 - VSS |
| PGD / ICSPDAT | Pin 13 - RB7 |
| PGC / ICSPCLK | Pin 12 - RB6 |
The PIC16F84A supports ICSP through RB6 and RB7, so the device can remain installed on your breadboard or PCB while you program it.
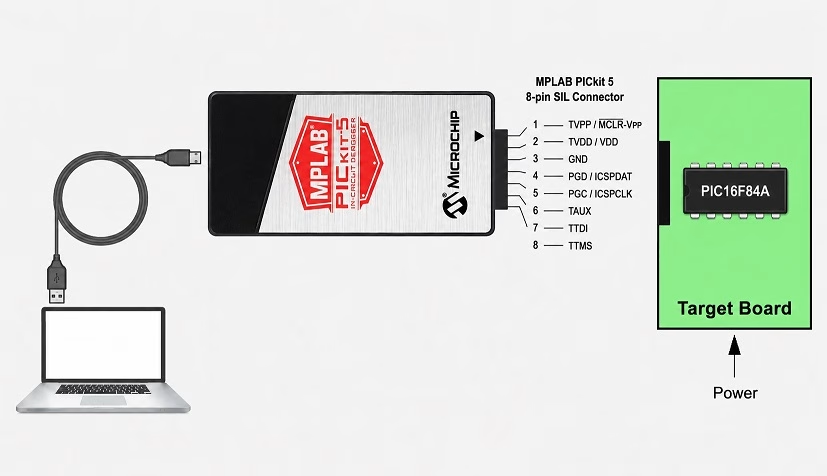
Make sure you also connect the normal power and oscillator circuitry required by the PIC16F84A. One detail that often confuses beginners is target power. The PIC can either be powered by your circuit or, depending on the programmer and configuration, supplied from the programmer. For normal development, I prefer powering the target circuit from its own regulated supply and allowing the PICkit to sense that voltage. Microchip also recommends external target power for its normal debugger connection.
Most importantly, never apply a supply voltage higher than the maximum allowed by your particular PIC microcontroller.
What is a HEX File?
When you write a PIC program in assembly language or C, the microcontroller doesn't directly understand your source code.
The assembler or compiler first converts your program into machine instructions. The build process then generates a HEX file containing the data that will eventually be written to the PIC's program memory.
For example, if your MPLAB project is called:
blink.Xbuilding that project may produce a file similar to:
blink.X.production.hexYou don't normally need to open or edit this file manually. You simply give it to the programmer.
The PICkit then transfers the contents of the HEX file into the microcontroller's Flash program memory.
Loading a HEX File Using MPLAB IPE
For programming an existing HEX file, the easiest current method is MPLAB IPE, or Integrated Programming Environment. MPLAB IPE installs together with MPLAB X IDE. Unlike the full IDE, IPE concentrates on programming devices rather than writing and compiling programs. Microchip itself recommends IPE when you already have a HEX file that you simply want to program into a device.
Here’s the complete process:
1. Install MPLAB X IDE and MPLAB IPE. Download the current MPLAB X installer from Microchip and make sure MPLAB IPE is selected during installation. Connect your PICkit to the computer afterward.
2. Connect the PICkit to your target PIC. Wire MCLR/VPP, VDD, VSS, PGD, and PGC correctly. Pay particular attention to the Pin 1 marker on the PICkit connector.
3. Power the target circuit. If your board uses its own power supply, turn it on before attempting to connect. The PICkit needs to detect the target supply voltage.
4. Open MPLAB IPE. Select the correct device family and then select the exact PIC microcontroller. For our example, this would be PIC16F84A.
5. Select the programmer. Choose the connected PICkit from the Tool field and click Connect. The Output window should indicate that the programmer has connected and the target has been detected.
6. Load the HEX file. Select File > Import > Hex, browse to your compiled `.hex` file and open it. IPE should display a message indicating that the HEX file loaded successfully.
7. Click Program. MPLAB IPE erases the required memory locations, writes your program and verifies the contents afterward.
8. Check the result. A successful operation produces a Programming/Verify complete message in the Output window.
9. Run your circuit. Disconnect the programmer if necessary or simply reset/power-cycle the PIC. Your program should now execute from Flash memory.
If you're using the LED-blinking program from our earlier PIC16F84A tutorial, the LED should now start blinking exactly as it did in the simulator—except this time the code is running on a real PIC microcontroller.
Programming Directly from MPLAB X IDE
If you are actively writing the program yourself, you don't actually have to export the HEX file and manually open MPLAB IPE every time. MPLAB X IDE can build and program the device directly. After connecting the PICkit, open your project properties and select the PICkit as your hardware tool. Build the project and use the Make and Program Device command. MPLAB X will compile the project, create the HEX file internally, and immediately send it to the PICkit.
This gives us two slightly different workflows:
| Situation | Recommended Tool |
|---|---|
| Writing and debugging your own PIC code | MPLAB X IDE |
| You already have a HEX file | MPLAB IPE |
| Repeated production programming | MPLAB IPE |
For beginners learning PIC assembly or XC8 programming, you will probably spend most of your time in MPLAB X and only use IPE when you need to program an existing HEX file.
Common PICkit Programming Problems
Target Device Not Detected
This is probably the most common PICkit error. First, make sure the PIC has power. Then verify the VSS connection and check that the PICkit's Pin 1 is connected to MCLR/VPP rather than accidentally reversing the connector. Also verify that you selected the correct PIC model in MPLAB.
Failed to Program Device
Check the PGC and PGD wiring. These are the two lines carrying the actual programming clock and data. Circuits connected to these pins can also interfere with ICSP. Large capacitors are particularly problematic because they slow the edges of the programming signals.
Wrong Device ID
If MPLAB reports a device ID different from what it expects, confirm that the selected PIC model matches the physical device on your breadboard. For example, don't select PIC16F84A if you actually installed a PIC16F628A.
PIC Works in the Programmer but Not After Disconnecting It
If programming succeeds but your application doesn't run afterward, check the rest of the target circuit. The PIC may need an oscillator, proper configuration bits, MCLR pull-up, power-supply decoupling, and other supporting components depending on the device. The programmer only guarantees that your program was written correctly. It cannot fix an incorrectly wired target circuit.
PICkit 3 Cannot Program a Newer PIC
This can simply be a device-support issue. PICkit 3 hasn't received support for new devices since 2019. If you are working with a newer Microchip device, use PICkit 5 or another currently supported Microchip programmer instead.
Which PICkit Should You Buy?
If you are buying a programmer today, I recommend PICkit 5. It provides current device support and works with the latest Microchip development tools. It also gives you debugging capabilities, which become increasingly valuable as your programs grow more complicated.
If you already have a genuine PICkit 4, keep using it as long as your target device remains supported.
PICkit 3 is still useful for learning with older devices such as the PIC16F84A, PIC16F628A, and PIC16F877A, especially if you already own one. However, I wouldn't purchase PICkit 3 specifically for a new collection of Microchip devices because its supported-device list is effectively frozen.
Conclusion
At this point, we have completed the whole basic PIC development cycle. We write our program in assembly or C, compile it into machine code, generate a HEX file, and finally use a programmer such as PICkit to transfer that program into the microcontroller. The important part to remember is that modern PIC programmers use ICSP, allowing you to program the PIC without removing it from your circuit. Once you have MCLR/VPP, VDD, VSS, PGD and PGC wired correctly, programming becomes a straightforward process.
For an existing HEX file, use MPLAB IPE. If you're developing the program yourself, you can program the device directly from MPLAB X IDE. From here, the PIC is finally ready to leave the simulator and start controlling real hardware. If you're following my PIC16F84A tutorials, the next step is to start writing more useful programs and learn how the PIC executes assembly-language instructions.