I recently got my hands on the All-in-One Starter Kit for Arduino Nano R4 from Elecrow. After receiving the kit, one thing immediately stood out to me: this is a surprisingly compact way to put most of the peripherals an Arduino beginner would want on a single workbench.
Instead of getting a breadboard, a bundle of jumper wires and a collection of separate modules, the kit puts most of the hardware directly on one large PCB. The Arduino Nano R4 itself plugs into the center of the board, while the sensors, displays and output devices surround it.
That makes the kit convenient, but there is also something technically interesting about how Elecrow managed to connect so many peripherals to a relatively small Arduino board. The answer is partly I2C, and partly some clever pin sharing.
Disclosure: Elecrow provided this kit to TeachMeMicro as a free sample. The observations and opinions in this article are my own.
What’s Inside the Elecrow Nano R4 Starter Kit?
Elecrow lists 16 different sensor or peripheral types in the kit. These cover most of the devices that normally appear during the first stages of learning Arduino: LEDs, buttons, a potentiometer, buzzer, relay, servo, ultrasonic sensor, PIR motion sensor, sound sensor, soil moisture sensor, infrared receiver, temperature and humidity sensing, light sensing, motion sensing and two different displays.
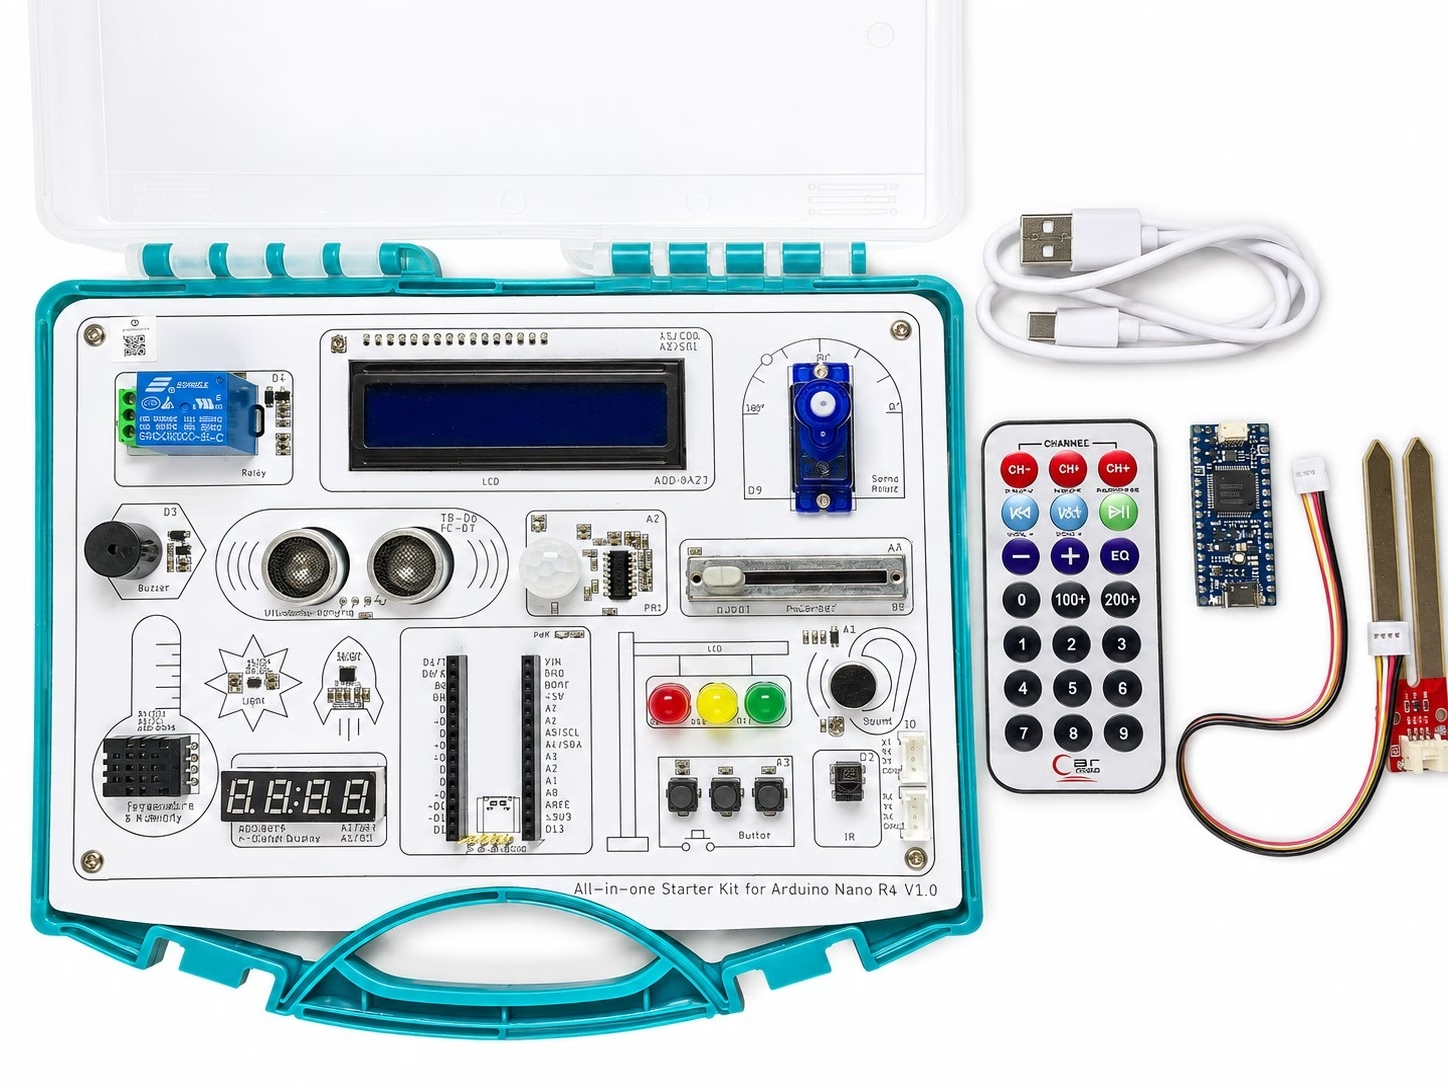
Elecrow also provides 20 example lessons, starting with basic LED and sensor exercises and eventually moving into small projects such as a reverse parking alarm, memory game, guessing game and Morse code decoding game.
You can find the example lessons in the Elecrow Arduino Nano R4 Starter Kit GitHub repository.
This is probably the kit's strongest feature. A beginner can experiment with inputs, outputs, analog signals, PWM, sensors, actuators, and communication buses without buying another module every time a new Arduino concept is introduced. There is one external part, such as the soil moisture probe, but most of the electronics stay permanently mounted on the main board.
For a classroom or someone learning Arduino at home, I can see this being particularly useful. You can put the whole kit away and continue experimenting later without first figuring out where all your jumper wires went.
The Arduino Nano R4 at the Center
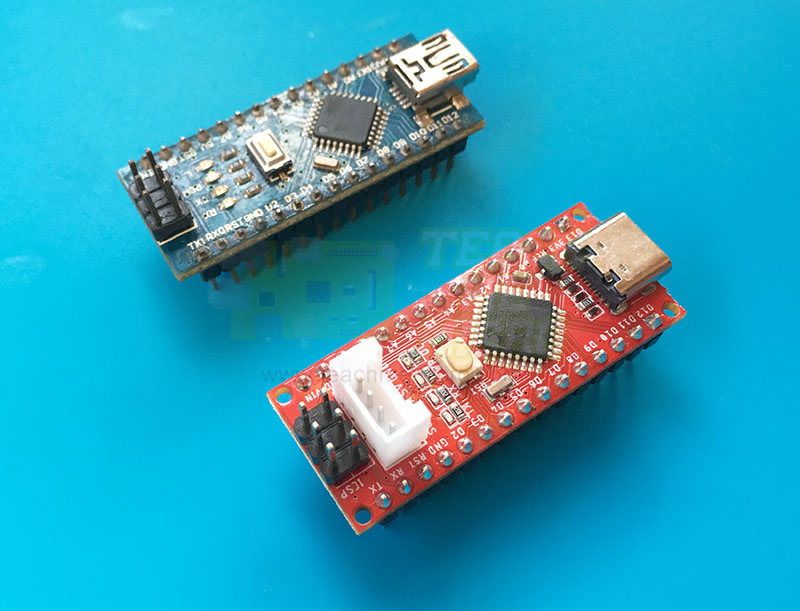
The controller included with the kit is the relatively new Arduino Nano R4.
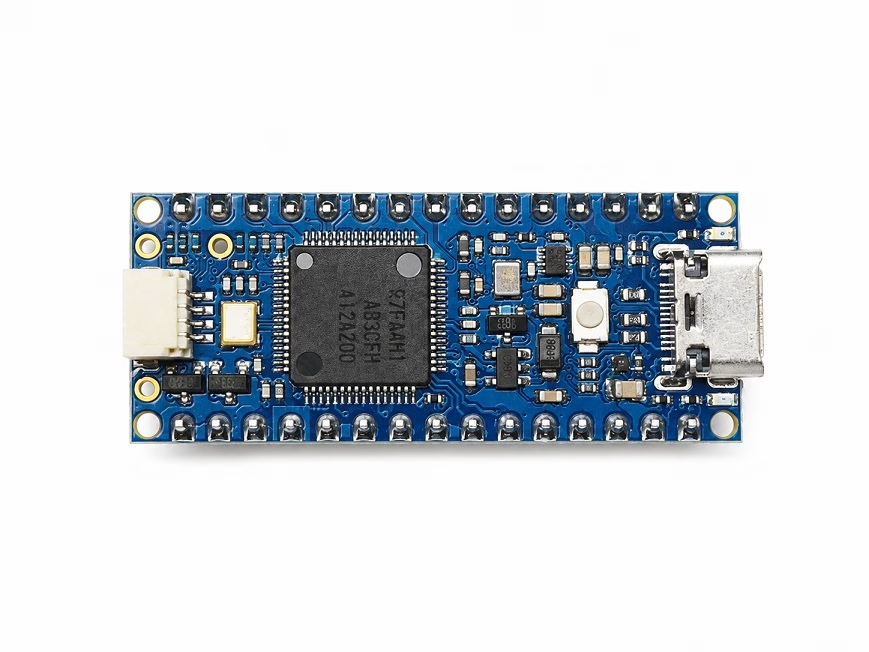
Despite its small Nano form factor, the board is based on the Renesas RA4M1, a 32-bit ARM Cortex-M4 microcontroller running at 48 MHz. It contains 256 kB of Flash, 32 kB of SRAM, and 8 kB of data memory. The Nano R4 also retains 5 V GPIO, which is convenient when working with the type of modules commonly used in beginner Arduino projects.
The Nano R4 has no Wi-Fi or Bluetooth, so it isn't really meant to compete with an ESP32 starter kit. Instead, I see it as a modern replacement for the traditional Arduino learning environment: plenty of processing power, familiar 5 V I/O and enough peripherals to go well beyond blinking an LED.
The Nano R4 itself is also very small, which helps explain why the complete kit still feels relatively compact despite the amount of hardware surrounding it.
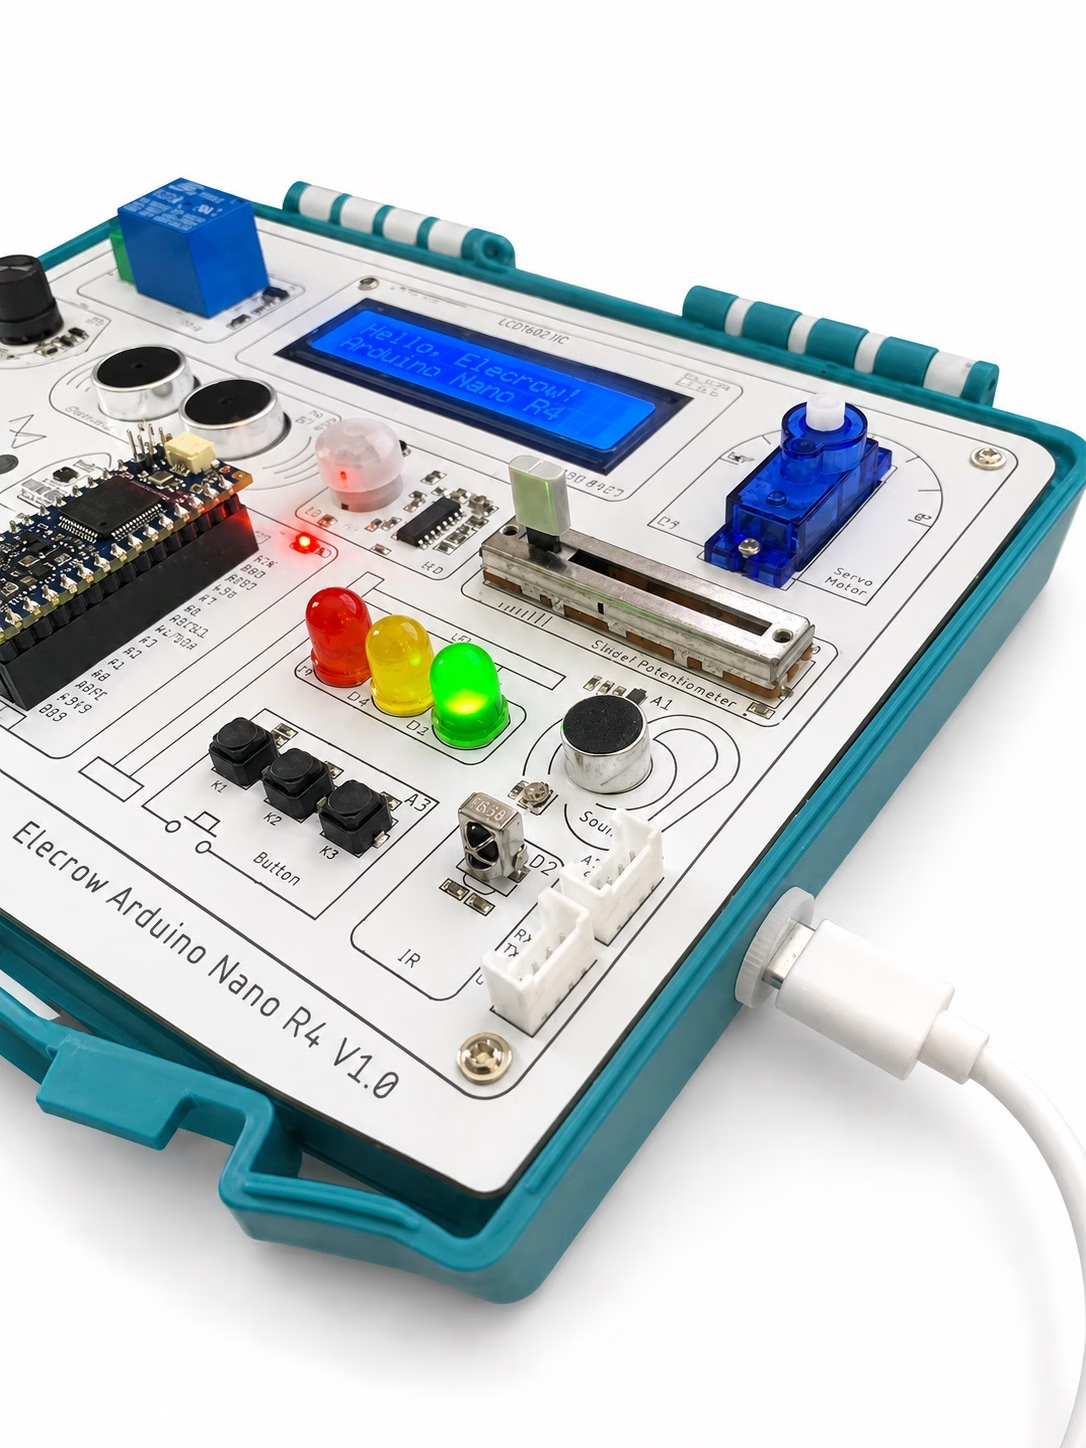
Another small but very practical design choice is the USB Type-C port mounted directly on the side of the starter kit. You don't have to reach into the middle of the board to connect a cable to the Nano R4 itself. The side-mounted connector makes it much easier to plug the kit into a computer for programming and power, especially when the board is sitting flat on a desk.
This may sound like a minor detail, but it contributes a lot to the kit's grab-and-go feel. You can place it on the workbench, connect a USB-C cable from the side and immediately start uploading sketches without rearranging the board or disturbing any of the attached peripherals.
How Do 16 Peripherals Fit on a Nano?
This was one of the more interesting things I noticed while looking into the board.
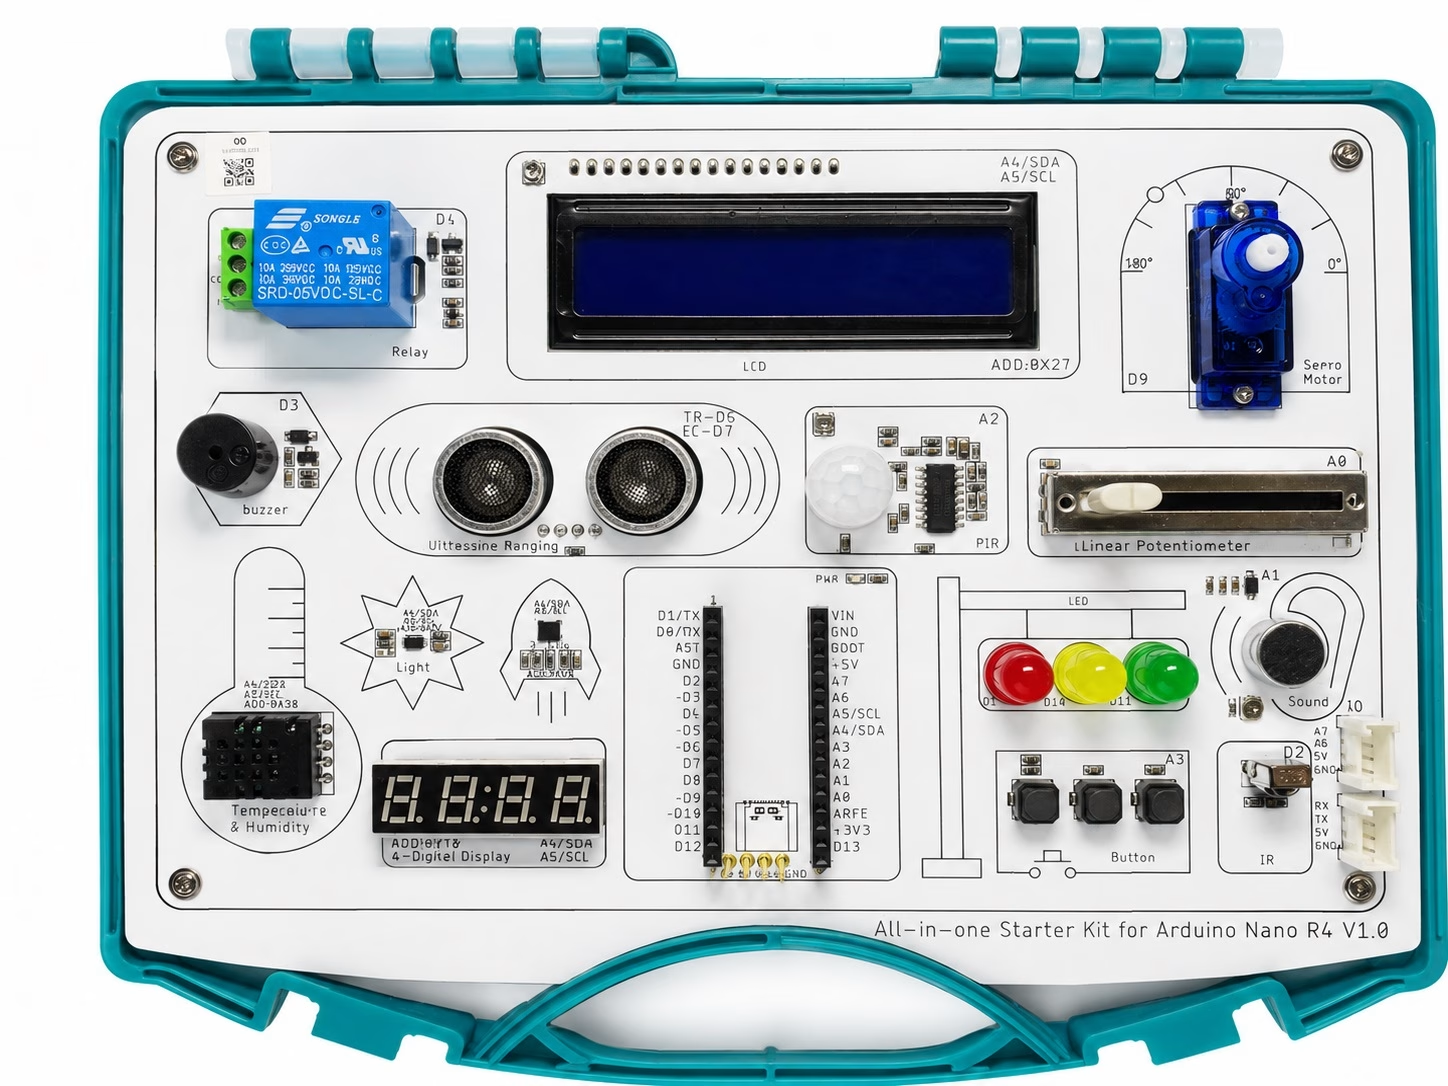
If every module required its own set of GPIO pins, connecting this many devices would become difficult very quickly. Elecrow instead combines dedicated GPIO, analog inputs and a shared I2C bus.
| Arduino Connection | Peripheral |
|---|---|
| A0 | Linear potentiometer |
| A1 | Sound sensor |
| A2 | PIR motion sensor |
| A3 | Three pushbuttons |
| A4 / SDA + A5 / SCL | Multiple I2C peripherals |
| A7 | Soil moisture sensor |
| D2 | IR receiver |
| D3 | Buzzer |
| D4 | Relay |
| D5, D10, D11 | Red, yellow and green LEDs |
| D6 + D7 | Ultrasonic sensor |
| D9 | Servo |
There are actually two different pin-saving techniques here.
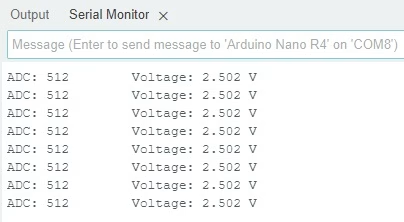
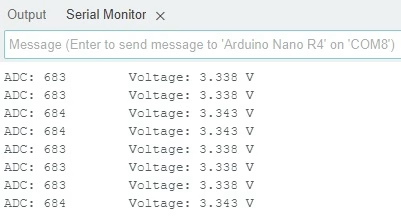
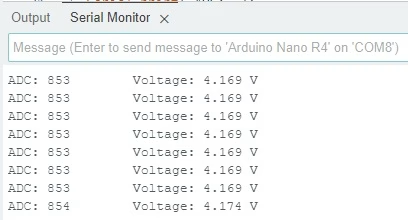
The three pushbuttons, for example, don't each consume one GPIO pin. They all connect to A3, with the software determining which button is pressed from the resulting analog value. This is essentially a resistor-ladder technique. Each button produces a different voltage at A3, allowing the Arduino's ADC to determine which one was pressed. This is a useful circuit-design technique and worth showing to beginners.
The other technique is I2C.
Five Devices Sharing Two I2C Pins
Five of the more sophisticated peripherals share the same SDA and SCL lines on A4 and A5.
| I2C Device | Address |
|---|---|
| 16×2 LCD | 0x27 |
| DHT20 temperature/humidity sensor | 0x38 |
| BH1750 light sensor | 0x5C |
| LSM6DS3 motion sensor | 0x6B |
| HT16K33 4-digit display | 0x70 |
This means five fairly complex peripherals can effectively share two microcontroller pins. And this is where the kit becomes more interesting than simply soldering a lot of modules onto the same PCB.
Why Using I2C Is an Advantage
The most obvious advantage is saving GPIO.
The LCD alone would require several digital pins if connected via its parallel interface. The accelerometer/gyroscope, light sensor, temperature/humidity sensor, and four-digit display would consume even more connections if each had its own interface.
Instead, all five devices share SDA and SCL. Each device has its own I2C address, so the Nano R4 can select which peripheral it wants to communicate with. For low-speed devices such as environmental sensors and small displays, this works very well. It also makes multi-sensor projects much easier.
For example, you could read temperature and humidity, measure ambient light, detect movement with the IMU, and show information on the LCD without changing any wiring. The hardware is already connected.
This is exactly where I think the all-in-one design becomes useful for beginners. You can spend more time experimenting with the software and less time rebuilding circuits.
This is also an educational opportunity. An I2C scanner should detect several addresses on the board at once, making this kit an excellent physical example for explaining how multiple devices can share a serial bus.
But I2C Also Has Disadvantages
Putting several devices on the same bus is not automatically better.
The first limitation is that all devices share the same communication channel. Only one transaction can occur on the bus at a time. This isn't a significant problem for a 16×2 LCD or an environmental sensor, but I2C would not be my first choice for a peripheral that requires continuous high-speed data. Address conflicts can also become an issue when expanding the kit. An I2C peripheral must have an address that doesn't conflict with something already connected.
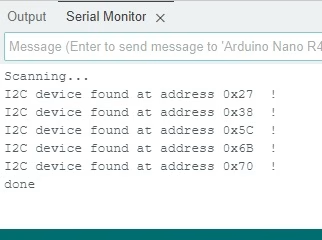
Since the kit already occupies addresses such as 0x27, 0x38, 0x5C, 0x6B, and 0x70, an additional module using one of those fixed addresses could require an address change, an I2C multiplexer, or another I2C controller. Another characteristic worth knowing: because SDA and SCL are shared, a problem affecting the bus can potentially affect several devices instead of just one.
For example, if one device holds SDA low because of a hardware or software problem, communication with the other devices on the bus may also stop. For beginner experiments on a professionally manufactured PCB, however, these disadvantages are unlikely to outweigh the convenience. In fact, encountering these limitations later can itself become part of learning how real embedded systems are designed.
Convenience Versus Learning How to Wire Circuits
One larger trade-off with this kit has nothing to do with I2C.
Almost everything is already wired for you.
That is great if the objective is learning Arduino programming. Upload an example, read a sensor, change some code, and immediately observe what happens. It also eliminates one of the most common sources of frustration for beginners: incorrect breadboard connections.
But wiring a circuit is also part of learning electronics. With a traditional starter kit, a beginner has to learn why an LED needs a current-limiting resistor, how breadboard rows are connected, where the sensor's VCC and GND pins go, and which Arduino pin should receive its signal. The Elecrow kit removes much of that process.
I wouldn't necessarily call this a disadvantage. I would simply describe it as a different learning approach. For learning Arduino programming, sensors, and embedded-system concepts, the all-in-one design is excellent. For learning breadboarding and basic circuit construction, I would still eventually recommend working with individual components.
Ideally, a beginner should experience both.
More Than Just Beginner Experiments
The included lessons also go beyond testing each module individually.
Elecrow's repository contains 20 lesson folders. After the individual LED, buzzer, PIR, relay, potentiometer, servo, ultrasonic, display, and sensor examples, later lessons combine components into applications including a reverse parking alarm, LED memory game, sliding-resistor guessing game, and Morse code decoding game.
You can browse the complete lesson code here.
This is important because a starter kit becomes much more useful once you stop treating every sensor as an isolated exercise. A project that combines an input, some processing, and an output is much closer to how an actual embedded system works. And because the hardware connections remain fixed, it should be relatively easy to move from one experiment to another.
My First Impression
My first impression of the Elecrow Arduino Nano R4 Starter Kit is that its strongest feature is how much hardware it fits into a small, convenient platform.
You get most of the classic beginner Arduino peripherals without maintaining a box full of individual modules and jumper wires. But what I find more interesting is how the hardware is designed around the limited number of Nano pins. Five peripherals share one I2C bus, three buttons share an analog input, while the remaining analog and digital devices are distributed across the available pins. That makes the board itself a useful example of embedded hardware design.
There is a trade-off. Beginners won't get quite as much experience wiring breadboards, and the fixed connections provide less flexibility than a collection of separate modules. Sharing multiple devices on I2C also introduces the usual issues of bus bandwidth, shared failures, and address conflicts. For its intended purpose, though, these are reasonable compromises.
If the objective is to start programming an Arduino, interact with real sensors and actuators, and build small projects with as little setup as possible, the Elecrow Nano R4 kit offers a convenient little electronics laboratory you can practically carry around.