Classroom printers already lose evenings to files that looked closed on the monitor. An enclosure for a small board fails when the lid clashes or a screw boss floats. A character file fails somewhere else: a gap under a cloak, a sword thinner than the nozzle, a second shell that never touches the base. When the STL comes from a miniature generator, the next useful move is a mesh check on the same computer, before the slicer quotes a long job and the heated bed starts.
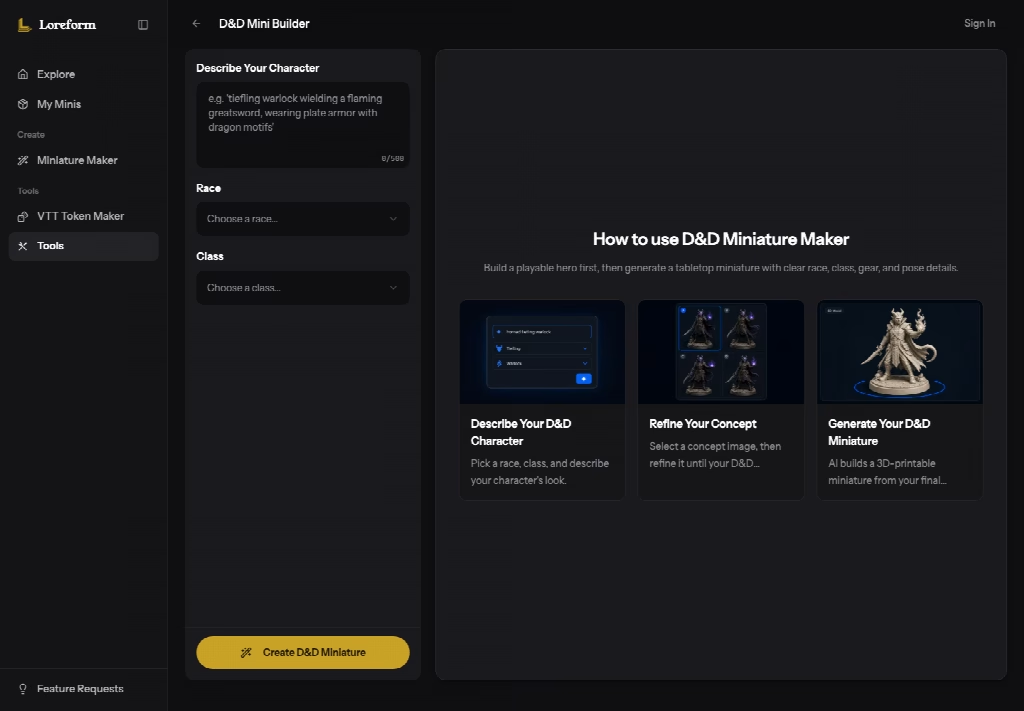
Loreform takes a written description or an uploaded picture and hands back an STL meant for FDM or resin, with a flat base and supports already in the file. That is a claim about the mesh, and a lab that teaches pinouts before an upload should treat it the same way. The checker next to the generator runs in the browser. It asks for no account, uploads nothing, and spends no credits. Drop the STL, read whether it is watertight, how the walls measure, how many shells exist, and whether the figure meets the base. Only then does the machine deserve the hours.
Why Enclosure Habits Fail On Figure Meshes
People who print project boxes build a good checklist, and then they reuse it on everything. They look for a lid gap, a flat mating face, and enough wall for a heat-set insert. Those checks matter for a case. They do not see the failure that ruins a figure. A cloak can read as a solid volume in a shaded view and still have an open boundary where the hem meets the boot. The slicer will either invent a cap or stop and complain after the preview has already been trusted.
The cost shows up as time, not as a mysterious quality score. A six-hour print that delaminates at a thin weapon wastes the evening the class needed for the next board. Filament is the smaller loss. The larger loss is the machine slot, and the habit of trusting a pretty turntable. A figure mesh needs a different pass: close the holes, measure the thin parts, count the floating shells, and see whether the feet actually meet the base the generator added.
Prepare The Checker Before The Slicer Opens
Keep the slicer closed until the report exists. The print checker accepts the STL locally. Nothing is sent up, there is no sign-up, and the run does not sit in a generation queue. That matters on a shared lab PC, where a student file should not leave the room just to learn whether it is hollow. The same validator is what Loreform says it uses to certify its own miniatures, so the report language matches the files the tool exports.
Open the report before anyone argues about nozzle size. Five lines decide whether the file is even a candidate:
- Watertight: open boundary loops are still in the mesh.
- Manifold: duplicate or internal faces would confuse the slicer about which side is outside.
- Wall thickness: weapons, cloak edges, and fingers may be thinner than the nozzle can hold.
- Shells: a debris shell floating off the body will print as grit or as a second object.
- Base contact: the figure has to meet the flat base, or it will not stand after the supports come off.
Read those five as a gate, not as a score to average. One failed line is enough to keep the file off the bed. A clean shaded preview does not cancel an open boundary.
Read Watertight Status And Wall Thickness
Watertight is the first reject. If the report marks an open loop, the mesh is not a closed solid, and a long print is a guess. Do not "fix" that by raising infill. Infill does not sew a hole in the cloak. Wall thickness is the second reject, and it is the one enclosure designers underestimate, because a 1.6 mm box wall is generous next to a sword edge. If the thinnest region is below what the nozzle can trace twice, the weapon will print as a smear or snap when the supports come off.
Write the two results on the job ticket in plain words: closed or open, and the thin spot named (sword, staff, hem). A later student should not have to rediscover the same edge. This is the same discipline as writing which GPIO the LED actually used, instead of trusting the silk screen.
Read Shell Count And Base Contact
Shell count catches the junk a shaded view hides. A tiny disconnected blob near the foot will become its own extrusion, or it will ride along and scar the base. Debris is a failure even when the hero body is closed. Base contact is the standing test. The generator's files are described as having a flat base; the report tells you whether this particular mesh actually touches it. A figure that hovers a fraction above the base will rely on supports for its whole height, and those supports become the part you spend the evening cutting.
If either line is wrong, stop. Do not compensate with a brim and hope. A brim can help a small contact patch. It cannot invent a base the mesh never meets.
Repair Open Holes Before You Add Thickness
Topology repair is a separate local tool, and it solves a narrower problem than people hope. You drop a binary or ASCII STL, up to 200MB, and the browser reads it on the machine. The file is not uploaded. The pipeline welds duplicate vertices, removes duplicate and degenerate faces, unifies normals, fills boundary loops it can cap, and drops tiny debris shells. Then it shows a before-and-after readiness report and a log of what changed. Download the binary STL only after that comparison.
Use this pass when the failure is an open seam or floating grit. Do not use it as a sculpt. The published repair list does not add material to a thin sword. Wall thickness stays a checker item after the repair, which is why a file can come back still marked Needs Review. Needs Review means the mesh is not cleared for a long print, even if the hole count dropped.
Keep The Repair Inside The Browser
Run the repair on the lab computer that already holds the STL. Because the work stays local, a student's character file does not need an account, and a failed network cannot stall the check. Compare the two reports on triangle count and on the five gates. If watertight flips to closed and a debris shell disappears, keep the new file and archive the old one under a different name so nobody slices the broken copy by habit.
If the log says an opening was too large to cap, do not pretend the fill happened. An oversized hole left open is still an open mesh. Send that file back to generation, or accept that a person has to close it in a modeler. The repair tool is honest about those openings. Treat the log as the record, not the turntable.
Leave Thin Swords For A Human Pass
A sword, a staff, or a cloak edge that fails wall thickness is still thin after holes are filled. Thickening that part is a design change: it alters the silhouette the description asked for. The checker can name the thin region. It will not decide whether a slightly heavier blade is acceptable for the game. That decision belongs to the person who will paint it and to the nozzle on the machine. If the class printer is a 0.4 mm FDM nozzle, a hair-thin blade is a reject even when the body is watertight. Resin can hold a finer edge, and that choice is a printer decision, not something the repair pass settles.
Reject the file when the thin part is structural, such as an ankle or a weapon the figure leans on. A decorative ribbon can sometimes be sacrificed. An ankle cannot. Write the reject reason as the thin feature, so the next prompt can ask for a thicker section instead of a new adjective about "high detail."
Slice Only After The Report Goes Quiet
When watertight, manifold, walls, shells, and base contact are all clear, open the slicer. Not before. The STL is then a normal print job: orient the base on the bed, keep the pre-built supports if they are in the file, and check the time estimate against the lab schedule. A quiet report does not mean the print will be pretty. It means the mesh is not already known to be broken. Layer lines, resin wash, and paint are later problems. They are cheaper to face when the file itself is closed.

If the slicer warns about non-manifold edges that the checker already cleared, trust the warning and re-export. Two tools can disagree when a download was truncated. Slice the file you just rechecked, not an older download sitting in Downloads with a similar name. This is the same mistake as flashing the wrong HEX because two builds shared a folder.
What A Lab Printer Should Refuse
Refuse the job when any gate is still red, when repair left Needs Review on wall thickness, or when the only "fix" on offer is a longer print with more infill. Infill does not close a hole and does not thicken a sword. Also refuse a file whose base contact failed and whose plan is "we will glue it to a washer afterward," unless that glue joint is an explicit choice written on the ticket. Surprise glue is how a figure leaves the lab and falls over on the table the same night.
A miniature maker that exports STL, GLB, and FBX without an extra credit charge is still only as good as the STL you actually slice. GLB can be handy for a screen preview. The printer wants the STL that passed the five gates. Do not slice a format conversion you have not rechecked, because a converter can reopen edges the report already cleared.
Put The File On The Bed Last
Loreform is a reasonable source of figure files for a lab that already runs a printer and does not want to sculpt. It does not design board enclosures, and it does not replace the person who reads a readiness report. Generate the mesh, check it locally, repair only the topology the log can prove, and leave thin structural parts for a human decision.
Put the file on the bed when the five gates are quiet. Keep it off the bed when Needs Review is still on the screen. The machine time is the expensive part, and the report is the cheap part.