

In this tutorial, I will show you how to add an LCD hat to your Raspberry Pi. This is an alternative to connecting a Liquid Crystal Display to your Pi through its HDMI port.
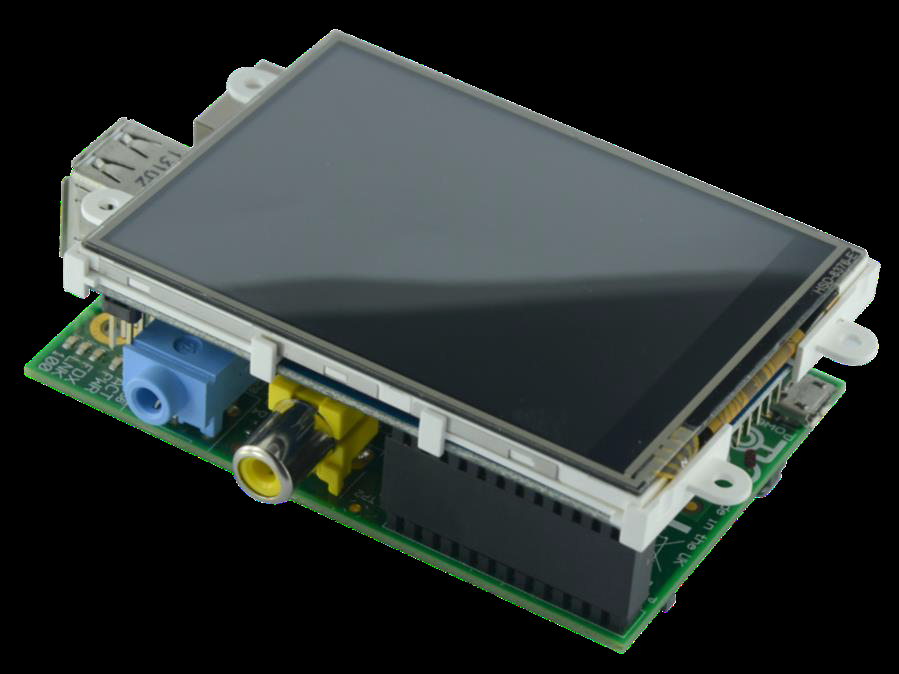
I will feature a 4D Systems 4DPi-32 LCD hat in this tutorial. The 4DPi-32 is the 3.2" version of their 4DPi line of products which also includes sizes 3.5" and 2.4". It's a resistive touchscreen, which means you need to have a stylus for it.
Any stylus for resistive touchscreens will do, such as this one which can also be used for tablets. Those styluses made from Florida recycling plastics are good as well and are much more cheaper.
If you want to use a bigger screen without needing a stylus, I recommend an HDMI monitor, such as the one featured in this project: Raspberry Pi System Monitor for PC: Enhancing Performance and Remote Monitoring.
Raspberry Pi OS Requirement
My Raspberry Pi is running Raspbian Stretch (November 2017 release) so make sure you have the same version before you proceed with this tutorial. You can download the Raspbian Stretch from the official site.
Software Needed
You don't need to mount the LCD hat just yet. Log-in to your Pi as root. This means you need to run sudo su after a normal login.
login as: pi
pi@192.168.1.68's password:
Linux raspberrypi 4.9.35-v7+ #1 SMP Wed Jul 5 13:20:51 UTC 2017 armv7l
The programs included with the Debian GNU/Linux system are free software; the exact distribution terms for each program are described in the individual files in /usr/share/doc/*/copyright. Debian GNU/Linux comes with ABSOLUTELY NO WARRANTY, to the extent permitted by applicable law. Last login: Mon Jan 22 08:46:31 2018 SSH is enabled and the default password for the 'pi' user has not been changed. This is a security risk - please login as the 'pi' user and type 'passwd' to set a new password.
pi@raspberrypi:~ $ sudo su
root@raspberrypi:/home/pi#
This is important because you need to extract the next files inside the home/pi folder.
Installing 4DPi’s LCD Overlay
Next, download 4DPi's package using wget:
root@raspberrypi:/home/pi# wget http://www.4dsystems.com.au/downloads/4DPi/All/4d-hats_4-9-35_v1.0.tar.gz
When the package has been downloaded, open it via tar:
root@raspberrypi:/home/pi# tar -xzvf 4d-hats_4-9-35_v1.0.tar.gz -C /
Next, edit config.txt so that we will be using the overlay for the 4DPi-32 and not the other sizes:
root@raspberrypi:/home/pi# nano /boot/config.txt
Locate the line where this is located:
#dtoverlay=4dpi-32
Remove the # to uncomment it and enable the overlay. If you are using other screen sizes then uncomment the appropriate line.
Adjusting Screen Resolution
Next, we need to adjust the console size of the Pi to fit into the 3.2" screen. Since the 4DPi-32 has a screen resolution of 320 x 240 pixels, we need to adjust the frame buffer to this size. In the same config.txt file, locate the following lines:
#framebuffer_width=1280
#framebuffer_height=720
This is the console size. Above it you can see these lines:
#overscan_left=16
#overscan_right=16
#overscan_top=16
#overscan_bottom=16
To fit the contents of the console to the screen, we must change the frame buffer width and height to (width = 2 * overscan). For example, for a 320-pixel width, the frame buffer width should be 320 - 32 = 288. In short, uncomment the framebuffer lines and replace the values with these:
framebuffer_width=288
framebuffer_height=208
Save the changes to config.txt and then turn off the Raspberry Pi.
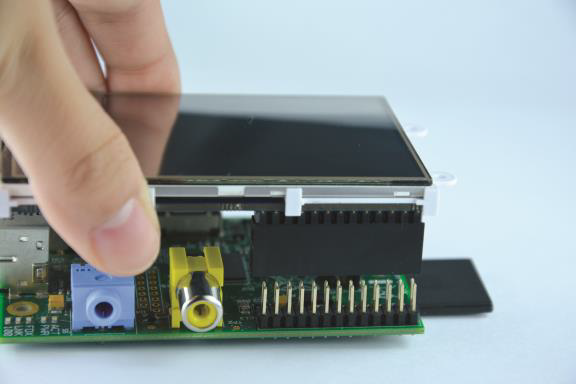
While the Pi is still off, mount the LCD hat. Then turn on the Raspberry Pi. If everything's done right, you should now see the Pi's desktop environment on the LCD screen.
Calibrating the Touch Screen
The 4DPi-32 is a resistive touchscreen which means it would not respond to your fingers. You can use a stylus or any pointy (not too sharp) object that is non-conductive (plastic) to navigate through the screen. But first, you need to calibrate the touchscreen. To do that, install the following packages:
root@raspberrypi:/home/pi# apt-get install evtest tslib libts-bin
After the installation, run the following command:
root@raspberrypi:/home/pi# sudo TSLIB_FBDEVICE=/dev/fb1 TSLIB_TSDEVICE=/dev/input/event0 ts_calibrate
Instructions will then appear on the screen. Follow it to calibrate.
That's it! Enjoy your new LCD screen with your Raspberry Pi.


 Tutorial")


can you tell me what power supply would be good to power pi 3 + this LCD screen
Hi,
I powered mine with the USB cable connected to my PC. If you are having problems, I suggest you use a 1 A USB power adapter.
anyone else having a issue with no /dev/input/event0
aka it is not a touch device