
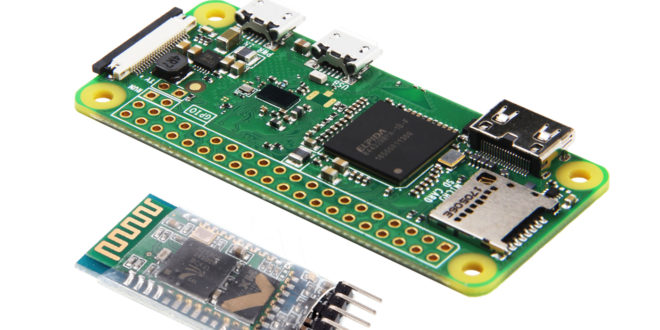
The Raspberry Pi Zero W comes with both WiFi and Bluetooth connectivity. I have already covered how to turn on WiFi on my previous tutorial. Now, let’s look at how to set up a Raspberry Pi Zero bluetooth connection without a GUI.
Introduction
The small-body version of the Raspberry Pi supports Bluetooth 4.1 which also means it’s Bluetooth Low Energy (BLE) compatible. This increases the number of possible devices we can interface with the Raspberry Pi Zero W.
My aim for this tutorial is to establish a connection between the Raspberry Pi Zero and my HC-05 bluetooth module. If this is possible, then I could control my RPi Zero via Bluetooth.
Bluetooth via GUI
As I've said, I'll exclusively be using the terminal here. Setting up Bluetooth via GUI requires blueman which can be installed using
sudo apt-get install bluetooth bluez blueman
When blueman is installed, Bluetooth Manager is now accessible in Preferences.
Raspberry Pi Zero Terminal Bluetooth Control
Bluetooth options via terminal is accessible by issuing this command
bluetoothctl
Once you enter this command, the Bluetooth MAC Address of your Pi will be shown as well as the addresses of nearby devices.
Next, you need to turn on the Bluetooth agent which is a program that will manage the pairing between devices
agent on
Press enter. You can then use custom agents or the default agent. For now, let’s use the default bluetooth agent. Type:
default-agent
And press enter.
To scan available bluetooth devices, type
scan on
The list of available devices will appear like this:
Discovery started
[CHG] Controller B8:27:EB:E3:B4:FC Discovering: yes
[NEW] Device 34:C0:59:9B:9C:D6 HC-05
[NEW] Device 60:57:18:AA:C1:33 CORPORATESALES
To pair with a specific device, like the HC-05 in this example, use this command
pair 34:C0:59:9B:9C:D6
That’s it for the pairing. But we can’t send data from and to these devices yet.
Creating a Serial Port Profile
Since Bluetooth is essentially a wireless serial port, we need to create a serial port profile first. This is done by editing the following file:
sudo nano /etc/systemd/system/dbus-org.bluez.service
Locate the line which says:
ExecStart=/usr/lib/bluetooth/bluetoothd
and add -C at the end. Then on the line immediately after, add
ExecStartPost=/usr/bin/sdptool add SP
So basically this is what it should look like:
ExecStart=/usr/lib/bluetooth/bluetoothd -C
ExecStartPost=/usr/bin/sdptool add SP
Save the file and reboot. Then go to bluetoothctl again and pair the RPi and the HC-05.
Sending Messages via Bluetooth
To send and receive message via Bluetooth, we can use minicom just like how we could send and receive messages through the serial port. But first use the command
sudo rfcomm watch hci0 34:C0:59:9B:9C:D6
Then install minicom
sudo apt-get install minicom
To open minicom and connect to the HC-05 bluetooth serial port, type
minicom -b 9600 -o -D /dev/rfcomm0
That’s it! The HC-05 will be receiving anything you type on the minicom terminal. Of course, to make that data on the HC-05 side useful, you still need a microcontroller.
Let’s say you use this diagram from my serial bluetooth tutorial:
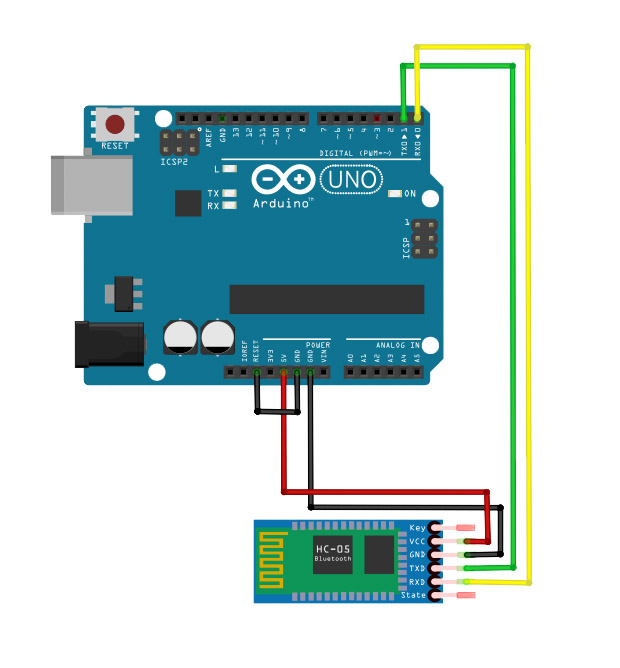
And then use this sketch which makes the Arduino UNO a dummy TTL-to-USB device:
void setup() {
}

void loop(){
}
Open the serial monitor on the Arduino IDE and start typing messages. They should appear on the Raspberry Pi terminal!


 Tutorial")


