For those who are looking to work with images on their projects, the Raspberry Pi offer enough tools to work with. This short tutorial will guide you on how you can take pictures using a camera attached to your Pi and then upload those camera images for use in a website.
Setup a Dropbox Account
There are a lot of free APIs for uploading images but I found Dropbox’s API to be the easiest. To start using their API, you need to create your own account.

Once you have your own account, login and head over to the Dropbox developer’s page. Register your application and then take note of the App key and App secret found in the settings tab.
The developer page contains lots of information on using the API in multiple platforms, including .NET, Java, Python and more. The Raspberry Pi can use multiple platforms, but we will limit ourselves to using HTTP.
Uploading an Image
To upload an image from the Raspberry Pi, we take note of the curl example on Dropbox’s development page.
curl -X POST https://content.dropboxapi.com/2/files/upload \
    --header "Authorization: Bearer <Your API Key>" \
    --header "Dropbox-API-Arg: {\"path\": \"/Homework/math/Matrices.txt\",\"mode\": \"add\",\"autorename\": true,\"mute\": false,\"strict_conflict\": false}" \
    --header "Content-Type: application/octet-stream" \
    --data-binary @local_file.txt
This example uploads a file name local_file.txt to Dropbox’s API service. Of course, you’ll need to provide your own app key on the area indicated. What we need to do next is to convert this into python. This is easily done using this page. Just paste the curl command on the left text box and the equivalent python code will be displayed on the right text box.

Here’s the equivalent python code of the curl example above:
import requests

headers = {
        'Authorization': 'Bearer', <Your API Key>
        'Dropbox-API-Arg': '{"path": "/Homework/math/Matrices.txt","mode": "add","autorename": true,"mute": false,"strict_conflict": false}',
        'Content-Type': 'application/octet-stream',
}

data = open('local_file.txt', 'rb').read()
response = requests.post('https://content.dropboxapi.com/2/files/upload', headers=headers, data=data)
Capturing Image from Camera
Now that we have a python script for uploading any file to dropbox, what’s left is to capture an image. I’ll present two solutions here, one when using the official raspberry pi camera and another when using a USB webcam.
Using Raspberry Pi Camera
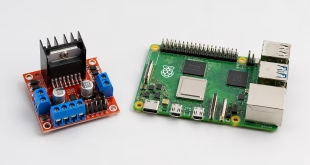
Attach the camera to the Raspberry Pi board as shown:

Next, SSH (or open terminal) into your Pi and enable the camera through raspi-config
sudo raspi-config
Select Interfacing Options then Camera. Select Enable. The camera is now usable.
This is an example script for capturing still images using Python:
from picamera import PiCamera
from time import sleep

camera = PiCamera()
camera.start_preview()
sleep(5)
camera.capture('/home/pi/Desktop/image.jpg')
camera.stop_preview()
After running the script, an image named image.jpg will be stored in /home/pi/Desktop.
Using USB Webcam
If you choose to use a USB webcam instead of the Raspberry Pi camera, you need to install fswebcam first:
sudo apt-get install fswebcam
For this tutorial, I used Logitech’s C270 camera. Check out this list of supported USB cameras for Raspberry Pi.

After installing fswebcam, we can now capture images by simply issuing the command:
sudo fswebcam -d /dev/video0 -r 840x480 image.jpg
The -d parameter specifies which camera to use. Here, I used /dev/video0. If you have multiple cameras installed, just change the last number in /dev/video*.
The -r parameter dictates the image resolution of the output image. Note that this is optional, just like the -d parameter. If this is not specified, the default 384x288 resolution will be used.
Finally, the file name of the image is provided last in the command. Here, “image.jpg” will be the name of the image captured.
Uploading the Image to Dropbox
We now combine the curl python script and the camera capture command into a single script to automatically upload the captured image to the Dropbox server.
Using Raspberry Pi Camera
from picamera import PiCamera
from time import sleep
import requests

camera = PiCamera()
sleep(2)
camera.capture('/home/pi/Desktop/image.jpg')
sleep(2)

headers = {
        'Authorization': 'Bearer', <Your API Key>
        'Dropbox-API-Arg': '{"path": "/image.jpg","mode": "add","autorename": true,"mute": false,"strict_conflict": false}',
        'Content-Type': 'application/octet-stream',
}

data = open('image.jpg', 'rb').read()
response = requests.post('https://content.dropboxapi.com/2/files/upload', headers=headers, data=data)
Using USB Web Camera
import subprocess
from time import sleep
import requests

proc = subprocess.Popen(“sudo fswebcam -d /dev/video0 -r 840x480 image.jpg”, shell=True)
proc.wait()
sleep(1)
headers = {
        'Authorization': 'Bearer', <Your API Key>
        'Dropbox-API-Arg': '{"path": "/image.jpg","mode": "add","autorename": true,"mute": false,"strict_conflict": false}',
        'Content-Type': 'application/octet-stream',
}

data = open('image.jpg', 'rb').read()
response = requests.post('https://content.dropboxapi.com/2/files/upload', headers=headers, data=data
Don’t forget to provide your own API Key!
Placing the Image to Your Website
Once the image is uploaded to Dropbox, placing them on your website requires another curl request. There are plenty of methods for this, depending on your choice of server side script. For php, you can use the following script:
<?php $pathToFile = "/image.jpg"; $url = 'https://api.dropboxapi.com/2/sharing/create_shared_link_with_settings'; //Initiate cURL. $ch = curl_init($url); //The JSON data which is just the path to the image on your DP account. $jsonData = array( 'path' => $pathToFile ); //Encode the array into JSON. $jsonDataEncoded = json_encode($jsonData); //Tell cURL that we want to send a POST request. curl_setopt($ch, CURLOPT_POST, 1); //Attach our encoded JSON string to the POST fields. curl_setopt($ch, CURLOPT_POSTFIELDS, $jsonDataEncoded); curl_setopt($ch, CURLOPT_RETURNTRANSFER, true); //Set the content type to application/json curl_setopt($ch, CURLOPT_HTTPHEADER, array('User-Agent: api-explorer-client','Authorization: Bearer <Your API Key>','Content-Type: application/json')); //Execute the request $result = curl_exec($ch); preg_match_all('#\bhttps?://[^,\s()<>]+(?:|([^,[:punct:]\s]|/))#', $result, $match); $url_parsed = implode("",$match[0]); $url_parsed .= "&dl=1"; echo "<img src='" . $url_parsed . "' style='width:100%;height:100%;' />"; ?>
For questions or clarifications regarding this tutorial, kindly drop a comment below or post in our forums!

")

 Tutorial")