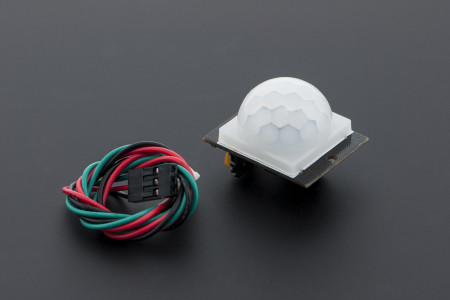
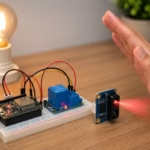
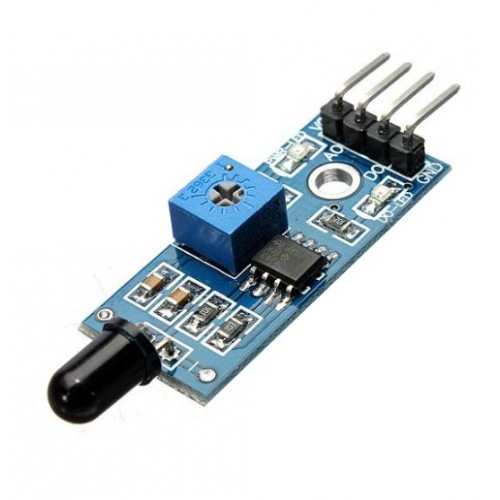
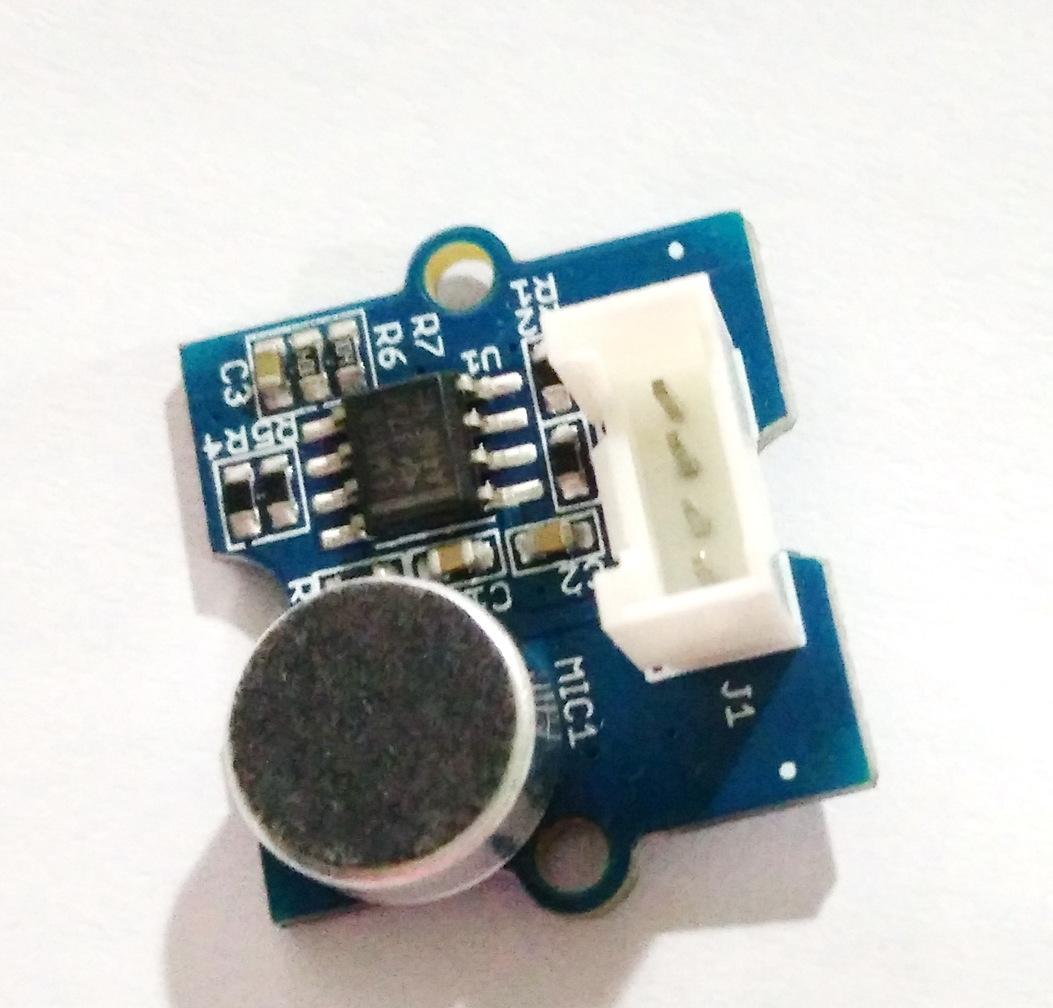
In this tutorial, we will connect an IR proximity sensor with the ESP32. This sensor is commonly used for obstacle detection, line-following robots, object counters, and simple automation projects where you only need to know if an object is near or not.
The common IR proximity sensor module has an infrared LED, an IR receiver, a comparator IC, and a small potentiometer for adjusting the detection distance. Most modules only have three pins: VCC, GND, and OUT. Some versions also include an AO pin for analog output.
For this tutorial, we will first use the digital output pin, as it is the easiest way to detect an object using the ESP32.
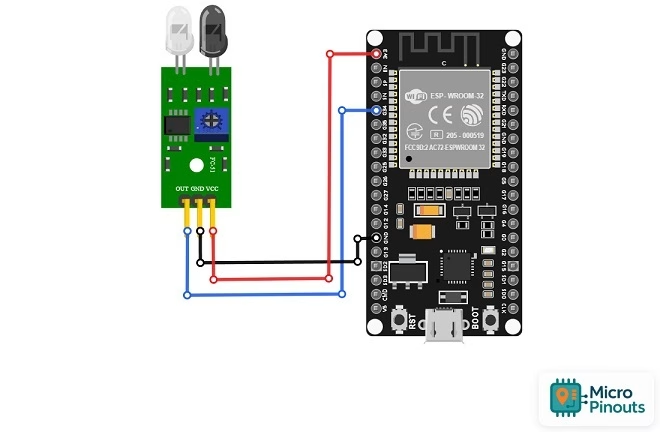
ESP32 IR Proximity Sensor Wiring Diagram
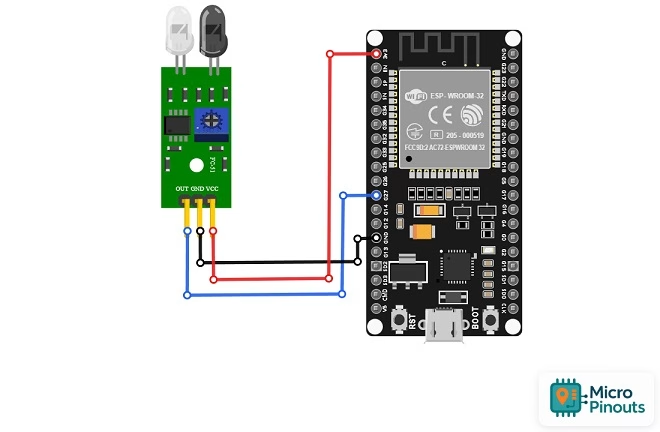
The safest way to connect the IR sensor to the ESP32 is to power the sensor from the ESP32's 3.3V pin. Many IR sensor modules can run from 3.3V to 5V, but the ESP32 GPIO pins are 3.3V pins. Powering the module from 3.3V keeps the OUT signal at a safer voltage level for the ESP32.
Connect the sensor as follows:
| IR Proximity Sensor Pin | ESP32 Pin |
|---|---|
| VCC | 3V3 |
| GND | GND |
| OUT | GPIO 27 |
For this example, I used GPIO 27 as the input pin. You can use other ESP32 GPIO pins, but avoid GPIO pins used for bootstrapping unless you know what you are doing. GPIO 34 to GPIO 39 are input-only pins, so they can also be used for reading sensor signals, but they cannot be used to drive LEDs or other output devices.
If your sensor has four pins, the pins are usually:
| Sensor Pin | Function |
|---|---|
| VCC | Power supply |
| GND | Ground |
| DO | Digital output |
| AO | Analog output |
Use DO for simple object detection. Use AO only if you want to read a changing analog value.
Basic ESP32 IR Sensor Code
After wiring the sensor, upload this sketch to your ESP32:
#define IR_SENSOR_PIN 27

void setup() {
  Serial.begin(115200);
  pinMode(IR_SENSOR_PIN, INPUT);
}

void loop() {
  int sensorValue = digitalRead(IR_SENSOR_PIN);

  if (sensorValue == LOW) {
    Serial.println("Object detected");
  } else {
    Serial.println("No object");
  }

  delay(300);
}
Open the Serial Monitor and set the baud rate to 115200. Place your hand or any object in front of the IR sensor. You should see the message change from “No object” to “Object detected”.
Most IR obstacle sensors are active LOW. This means the output pin becomes LOW when the sensor detects an object. This is why the code checks:
if (sensorValue == LOW)
If your sensor behaves the opposite way, just reverse the condition.
Using an LED Indicator
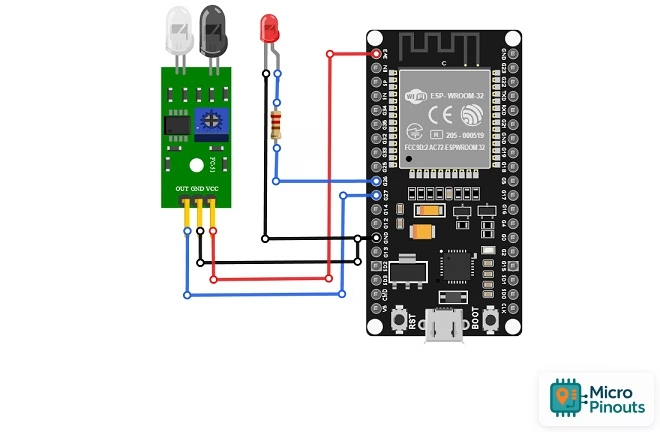
The Serial Monitor is useful for testing, but sometimes it is better to see the sensor output using an LED. In this next example, we will turn on an LED connected to GPIO 26 whenever an object is detected.
Connect the LED as follows:
| LED Part | ESP32 Connection |
|---|---|
| LED anode (+) | GPIO 26 through a 220Ω resistor |
| LED cathode (-) | GND |
Here is the code:
#define IR_SENSOR_PIN 27
#define LED_PIN 26

void setup() {
  Serial.begin(115200);

  pinMode(IR_SENSOR_PIN, INPUT);
  pinMode(LED_PIN, OUTPUT);
}

void loop() {
  int sensorValue = digitalRead(IR_SENSOR_PIN);

  if (sensorValue == LOW) {
    Serial.println("Object detected");
    digitalWrite(LED_PIN, HIGH);
  } else {
    Serial.println("No object");
    digitalWrite(LED_PIN, LOW);
  }

  delay(300);
}
This is a simple setup, but it is already useful for testing object detection. You can replace the LED with a buzzer, relay module, or motor driver input depending on your project.
Adjusting the Detection Distance
Most IR proximity sensor modules have a small potentiometer. This potentiometer sets the reference voltage of the comparator circuit. In simpler terms, it adjusts how sensitive the sensor is.
Turn the potentiometer slowly while watching the Serial Monitor. If the sensor detects an object even when nothing is nearby, reduce the sensitivity. If it does not detect your hand or object, increase the sensitivity.
The detection distance depends on several things:
- color of the object
- reflectiveness of the surface
- angle of the object
- ambient light
- supply voltage
- sensor module quality
White or shiny objects are usually easier to detect because they reflect more infrared light. Black or matte objects may be harder to detect because they absorb more light.
Reading the Analog Output
Some IR proximity sensor modules include an AO pin. This pin gives an analog voltage that changes depending on the received IR light. If you want to read this value, connect the sensor like this:
| IR Sensor Pin | ESP32 Pin |
|---|---|
| VCC | 3V3 |
| GND | GND |
| AO | GPIO 34 |
GPIO 34 is a good choice for analog input because it is an input-only ADC pin.
Upload this code:
#define IR_ANALOG_PIN 34

void setup() {
  Serial.begin(115200);

  analogReadResolution(12); // ESP32 default: 0 to 4095
  analogSetPinAttenuation(IR_ANALOG_PIN, ADC_11db);
}

void loop() {
  int analogValue = analogRead(IR_ANALOG_PIN);

  Serial.print("IR analog value: ");
  Serial.println(analogValue);

  delay(300);
}
The ESP32 returns a value from 0 to 4095 by default when using 12-bit ADC resolution. A higher or lower value does not directly mean “distance in centimeters”. It only tells you that the received IR reflection changed.
If you need actual distance measurement, this sensor is not the best choice. Use it as a proximity or obstacle detector, not as an accurate distance sensor. For distance measurement, consider sensors such as the VL53L0X time-of-flight sensor or an ultrasonic sensor.
Simple ESP32 Web Server Example
Since we are using an ESP32, we can also display the sensor status on a web page. This is useful if you want to monitor the sensor wirelessly.
Replace the WiFi name and password with your own:
#include <WiFi.h>
#include <WebServer.h>

#define IR_SENSOR_PIN 27

const char* ssid = "YOUR_WIFI_NAME";
const char* password = "YOUR_WIFI_PASSWORD";

WebServer server(80);

String getSensorStatus() {
  int sensorValue = digitalRead(IR_SENSOR_PIN);

  if (sensorValue == LOW) {
    return "Object detected";
  } else {
    return "No object";
  }
}

void handleRoot() {
  String html = "<!DOCTYPE html><html>";
  html += "<head>";
  html += "<meta name='viewport' content='width=device-width, initial-scale=1'>";
  html += "<meta http-equiv='refresh' content='1'>";
  html += "<style>";
  html += "body{font-family:Arial;text-align:center;margin-top:50px;}";
  html += ".box{display:inline-block;padding:20px;border:1px solid #ccc;border-radius:8px;}";
  html += "</style>";
  html += "</head>";
  html += "<body>";
  html += "<div class='box'>";
  html += "<h2>ESP32 IR Proximity Sensor</h2>";
  html += "<h1>" + getSensorStatus() + "</h1>";
  html += "</div>";
  html += "</body></html>";

  server.send(200, "text/html", html);
}

void setup() {
  Serial.begin(115200);
  pinMode(IR_SENSOR_PIN, INPUT);

  WiFi.begin(ssid, password);
  Serial.print("Connecting to WiFi");

  while (WiFi.status() != WL_CONNECTED) {
    delay(500);
    Serial.print(".");
  }

  Serial.println();
  Serial.print("ESP32 IP Address: ");
  Serial.println(WiFi.localIP());

  server.on("/", handleRoot);
  server.begin();
}

void loop() {
  server.handleClient();
}
After uploading the code, open the Serial Monitor. Once the ESP32 connects to your WiFi network, it will print its IP address. Open that IP address in a browser connected to the same network.
The page refreshes every second and shows whether the sensor detects an object or not.
How the IR Proximity Sensor Works
The IR proximity sensor uses an infrared LED to transmit invisible light. When an object is in front of the sensor, some of this infrared light bounces back and reaches the IR receiver.
The module then compares the receiver signal against a reference level set by the potentiometer. This comparison is usually done by an LM393 comparator IC. If the reflected IR signal is strong enough, the comparator changes the state of the OUT pin.
This is why the output is digital. The ESP32 does not need to know the exact light intensity. It only reads whether the comparator output is HIGH or LOW.
The limitation is that the sensor depends heavily on reflection. A white surface may be detected farther away than a black surface. A shiny surface may give a stronger response than a dull one. Sunlight or strong ambient light may also affect the sensor.
Common Problems and Fixes
The sensor always says “Object detected”
Adjust the potentiometer slowly. The sensitivity may be too high. Also check if the sensor is facing a nearby surface such as the table or breadboard.
The sensor never detects anything
Check the wiring first. Make sure VCC goes to 3V3, GND goes to GND, and OUT goes to GPIO 27. Also try adjusting the potentiometer in the opposite direction.
The output is reversed
Some modules may behave differently. If your sensor prints “Object detected” when there is no object, change the condition from:
if (sensorValue == LOW)
to:
if (sensorValue == HIGH)
The ESP32 restarts or behaves strangely
Do not power the sensor from 5V and connect its OUT pin directly to the ESP32. The ESP32 uses 3.3V logic. If your module must be powered from 5V, use a voltage divider or a logic level shifter on the OUT pin.
The analog value is not stable
This is normal for simple IR modules. The reading can change because of hand movement, object color, surface angle, and ambient light. Take several readings and average them if you need a smoother value.
Final Thoughts
Connecting an IR proximity sensor with the ESP32 is straightforward if you use the digital output pin. The important thing is to remember that the sensor module and the ESP32 do not always use the same logic voltage. For beginner projects, power the IR sensor from the ESP32’s 3.3V pin and connect the OUT pin to a safe GPIO like GPIO 27.
This sensor is best used for simple object detection. It is not a precision distance sensor, but it works well for robot obstacle detection, counters, touchless triggers, and other projects where you only need to know if something is nearby.