Temperature is a very common parameter in all of science and engineering. The behavior of electronic components drastically changes with temperature; storage of food and medicine relies on the correct temperature; getting the right metal type depends on how much heat is applied; fever means our body temperature goes beyond 37 degrees, and so on.
The prevalence of temperature measurement is one of the reasons there are various types of temperature sensors. We already have tutorials on the DHT22, LM35, BMP085, and thermistor on this website. For this tutorial, we will use a popular industrial temperature sensor: the thermocouple.
In a Rush: Using the MAX6675 and Thermocouple with Arduino
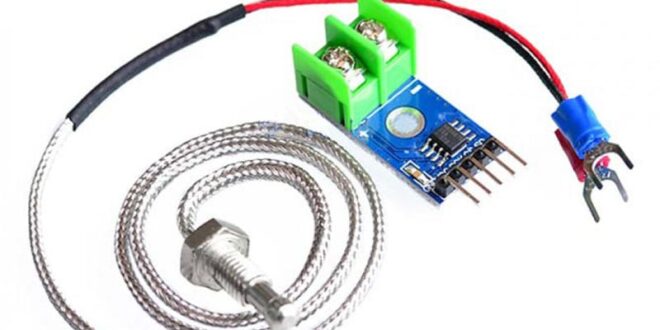
The MAX6675 is an analog-to-digital converter designed specifically for a K-Type thermocouple. It readily gives out the temperature from the thermocouple to SPI format at a maximum speed of 4.3 MHz.
Using SPI means you can use any of Arduino’s digital pins. Here, I am wiring the MAX6675 module to the Arduino UNO’s ICSP header:
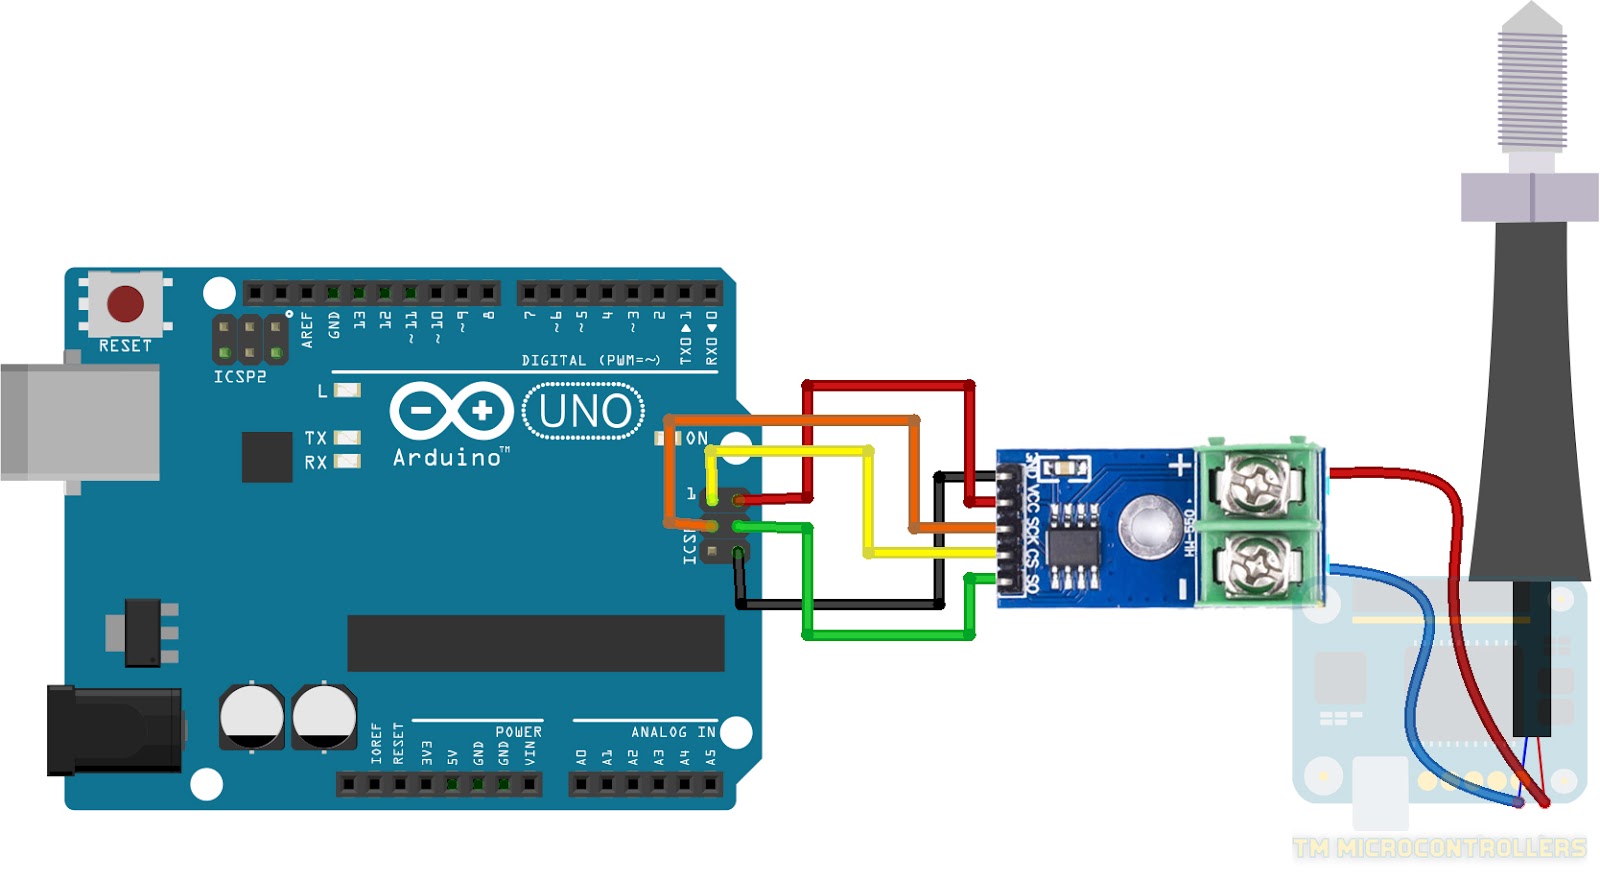
Correct polarity must be observed when attaching the thermocouple to the MAX6675 board. Here, the red wire is attached to (+) while the black wire is attached to (-).
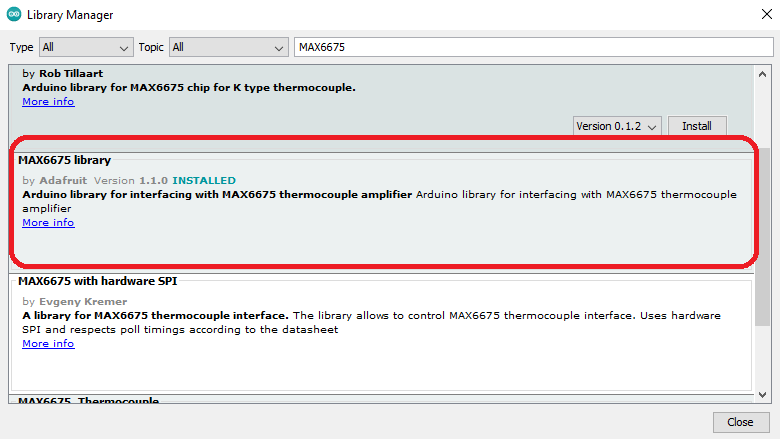
Adafruit provides an easy-to-use library via GitHub or Arduino’s library manager: go to Tools > Manage Libraries and search for “MAX6675”
The library provides two examples. Here’s the serialthermocouple sketch, which gives out the temperature readings on the serial port. I’ve modified it to match the wiring diagram above.
// this example is public domain. enjoy!
// https://learn.adafruit.com/thermocouple/

#include "max6675.h"

int thermoDO = 11;
int thermoCS = 12;
int thermoCLK = 13;

MAX6675 thermocouple(thermoCLK, thermoCS, thermoDO);

void setup() {
  Serial.begin(9600);
  Serial.println("MAX6675 test");
  // wait for MAX chip to stabilize
  delay(500);
}

void loop() {
  // basic readout test, just print the current temp
  Serial.print("C = ");
  Serial.println(thermocouple.readCelsius());
  Serial.print("F = ");
  Serial.println(thermocouple.readFahrenheit());
  // For the MAX6675 to update, you must delay AT LEAST 250ms between reads!
  delay(1000);
}
The sketch above makes the Arduino display both Celsius and Fahrenheit temperatures on the serial port.
Want to learn more about thermocouples and how it works with Arduino? Then read on.
In Depth: How a Thermocouple Works
A thermocouple exhibits the “thermoelectric effect” which consists of three separately observed effects: Seebeck, Peltier, and Thomson. However, you will only need to know about the Seebeck effect to understand how a thermocouple works.
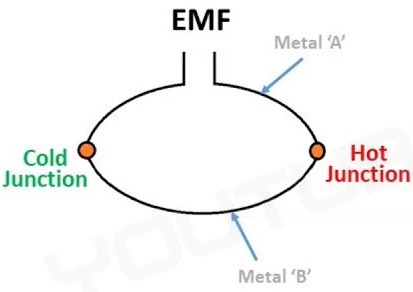
Seebeck effect describes how voltage is developed in a junction of two dissimilar metals with a temperature difference between them.
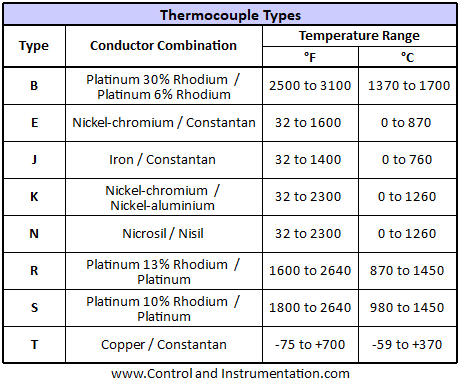
The type of metals determines the type of thermocouple. The MAX6675 supports only type “K” thermocouples, which consist of nickel-chromium (Chromel) and nickel-aluminum (Alumel). The rest of the thermocouple types are listed below:
Thermocouples generate a voltage, typically in millivolts, proportional to temperature. Type E thermocouple, made out of Chromel and Constantan is the most sensitive to temperature changes while Type S is the least sensitive:
The end where the metals are joined is called the hot junction while the other “open” end is the cold junction. The cold junction is also known as the reference junction and must have a constant temperature. Some thermocouples use ice to maintain the cold junction at zero degrees. Others, use another temperature sensor, like a thermistor installed on the instrument where the thermocouple is mounted. Using a second temperature sensor allows the conditioning circuit to compensate for the temperature variations in the cold junction.

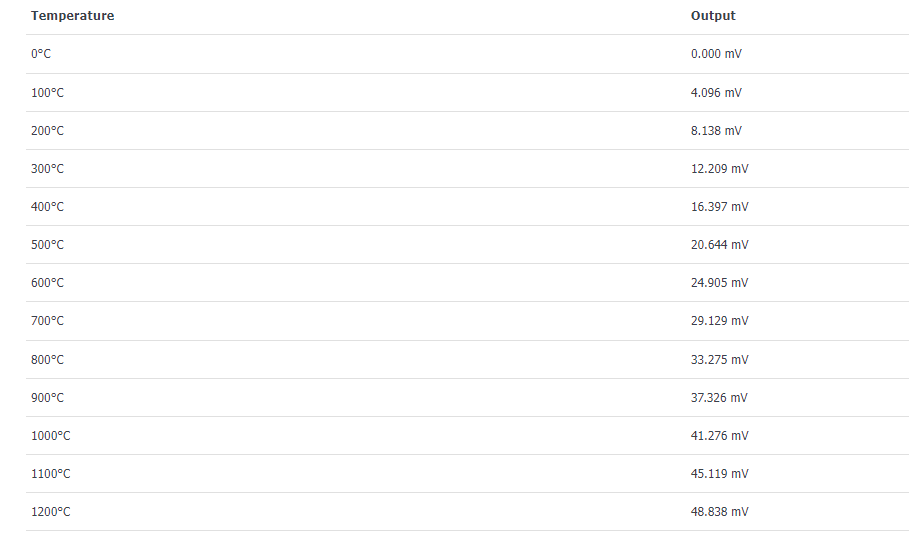
Thermocouple gives out millivolts in proportion to temperature. These voltage levels are too small to read by a microcontroller's analog-to-digital converter. Consider the chart below for a type K thermocouple:
This thermocouple gives out 40.96 µV per °C but the Arduino UNO’s ADC can only measure a minimum of 4.88 mV.
The MAX6675
This is where the MAX6675 comes in. The MAX6675 is a 12-bit thermocouple to digital converter with cold-junction compensation. Being 12-bit means it can read as small as 0.25 °C and then convert that to a digital value readily readable by a microcontroller. Its cold-junction compensation feature allows it to continuously detect the temperature fluctuations on the reference end (which is the temperature of the MAX6675’s PCB) and adjust the output accordingly.
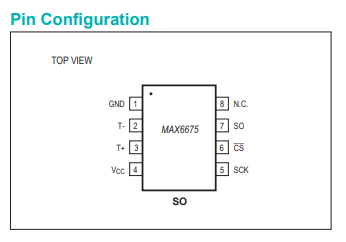
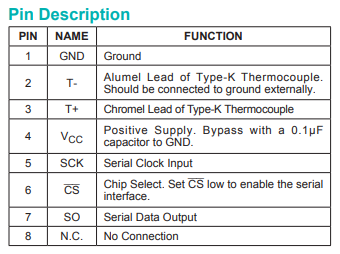
The MAX6675 is an 8-pin IC and uses the SPI interface:
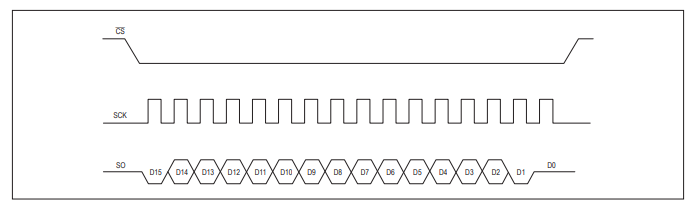
The 15 bits of data are sent out through the SO pin when the CS pin is set to low. Each bit synchronizes with each clock pulse in the SCK pin.
Bits 3-14 are the 12-bit temperature value while bit 15 is the sign bit. Bit 2 is normally low but becomes high when there is no thermocouple connected. Bit 1 is always low and is for providing a device id for the MAX6675. Bit 0 is a three-state bit and is safely ignorable.
MAX6675 Arduino Library
Here’s how the library works; we'll go straight to the temperature reading function:
float MAX6675::readCelsius(void) {

  uint16_t v;

  digitalWrite(cs, LOW);
  delayMicroseconds(10);

  v = spiread();
  v >>= 8;
  v |= spiread();

  digitalWrite(cs, HIGH);

  if (v & 0x4) {
    // uh oh, no thermocouple attached!
    return NAN;
   // return -100;
  }

  v >>= 3;
  return v * 0.25;
}
Recall that enabling the serial output from the MAX6675 is by setting CS low.
digitalWrite(cs, LOW);
delayMicroseconds(10);
Variable v is a word but the custom function spiread() returns only a byte. Hence, the first byte is read first, moved to upper byte, and then on to the next byte:
v = spiread();
v <<= 8;
v |= spiread();
The transmission ends in this line:
digitalWrite(cs, HIGH);
Recall that bit 2 is for detecting if there is no thermocouple:
if (v & 0x4) {
  // uh oh, no thermocouple attached!
  return NAN;
  // return -100;
}
Temperature is now then only bits 3 to 15, ignoring the least 3 bits.
v >>= 3;
To get the temperature in Celsius, we multiply by 0.25 which is the lowest temperature reading for the MAX6675.
return v * 0.25;
To read the temperature in Fahrenheit, we just use the conversion formula:
float MAX6675::readFahrenheit(void) { return readCelsius() * 9.0 / 5.0 + 32; }
If you have any questions or reactions, kindly post a comment below.