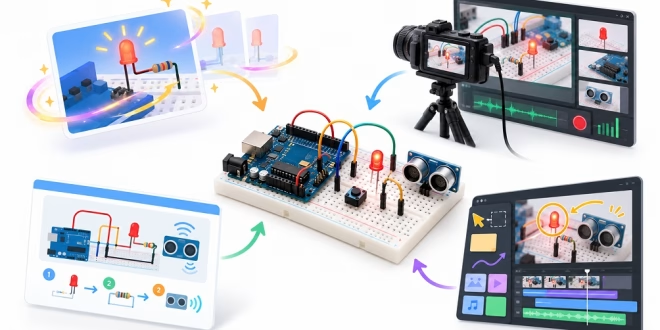
Let's be real. Explaining an Arduino or electronics project clearly takes more than a schematic and a few lines of code. Way more. If you're an educator or maker, you might need to show wiring. Explain what each component does. Walk through software workflows. And make tricky electrical concepts actually easy to picture. Here's the deal. The right video tool depends on what you're going for. Live demos? Presentation-style teaching? Screen recording? Or illustrated animation?
So here are four super handy options worth a look. Magic Hour, OBS Studio, PowerPoint, and Canva.
Magic Hour: Useful for Illustrative AI Concept Clips
Magic Hour is handy when your electronics lesson calls for visuals that are hard to film for real. Its AI video generator can generate video content from text prompts. So it’s great for building illustrated sequences that explain concepts. Such as signal flow. Sensor interactivity Or the fundamental notion of a micro controller responding to an input. Pretty cool, huh?
For makers, there's another handy workflow, too. Turning an existing diagram, illustration, or project image into an animated sequence. The platform's image to video AI approach can add motion to visuals that would otherwise just sit there. Static and boring.
But here's the big catch. And it really matters. Treat generated visuals as illustrations. Not technical proof. Nope. An AI-generated animation doesn't show verified circuit behavior. It doesn't replace CAD simulation. It doesn't give you lab measurements. And it definitely doesn't prove a certain wiring setup is electrically safe. So use generated clips alongside the real stuff. Accurate schematics. Datasheets. Measurements. And actual demos.
Magic Hour really shines when your goal's making an abstract concept fun to look at. Not documenting exact physical behavior.
OBS Studio: Strong for Real-Time Demonstrations
OBS Studio is built for recording and live production. For Arduino educators, that makes it super useful. Especially when your lesson needs to show a bunch of sources at once.
Picture this. A typical electronics tutorial might show a webcam view of your breadboard. A screen with the Arduino IDE. And another window with documentation or a serial monitor. You can arrange all of these into scenes. Then switch between them while recording. Or during a live lesson. Easy.
Its biggest strength? Control over real-world demos. You're not showing a circuit through generated images. You're showing the actual board. The LEDs. Sensors. Meters. And your computer screen. The real deal.
But the learning curve is a little steeper than a simple presentation app. Some prep may be required to set up scenes, audio sources, layouts and recording settings. So OBS is a good match for makers who want to do detailed demos. Or you already have a multi-source recording setup.
PowerPoint: Practical for Structured Lessons
PowerPoint is still very useful for teaching electronics because many lessons involve explaining concepts rather than simply demonstrating them. You can use slides to introduce components, show schematics, present snippets of code, and break a complex project into smaller, easier-to-follow stages.
You can record narration and presentation activity. Add in diagrams and animations. Then turn the finished presentation into a video. Simple motion effects can help explain sequences, too. Like how an Arduino reads a sensor. Then triggers an output.
Its biggest strength? Organization. You can build a clear flow. From the problem you're solving. To the components. Wiring. Programming logic. Testing. And results. Nice and tidy.
But PowerPoint isn't really made for recording a detailed physical workbench demo. And you'll need to create or find accurate diagrams and visuals yourself. Don't count on presentation software to get the technical stuff right for you. That's on you.
Canva: Accessible Visual Presentation and Editing
Canva's handy if you wanna mix diagrams, labels, screenshots, images, text, and video clips. All in a pretty simple editing setup. An Arduino lesson could use separate sections. One to introduce components. One to explain connections. One to show code. And one to sum up troubleshooting steps.
Its visual design tools can make educational videos way easier to follow. Especially when you need to point out several components or stages on screen. You can mix recorded footage with explainer graphics. Instead of showing raw workshop footage from start to finish. Way better.
The trade-off? A polished-looking presentation doesn't automatically bring technical depth. Not even close. Detailed circuit behavior. Timing relationships. Voltage measurements. Troubleshooting. Those might still need real footage, instruments, schematics, or software demos.
How to Choose the Right Tool
The best pick depends on the teaching job. Not just how many features a tool has.
For illustrated concept sequences, an AI-based video tool can help get across ideas that are tough to film. For physical circuit demos, OBS Studio connects you more directly to the actual hardware. For structured classroom explanations, PowerPoint gives you a familiar slide-based workflow. And Canva fits projects that need a mix. Educational graphics. Screenshots. Recorded footage. And visual editing.
Here's a smart move, too. Combine tools. For example, you could create an illustrated concept clip. Record the real Arduino circuit with OBS Studio. Then pull both into a structured lesson. Best of everything.
Accuracy Matters in Electronics Education
No matter which software you pick, one thing stays the same. Educational electronics videos need a clear line between visual explanation and verified engineering info. Animations can simplify a circuit, sure. But don't treat them as proof that current, voltage, timing, component ratings, or physical connections work exactly as shown. That's where it gets shady.
Back up important technical claims with the real stuff. Circuit diagrams. Datasheets. Calculations. Simulations where they make sense. And measurements from real hardware. Same goes for safety instructions. Get them from reliable technical guidance. Not from generated images. Don't just trust it and move on.
In the end, the best video workflow is the one that fits your lesson's purpose. AI-generated visuals can help with conceptual storytelling. While recording and presentation tools are still super valuable for showing real hardware. Code. Measurements. And repeatable procedures. Mix these approaches, and you get the best of both. Visual clarity. And real technical credibility.