
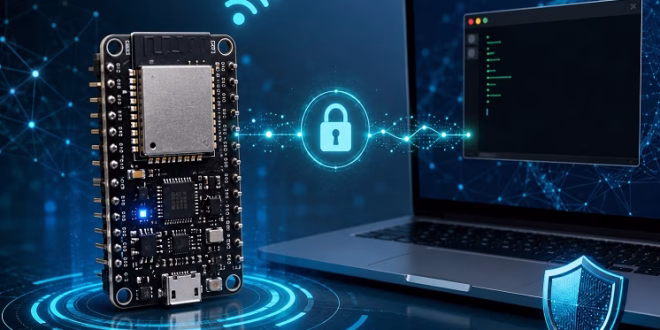
An SSH server on ESP32 lets you log in to your microcontroller over Wi-Fi using a secure terminal connection. Instead of opening the Arduino Serial Monitor through USB, you can connect from a computer, phone, or another device on the same network and send commands remotely.
In this tutorial, you will learn how to set up an SSH server on ESP32 using the Arduino IDE. We will use the LibSSH-ESP32 library, generate the required SSH host key, connect the ESP32 to Wi-Fi, and log in from a terminal.
This project is useful if you want a safer remote command interface than plain Telnet. However, you should still treat it as a local-network tool, not as something to expose directly to the public internet.
What Is an SSH Server?
SSH means Secure Shell. It is a protocol used to open an encrypted command-line session between two devices.
In a normal SSH setup, a computer connects to a server like this:
ssh username@server_ip_address
For this project, the ESP32 becomes the SSH server. Your laptop, desktop PC, or phone becomes the SSH client.
Once connected, you can type commands into the SSH terminal. The ESP32 receives those commands and can respond with text, sensor readings, status messages, or control actions.
Why Use SSH on ESP32?
Most ESP32 projects use one of these interfaces:
- Serial Monitor through USB
- Web server page
- REST API
- MQTT
- Bluetooth serial
- Telnet-style TCP server
An SSH server is different because it provides an encrypted terminal session. That makes it useful for projects where you want remote diagnostics or command access without sending plain text over the network.
For example, an SSH server on ESP32 can be used for:
- Remote debugging
- Reading sensor values from a terminal
- Restarting parts of a program
- Viewing device status
- Controlling GPIO pins
- Sending simple maintenance commands
- Building a secure command console for an IoT device
However, SSH also uses more memory and processing power than a simple TCP server. For small projects, a web server or serial command interface may still be easier.
Parts Required
For this tutorial, you need:
- ESP32 development board
- USB cable
- Arduino IDE
- Wi-Fi network
- Computer with an SSH client
Most Linux and macOS systems already include the ssh command. On Windows 10 and Windows 11, OpenSSH is usually available from PowerShell or Command Prompt.
You can check by opening a terminal and typing:
ssh
If you see SSH usage information, your computer already has an SSH client.
Installing the ESP32 Board Package
Before using the ESP32, install the ESP32 board package in the Arduino IDE.
Open Arduino IDE, then go to:
File > Preferences
Add this URL to the Additional Boards Manager URLs field:
https://espressif.github.io/arduino-esp32/package_esp32_index.json
Then go to:
Tools > Board > Boards Manager
Search for:
esp32
Install the package by Espressif Systems.
After installation, select your ESP32 board from:
Tools > Board > esp32
For most ESP32-WROOM development boards, select:
ESP32 Dev Module
Installing the LibSSH-ESP32 Library
Next, install the SSH library.
In Arduino IDE, go to:
Sketch > Include Library > Manage Libraries
Search for:
LibSSH-ESP32
Install the library.
This library is a port of libssh for ESP32. It includes examples for SSH server, SSH client, SCP, key generation, and OTA-style file transfer.
How the ESP32 SSH Server Works
The ESP32 SSH server needs three main parts:
- Wi-Fi connection
- SSH host key
- SSH server task
The Wi-Fi connection allows the ESP32 to join your local network.
The SSH host key identifies the ESP32 to the SSH client. This is different from the username and password. The host key lets your computer recognize the ESP32 if you connect again later.
The SSH server task listens for incoming SSH connections, handles authentication, and opens a terminal channel.
Generate the SSH Host Key
Before starting the SSH server, the ESP32 needs a host key. The LibSSH-ESP32 library includes a key generation example.
Open:
File > Examples > LibSSH-ESP32 > keygen2
Upload the sketch to your ESP32.
Open the Serial Monitor and set the baud rate to:
115200
The sketch will mount SPIFFS and generate an SSH key. If the Serial Monitor asks whether to format SPIFFS, type:
y
Then press Enter.
Formatting SPIFFS erases files stored in the ESP32 flash file system, so do this only on a test board or when you do not need the existing SPIFFS files.
The key generation sketch usually creates a key file inside the ESP32 file system. The SSH server example will use this file as the host key.
Upload the SSH Server Example
After generating the key, open the SSH server example:
File > Examples > LibSSH-ESP32 > samplesshd-kbdint
Find the Wi-Fi credentials near the top of the sketch:
const char *configSTASSID = "YourWiFiSSID";
const char *configSTAPSK = "YourWiFiPSK";
Change them to match your Wi-Fi network:
const char *configSTASSID = "YourNetworkName";
const char *configSTAPSK = "YourNetworkPassword";
Upload the sketch to your ESP32.
Open the Serial Monitor at 115200 baud. After the ESP32 connects to Wi-Fi, it should print its IP address.
For example:
% WiFi connected
% IPv4 Address: 192.168.1.45
Started sample libssh sshd on port 22
Write down the IP address because you will use it to connect through SSH.
Logging In to the ESP32 with SSH
Open a terminal on your computer.
Use this command:
ssh libssh@192.168.1.45
Replace
192.168.1.45When asked for a password, enter:
libssh
The default example username and password are:
Username: libssh
Password: libssh
If this is your first time connecting to the ESP32, your computer may show a message like this:
The authenticity of host '192.168.1.45' can't be established.
Are you sure you want to continue connecting?
Type:
yes
Then press Enter.
You should now have an SSH session connected to the ESP32.
Testing the SSH Connection
The sample SSH server behaves like a simple echo terminal. When you type text, the ESP32 sends the text back through the encrypted SSH channel.
Try typing:
hello esp32
The ESP32 should echo the text back.
This proves that:
- The ESP32 joined your Wi-Fi network
- The SSH server started correctly
- Your computer connected to the ESP32 through SSH
- Authentication worked
- The SSH channel is working
Turning the Example into a Command Server
The default SSH server example is only a starting point. For a practical project, you can modify the part of the code that reads incoming characters from the SSH channel.
A simple command interface can support commands like:
status
led on
led off
restart
For example, the ESP32 can check the received text and respond with a message.
Conceptually, the command handler can work like this:
String handleCommand(String cmd) {
  cmd.trim();

  if (cmd == "status") {
    return "ESP32 is running\r\n";
  }

  if (cmd == "led on") {
    digitalWrite(2, HIGH);
    return "LED turned ON\r\n";
  }

  if (cmd == "led off") {
    digitalWrite(2, LOW);
    return "LED turned OFF\r\n";
  }

  if (cmd == "help") {
    return "Commands: status, led on, led off, help\r\n";
  }

  return "Unknown command. Type help.\r\n";
}
Then, when a complete line arrives from the SSH channel, pass it to
handleCommand()This approach turns the ESP32 SSH server into a secure remote console.
Example Command Ideas
Here are some useful commands you can add to your ESP32 SSH server:
| Command | Function |
|---|---|
| status | Print uptime, free heap, and Wi-Fi RSSI |
| ip | Print the ESP32 IP address |
| led on | Turn on an LED |
| led off | Turn off an LED |
| read adc | Print an analog reading |
| read temp | Print a sensor value |
| restart | Restart the ESP32 |
| help | Show available commands |
For an IoT project, the status command is one of the most useful commands to add first.
Example response:
Uptime: 923 seconds
Free heap: 183420 bytes
WiFi RSSI: -54 dBm
IP: 192.168.1.45
Adding a Status Command
You can use standard Arduino and ESP32 functions to get basic system information.
For example:
String getStatus() {
  String msg;

  msg += "ESP32 Status\r\n";
  msg += "Uptime: ";
  msg += String(millis() / 1000);
  msg += " seconds\r\n";

  msg += "Free heap: ";
  msg += String(ESP.getFreeHeap());
  msg += " bytes\r\n";

  msg += "WiFi RSSI: ";
  msg += String(WiFi.RSSI());
  msg += " dBm\r\n";

  msg += "IP address: ";
  msg += WiFi.localIP().toString();
  msg += "\r\n";

  return msg;
}
Then your command handler can call this function:
if (cmd == "status") {
  return getStatus();
}
Now, when you connect through SSH and type:
status
The ESP32 can return live system information.
Changing the Default Username and Password
Do not keep the default login credentials in your final project.
Look for the username and password definitions in the SSH server example. They usually look similar to this:
#define SSHD_USER "libssh"
#define SSHD_PASSWORD "libssh"
Change them to something else:
#define SSHD_USER "esp32admin"
#define SSHD_PASSWORD "ChangeThisPassword123"
Use a long password, especially if the ESP32 will run on a shared network.
Again, do not expose this ESP32 SSH server directly to the internet. If you need remote access outside your home or lab network, use a VPN such as WireGuard or Tailscale instead.
Troubleshooting
The ESP32 Does Not Connect to Wi-Fi
Check the SSID and password in the sketch.
Also make sure your ESP32 is connecting to a 2.4 GHz Wi-Fi network. Most ESP32 boards do not connect to 5 GHz Wi-Fi.
The SSH Command Times Out
If the SSH client times out, check these items:
- The ESP32 IP address is correct
- Your computer and ESP32 are on the same network
- The ESP32 Serial Monitor says the SSH server started
- Your router does not block client-to-client communication
- The ESP32 did not restart due to a power issue
You can also try pinging the ESP32:
ping 192.168.1.45
Replace the IP address with your ESP32 address.
The SSH Client Shows a Host Key Warning
If you regenerate the ESP32 host key, your computer may warn you that the host key changed.
This can happen during development. Remove the old host entry from your computer’s known_hosts file, then connect again.
On many systems, you can use:
ssh-keygen -R 192.168.1.45
Then connect again:
ssh libssh@192.168.1.45
The ESP32 Restarts or Crashes
SSH needs more memory than a basic web server or TCP server. If the ESP32 crashes, try these fixes:
- Use a stable USB power source
- Close other memory-heavy tasks
- Avoid large buffers
- Test with a basic ESP32 board first
- Use an ESP32 module with PSRAM if your project is large
- Avoid running camera, Bluetooth, web server, and SSH all at once unless you have enough memory
Port 22 Does Not Work
Port 22 is the standard SSH port. However, some networks may block it.
For local testing, you can change the SSH server port in the sketch if the example allows it.
For example, you might use:
2222
Then connect with:
ssh -p 2222 libssh@192.168.1.45
Security Notes
SSH is encrypted, but your ESP32 project is still only as secure as your implementation.
Follow these rules:
- Change the default username and password
- Do not expose the ESP32 SSH server to the internet
- Use a strong Wi-Fi password
- Limit commands to only what your project needs
- Do not add dangerous commands without confirmation
- Avoid printing secrets in the SSH terminal
- Disable the SSH server when not needed
- Prefer key-based login for serious projects
For hobby and lab projects, an ESP32 SSH server is best used on a trusted local network.
Arduino IDE vs ESP-IDF
This tutorial focuses on Arduino IDE because it is easier for beginners and fits most ESP32 hobby projects.
However, if you are already using ESP-IDF, there are ESP-IDF components that provide a more integrated SSH console experience. Some components can expose ESP-IDF console commands over SSH, which makes them useful for professional firmware debugging.
Use Arduino IDE if you want a fast starting point.
Use ESP-IDF if you want deeper control, command registration, and a more production-style console.
Project Ideas Using an ESP32 SSH Server
Once the SSH server is working, you can build projects such as:
- Remote GPIO control terminal
- Secure sensor monitor
- Wi-Fi relay controller
- ESP32 diagnostics shell
- Remote reboot tool
- Secure serial-to-SSH bridge
- Lab instrument command console
- Local IoT maintenance port
For example, a greenhouse controller can use an SSH command such as:
status
Then return:
Temperature: 29.4 C
Humidity: 71 %
Soil moisture: 48 %
Pump: OFF
Fan: ON
This gives you a simple maintenance interface without building a full web dashboard.
Conclusion
Running an SSH server on ESP32 gives your microcontroller a secure remote terminal over Wi-Fi. With the LibSSH-ESP32 library, you can start from the included SSH server example, connect to the ESP32 from a computer, and then build your own command interface.
For most beginner projects, a web server is still easier. However, if you want terminal-style control, encrypted communication, and remote diagnostics, an ESP32 SSH server is a powerful option.
Start with the sample SSH server, change the default credentials, add a few safe commands, and test everything on your local network before using it in a real project.
Frequently Asked Questions
Can ESP32 run an SSH server?
Yes. The ESP32 can run an SSH server using libraries such as LibSSH-ESP32. However, SSH uses more memory and processing power than simple serial, Telnet, or web server examples.
Is SSH better than Telnet on ESP32?
SSH is more secure because it encrypts the connection. Telnet sends data in plain text. If you only need a quick private lab test, Telnet is simpler. If you want encrypted terminal access, use SSH.
Can I SSH into ESP32 from Windows?
Yes. Open PowerShell or Command Prompt and use the ssh command:
ssh username@esp32_ip_address
Windows 10 and Windows 11 usually include OpenSSH by default.
Can I expose my ESP32 SSH server to the internet?
You should not expose it directly to the public internet. Use it on a local network. For remote access, use a VPN instead.
What is the default username and password for the LibSSH-ESP32 example?
The sample server may use libssh as the username and libssh as the password. Change these credentials before using the project beyond basic testing.
Does ESP32-S3 also support an SSH server?
Yes, LibSSH-ESP32 lists support for ESP32 variants including ESP32-S3. However, always check the current library notes and test your specific board because memory availability and board support can vary.


