Home / Projects / ESP32 Projects / ESP32 Meets AI: Talking to Large Language Models via OpenRouter
pcbway
ESP32 AI

ESP32 Meets AI: Talking to Large Language Models via OpenRouter

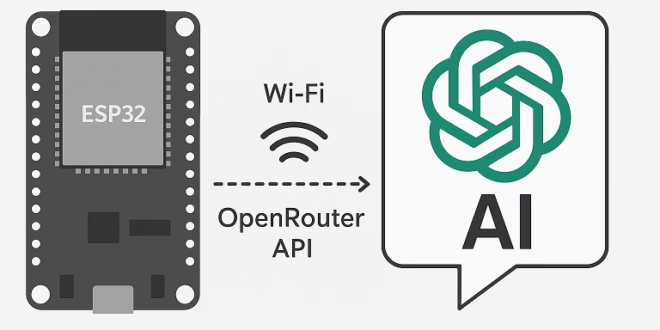
Large Language Models (LLMs) like ChatGPT are usually something you access from a laptop or phone. But what if your humble ESP32 could send a question over Wi-Fi and get an answer back? That’s what we’ll build in this tutorial. We’ll make the ESP32 query an LLM through the OpenRouter API, and print the response on Serial. We’ll cover two approaches:

  1. Direct: ESP32 → OpenRouter API
  2. With Proxy: ESP32 → Python Flask Server → OpenRouter API

By the end, you’ll have an ESP32 that can “talk” to AI — and you’ll understand which setup is best for demos vs real projects.


What is OpenRouter?

OpenRouter is a service that lets you use many different AI models (OpenAI, Anthropic, Mistral, LLaMA, etc.) with just one API. Instead of juggling keys and endpoints, you use a single chat completions endpoint:

POST https://openrouter.ai/api/v1/chat/completions
You send:
  • Authorization: Bearer <API_KEY>
  • Optional: HTTP-Referer and X-Title headers (to identify your app)
  • JSON body with model, messages, etc.

The response looks like OpenAI’s API: a JSON with choices[0].message.content.


Approach A: ESP32 Directly to OpenRouter

This is the “bare minimum” setup: the ESP32 connects to Wi-Fi and makes an HTTPS POST request.

Hardware Needed

  • Any ESP32 development board
  • Wi-Fi connection
  • Arduino IDE

Sketch

#include <WiFi.h>
#include <WiFiClientSecure.h>
#include <HTTPClient.h>

// ====== EDIT THESE ======
const char* WIFI_SSID = "YOUR_WIFI";
const char* WIFI_PASS = "YOUR_PASS";
const char* OPENROUTER_API_KEY = "YOUR_API_KEY";
const char* OPENROUTER_URL = "https://openrouter.ai/api/v1/chat/completions";
const char* MODEL = "openai/gpt-4o-mini";
// ========================

void setup() {
  Serial.begin(115200);
  WiFi.begin(WIFI_SSID, WIFI_PASS);
  while (WiFi.status() != WL_CONNECTED) { delay(500); Serial.print("."); }
  Serial.println("\nWiFi connected.");

  WiFiClientSecure client;
  client.setInsecure(); // For demo only! Use setCACert() in production.

  HTTPClient https;
  if (!https.begin(client, OPENROUTER_URL)) {
    Serial.println("HTTPS begin failed");
    return;
  }

  https.addHeader("Content-Type", "application/json");
  https.addHeader("Authorization", String("Bearer ") + OPENROUTER_API_KEY);
  https.addHeader("HTTP-Referer", "https://teachmemicro.com");
  https.addHeader("X-Title", "ESP32 LLM Demo");

  String body = String("{\"model\":\"") + MODEL + "\","
                "\"messages\":["
                  "{\"role\":\"system\",\"content\":\"Answer in <=25 words.\"}," "{\"role\":\"user\",\"content\":\"Say hi from an ESP32.\"}" "]," "\"max_tokens\": 50," "\"temperature\": 0.7" "}"; int code = https.POST(body); if (code > 0) {
    Serial.printf("HTTP %d\n", code);
    String resp = https.getString();
    Serial.println(resp);
  } else {
    Serial.printf("HTTP error: %d\n", code);
  }
  https.end();
}

void loop() {}

Things to Note

  • API key is on the device. Anyone who gets your ESP32 could extract it.
  • TLS certificates. I used setInsecure() for demo. Properly, you should embed OpenRouter’s root CA.
  • Memory. ESP32 RAM is small. Don’t ask for long essays; keep max_tokens low.
  • Parsing JSON. The full response is big. Use ArduinoJson filters if you only need choices[0].message.content.

This works fine for demos and lab projects. But for real-world apps, we need more control.


Approach B: ESP32 → Python Proxy → OpenRouter

Here, the ESP32 doesn’t talk to OpenRouter directly. Instead, it calls a tiny Python Flask server you run on your PC, Raspberry Pi, or VPS. The proxy calls OpenRouter, trims the answer, and returns a small JSON.

Why bother?

  • No API key on the ESP32.
  • Responses are small and easy to parse.
  • You can switch models or preprocess answers without touching the ESP32.

Setting Up the Python Flask Proxy on Windows

We’ll create a tiny Flask server that your ESP32 can call on your home network. These steps use Windows 10/11, PowerShell, and Python 3.10+.

1) Install Python (and add to PATH)

  1. Download Python from python.org → Downloads → Windows.
  2. Run the installer and tick “Add python.exe to PATH.”
  3. Verify in PowerShell:
    python --version
    pip --version

    If either command is not found, sign out/in or reboot.


2) Make a project folder

Open PowerShell and create a folder anywhere (e.g., Documents):

cd $HOME\Documents
mkdir esp32-llm-proxy
cd esp32-llm-proxy

3) Create and activate a virtual environment

A venv keeps your dependencies clean and local to the project.

python -m venv .venv
.\.venv\Scripts\Activate.ps1   # You should see (.venv) prefix in the prompt

If you get an execution policy error, run PowerShell as Administrator once:

Set-ExecutionPolicy RemoteSigned

Then retry Activate.ps1.

4) Add the three files

Create requirements.txt, .env, and server.py in the folder.

esp32-llm-proxy/
├─ server.py
├─ requirements.txt
├─ .env

requirements.txt

flask
requests
python-dotenv

.env

OPENROUTER_API_KEY=your_key_here
MODEL=openai/gpt-4o-mini
APP_URL=https://teachmemicro.com
APP_TITLE=ESP32 LLM Proxy

server.py

import os, json, requests
from flask import Flask, request, jsonify
from dotenv import load_dotenv

load_dotenv()

API_KEY = os.getenv("OPENROUTER_API_KEY")
MODEL = os.getenv("MODEL", "openai/gpt-4o-mini")
APP_URL = os.getenv("APP_URL")
APP_TITLE = os.getenv("APP_TITLE")

OPENROUTER_URL = "https://openrouter.ai/api/v1/chat/completions"
app = Flask(__name__)

@app.post("/ask")
def ask():
    q = str((request.json or {}).get("q", ""))[:200]
    payload = {
        "model": MODEL,
        "messages": [
            {"role": "system", "content": "Answer concisely (<=25 words)."},
            {"role": "user", "content": q}
        ],
        "max_tokens": 60
    }
    headers = {
        "Authorization": f"Bearer {API_KEY}",
        "Content-Type": "application/json",
        "HTTP-Referer": APP_URL,
        "X-Title": APP_TITLE,
    }
    r = requests.post(OPENROUTER_URL, headers=headers, data=json.dumps(payload))
    data = r.json()
    text = data.get("choices", [{}])[0].get("message", {}).get("content", "")
    return jsonify({"text": text[:512]})

Run it:

pip install -r requirements.txt
python server.py

Test from your PC:

curl -X POST http://localhost:3000/ask -H "Content-Type: application/json" -d '{"q":"Say hi!"}'

Or if you don’t have curl:

Invoke-RestMethod -Method Post -Uri http://localhost:3000/ask -Body (@{q="Say hi!"} | ConvertTo-Json) -ContentType "application/json"

You should see a JSON response:

{"text":"Hi from the LLM!"}

ESP32 Sketch (Proxy Version)

Now that your python proxy server is running on PC, upload this sketch to your ESP32:

#include <WiFi.h>
#include <HTTPClient.h> 

const char* WIFI_SSID = "YOUR_WIFI";
const char* WIFI_PASS = "YOUR_PASS";
const char* PROXY_URL = "http://192.168.1.100:3000/ask";

void setup() {
  Serial.begin(115200);
  WiFi.begin(WIFI_SSID, WIFI_PASS);
  while (WiFi.status() != WL_CONNECTED) { delay(500); Serial.print("."); }
  Serial.println("\nWiFi connected.");

  HTTPClient http;
  http.begin(PROXY_URL);
  http.addHeader("Content-Type", "application/json");

  String body = R"({"q":"ESP32 says hello! Keep it short."})";
  int code = http.POST(body);

  if (code > 0) {
    String resp = http.getString(); // Example: {"text":"Hi from the LLM!"}
    Serial.println(resp);
  } else {
    Serial.printf("HTTP error: %d\n", code);
  }
  http.end();
}

void loop() {}

Open Serial Monitor @ 115200. You should see the tiny JSON:

{"text":"Hi from the LLM!"}

Pros and Cons

Direct (ESP32 → OpenRouter)
✔ Simple, no server
✔ One less hop
✘ API key in firmware
✘ Large JSON responses
✘ Hard to change models without reflashing

Proxy (ESP32 → Flask → OpenRouter)
✔ API key stays safe
✔ Tiny, clean responses
✔ Easy to swap models or add features (caching, logging, RAG)
✘ Requires hosting a server
✘ One extra hop


When to Use Which

  • For a classroom demo or quick experiment: Direct is fine.
  • For anything serious (multiple devices, production, or publishing a project): Use a proxy.

Final Thoughts

This project shows how the ESP32 — a microcontroller with just a few hundred KB of RAM — can still talk to cutting-edge AI models. Thanks to OpenRouter, you can choose models freely without rewriting code.

Start with the direct approach if you just want to see “Hello from ESP32” echoed back by an AI. But if you plan to make an AI gadget (like a smart display or voice assistant), invest the extra step: build a proxy. It makes your setup more secure, scalable, and flexible.

Check Also

ESP32 DHT11 Wiring

Building a Data Logger with ESP32: Logging Temperature Data to SD Card and Hosting a Dynamic Web Interface

In this tutorial, we will build a simple yet powerful data logger using the ESP32 …

Index