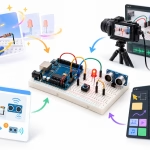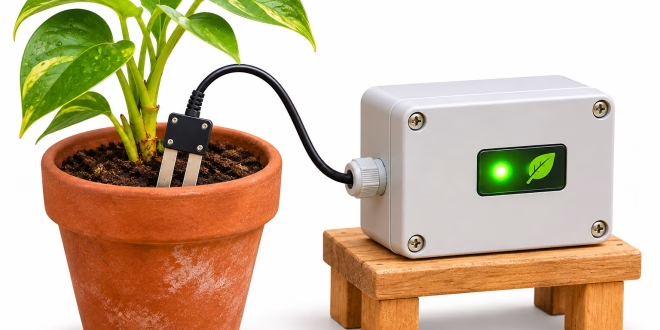
A small sensor project becomes easier to explain when the viewer can see what it is supposed to change. For a proposed soil-monitoring demonstration, I would open with a potted plant beside a workbench, then move toward the sensor enclosure and its indicator. The video would introduce the intended user experience before the tutorial turns to actual wiring, code, and measured results.
I would keep two kinds of footage separate from the start. Real recordings would show the board, connections, and observed readings. Concept footage would illustrate the intended garden setting and the enclosure's appearance. A generated image should never become evidence that a circuit works. That distinction would let the introduction be visually engaging without confusing a learner about what has been built or tested.
The materials for the concept would include photographs of the planned enclosure, a sketch of the pot arrangement, and a short clip showing the intended camera movement. I would photograph the enclosure from the same angle as the real demonstration so the transition between the two feels natural. The plant would remain a simple visual subject, with one pot and a few broad leaves rather than a dense greenhouse.
Those references give seedance 3.0 a concrete visual brief: a small garden sensor enclosure beside a terracotta pot, a slow camera move toward the indicator, and soft morning light. Its text, image, video, and audio reference workflow would be useful for exploring that introductory scene. The technical explanation would still rely on the real device and verified documentation.
Start With The User’s View Of The Device
The first shot would establish where the enclosure sits in relation to the plant. I would place it on a small stand beside the pot, with the cable following a clear route toward the soil. The cable would not disappear into an impossible joint or change color between shots. Even in a concept, obvious inconsistencies can distract a technically minded viewer before the explanation begins.
For the seedance 3.0 scene, I would describe the enclosure as a fixed object with a plain face and one visible indicator window. I would not ask for animated circuit traces or glowing signals moving through the cable. Those effects might look energetic, but they would add a visual claim that the tutorial then has to explain or undo.
The camera would begin wide enough to include the plant, then settle near the enclosure. I would leave a clean area beside it for a label added in the editor: “Proposed installation.” That wording would make the concept's role clear. The next real shot could then carry a different label, such as “Bench prototype,” making the transition explicit without interrupting the video.
Build A Reference Set Around The Actual Housing
I would photograph the housing against a neutral background, showing the lid seam, cable opening, and indicator position. If the enclosure is still a design proposal, I would use a clearly identified drawing or mock-up instead. The reference should describe what the maker intends to build, not imply that a finished weatherproof device already exists.
A second reference could establish the garden's colors and light. I would choose a scene with the same pot and a simple wooden surface, keeping the enclosure photograph responsible for the device's appearance. Combining many unrelated garden images in seedance 3.0 would give the scene more competing details without necessarily making the installation easier to understand.
The motion reference would be equally modest: a short, steady movement from the plant toward the device. I could record that movement using an empty box as a stand-in. Its purpose would be to communicate pacing and framing, not to demonstrate sensor behavior. A camera move that can be described in one sentence is easier to compare with the resulting draft.
Cut To Real Evidence At The Right Moment
Once the concept has established the setting, I would cut to a real overhead view of the workbench. The board, sensor, and display would be visible together. Any connection labels would come from the actual project notes and be checked against the relevant component documentation. I would avoid putting fictional pin names or generated code into the introduction just to make it look more technical.
The seedance 3.0 material would end before the tutorial presents a reading. If the real demonstration shows a value changing, that footage would remain unaltered except for ordinary cuts and explanatory captions. A learner should be able to distinguish a proposed installation from an observed test. Keeping the visual boundary clear would make the tutorial more useful when someone tries to reproduce it.
I would also keep the sound transition simple. A little outdoor ambience could support the concept, then fade as the bench explanation begins. The voice recording would carry the actual teaching. I would not add a success chime to imply that the device has passed a test unless the real demonstration and the explanation support that conclusion.
Fix The Enclosure Before Polishing The Atmosphere
A likely issue in a seedance 3.0 draft would be an extra opening appearing on the housing or a cable that bends unnaturally. I would first simplify the shot: use a more direct view, reduce camera travel, and keep the cable largely outside the frame. Those changes would address the visible problem without introducing more objects or effects.
If the indicator changed shape during the move, I would replace the close moving shot with a checked still view. The concept only needs to establish the intended location and appearance. It does not need to simulate every detail of the electronics. I would reserve the close inspection of the indicator for the real footage, where its physical shape and behavior can be shown accurately.
Before expanding the concept into several garden variations, I would check the current seedance 3.0 pricing and choose a small revision scope. One useful introduction, one alternate crop, and a correction to the housing would be a clearer plan than generating many scenes with different pots and backgrounds. The tutorial's value still comes from the maker's explanation and real project evidence.
Make The Intro Serve The Tutorial
The final cut would move from plant, to proposed enclosure, to real workbench in a straightforward sequence. I would keep the generated introduction short enough that a viewer who came for the project does not have to wait through a miniature film. The visual scene should answer “What is this for?” and then make room for “How does this particular build work?”
I would review the finished video with that distinction in mind. Every technical claim should point to the real demonstration or a verified source, while the concept shots should remain clearly illustrative. Used in that limited role, the video introduction can give a small electronics project a recognizable setting without asking generated imagery to stand in for engineering evidence.